Integrating JumpTrack with E-automate
ECI™ JumpTrack® is a proof-of-delivery system for dealers who want to use their own fleet to deliver products to their customers. This integration requires separate licensing. Contact your account manager for more information.
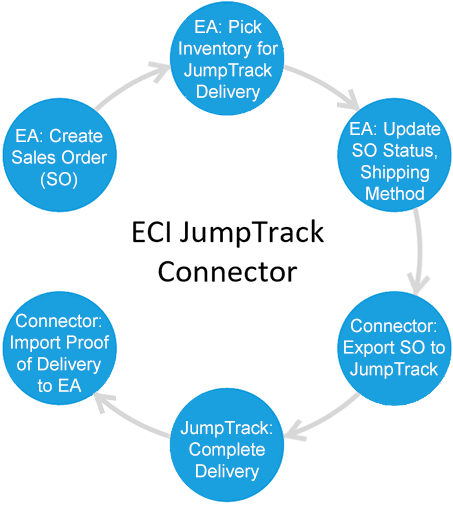
Using this integration, you can:
Create a sales order in e-automate.
Pick the item(s) from the warehouse needed for the JumpTrack delivery.
Update the sales order, indicating the sales order is ready for JumpTrack delivery and assigning the delivery to a JumpTrack route.
Run a Windows service that generates a JumpTrack delivery manifest from the e-automate sales order.
Process the delivery via JumpTrack, adding notes, attaching photos, and collecting a signature from the person who received the delivery.
Run a Windows service that:
Updates the sales order's status to indicate if the delivery was completed, partially completed, or refused.
Updates the sales order to indicate which items on the sales order were successfully shipped.
Updates the sales order to track the number of delivery attempts made to complete the sales order.
Attaches any photos and an image file of the signature to the sales order as file attachments.
Adds any notes to the sales order.
Creates a shipment record based on what was delivered.
View two month's worth of activity regarding:
Data sent from e-automate to JumpTrack.
Data sent from JumpTrack to e-automate.
Information about the services used to send the data.
Integrating JumpTrack with e-automate involves the following processes:
Verifying PrerequisitesVerifying Prerequisites
This integration requires the following:
Microsoft SQL Server 2012 or Higher
The credentials of a SQL User with full access (read, write, create objects, etc.) to your e-automate company database
Microsoft .NET Framework 4.6 or Higher
An e-automate company database name that includes the Co prefix (e.g., CoSample)
Defining Sales Order Statuses for Use with JumpTrackDefining Sales Order Statuses for Use with JumpTrack
During the installation process, you will specify four Sales Order Statuses for use with JumpTrack. The table below lists the default names and sample descriptions:
|
Name |
Sample Description |
|
JT Ready |
JumpTrack Ready for Delivery |
|
JT Completed |
JumpTrack Delivery Completed |
|
JT Partial |
JumpTrack Delivery Partial |
|
JT Refused |
JumpTrack Delivery Refused |
The names you assign to these records in e-automate must match the names you specify for these fields during the installation.
To create the Sales Order Statuses in e-automate, do the following:
From the Tools menu, select Lists and Codes to open the Lists and Codes window.
In the Select a list or code type field, use the drop-down menu to select Sales/RMA Order Statuses.
Click [New] to open the New Order Status window.
For each sales order status, do the following:
In the Status field, enter a name for the status (e.g., JT Ready for the first sales order status).
In the Description field, enter a description for the status (e.g., JumpTrack Ready for Delivery for the first sales order status).
In the Use status for region, do the following:
Check the Sales orders checkbox.
Do not check the RMA orders checkbox.
Verify that the Active checkbox is selected.
Click [Apply] to save the current sales order status and enter a new sales order status; click [OK] to save the last sales order status.
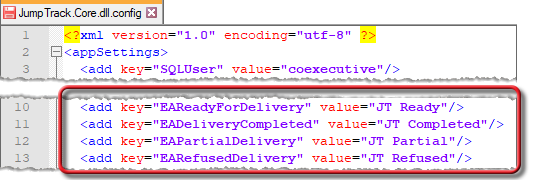
To review and/or update the values in the JumpTrack.Core.dll.config file after the installation is complete, refer to the following image and do the following:
On the system where you installed the JumpTrack Connector, navigate to the C:\Program Files\ECI Solutions\ECI JumpTrack Connector folder.
Open the JumpTrack.Core.dll.config file using a text editor such as NotePad++.
Locate the row that begins with: <add key="EAReadyForDelivery".
Change the value for this row to the value you want to list as the "Ready for Delivery" order status.
Locate the row that begins with: <add key="EADeliveryCompleted".
Change the value for this row to the value you want to list as the "Delivery Completed" order status.
Locate the row that begins with: <add key="EAPartialDelivery".
Change the value for this row to the value you want to list as the "Partial Delivery" order status.
Locate the row that begins with: <add key="EARefusedDelivery".
Change the value for this row to the value you want to list as the "Refused Delivery" order status.
Save the file.
Installing the ECI JumpTrack ConnectorInstalling the ECI JumpTrack Connector
To install the ECI JumpTrack Connector, do the following:
Place the ECI JumpTrack Connector Installer (MSI) file on the intended installation computer on your network.
The ECI JumpTrack Connector installer must be run as an administrator. Microsoft does not provide a right-click option to run this installer as an administrator, so you must run the installer using a command prompt. To open the installer as an administrator from the command line, do the following (based on Windows 10):
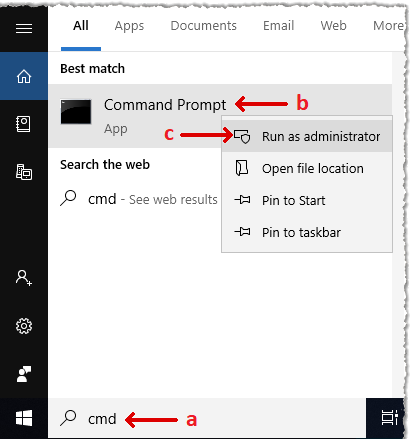
In the Windows Type here to search field, enter cmd to locate the Command Prompt app.
Right-click the Command Prompt app.
From the right-click menu, select Run as administrator.
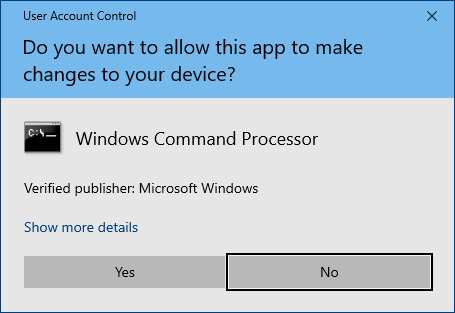
The system displays a User Account Control message, asking if you want to allow Windows Command Processor to make changes to this computer. Click [Yes].
The system displays the Administrator: C:\Windows\System32\cmd.exe command prompt window. At the command prompt, enter in quotation marks the full path to—and file name of—the installer file (e.g., "C:\Users\username\Downloads\FileName.msi" where username is the name of the currently logged in user and FileName.msi is the name of the JumpTrackIntegration-1.0.0.0-Release-x64.msi file).
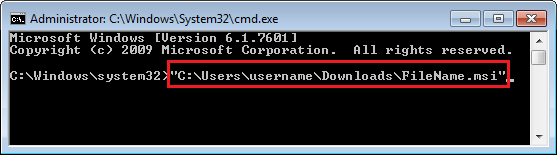
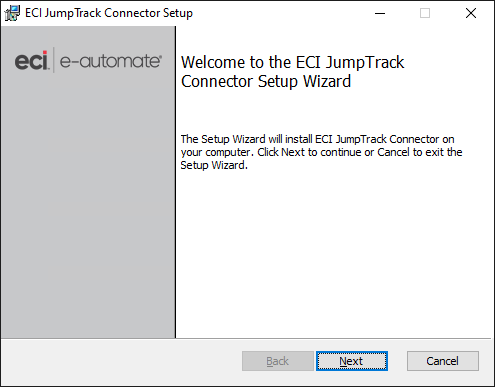
Click Enter to have the system open the ECI JumpTrack Connector Setup window.
On the ECI JumpTrack Connector Setup window, click the [Next] button to continue.
On the End-User License Agreement window, do the following:
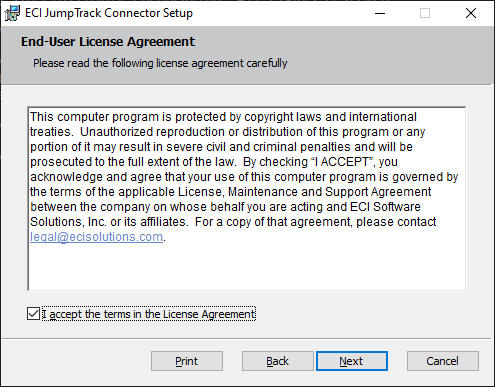
Read the end-user license agreement.
Check the I accept the terms in the License Agreement checkbox.
Click the [Next] button to continue.
On the Dealer Gateway Dealer Information window, do the following:
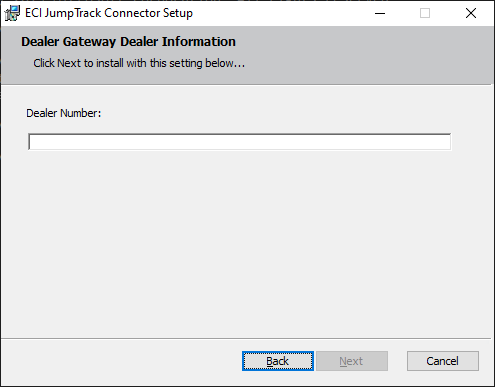
In the Dealer Number field, enter your Dealer Gateway dealer number.
Click the [Next] button to continue.
On the JumpTrack Settings window, do the following:
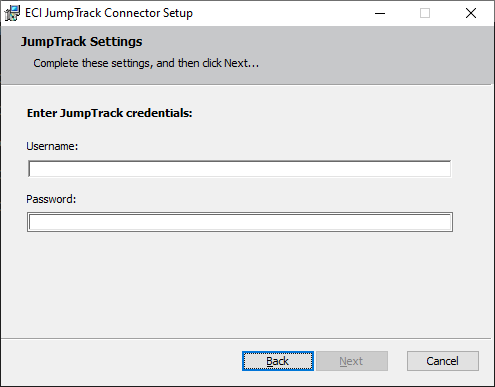
In the Username field, enter the user name of a user who is set up in e-automate with admin rights and who is set up in JumpTrack with administrator rights.
In the Password field, enter the user's password.
Click the [Next] button to continue.
On the Database Connection Settings window, do the following:
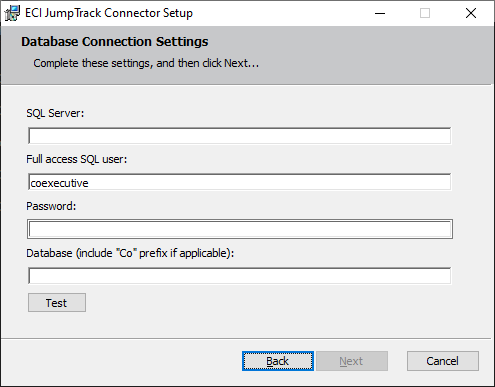
In the SQL Server field, enter the exact name of your SQL Server. If you do not know the name, ask your system administrator.
In the Full access SQL User field, leave this field's value set to coexecutive (the default value).
In the Password field, enter the coexecutive user's password.
In the Database... field, enter the name of your company database with the Co prefix if applicable (e.g., if your company database name is CoSample, enter CoSample).
Click the [Test] button.
If the test is successful, the system displays a "Connection Valid" message. Click the [OK] button, and proceed with the installation. If the test is not successful, the system displays an "Invalid Database Connection" message with details regarding the invalid connection. Review the details and the values entered in the fields on this screen before proceeding with the installation.
Click the [Next] button to continue.
On the E-automate Sales Order Settings screen, do the following:
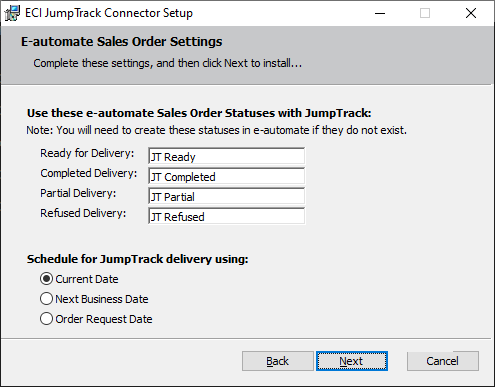
In the Use these e-automate Sales Order Statuses with JumpTrack section, do the following:
In the Ready for Delivery field, make no change to accept the default value displayed, or enter the name of the sales order Status you created for this purpose in connection with the "Defining Sales Order Statuses for Use with JumpTrack" section of this topic.
In the Completed Delivery field, make no change to accept the default value displayed, or enter the name of the sales order Status you created for this purpose in connection with the "Defining Sales Order Statuses for Use with JumpTrack" section of this topic.
In the Partial Delivery field, make no change to accept the default value displayed, or enter the name of the sales order Status you created for this purpose in connection with the "Defining Sales Order Statuses for Use with JumpTrack" section of this topic.
In the Refused Delivery field, make no change to accept the default value displayed, or enter the name of the sales order Status you created for this purpose in connection with the "Defining Sales Order Statuses for Use with JumpTrack" section of this topic.
In the Schedule for JumpTrack delivery using section, select one of the following:
Select Current Date if you want the system to create the shipping manifest for the delivery in JumpTrack using the same date on which the sales order is created in e-automate.
Select Next Business Date if you want the system to create the shipping manifest for the delivery in JumpTrack on the next business date after the sales order is created in e-automate.
Select Order Request Date if you want the system to create the shipping manifest for the delivery in JumpTrack using the Req. date listed on the sales order.
Click the [Next] button to continue.
On the Ready to install ECI JumpTrack Connector screen, click the [Install] button.
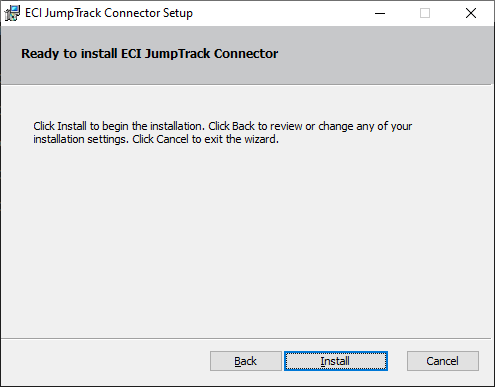
If the system displays a User Account Control screen, click the [Yes] button to continue.
The system begins the installation process.
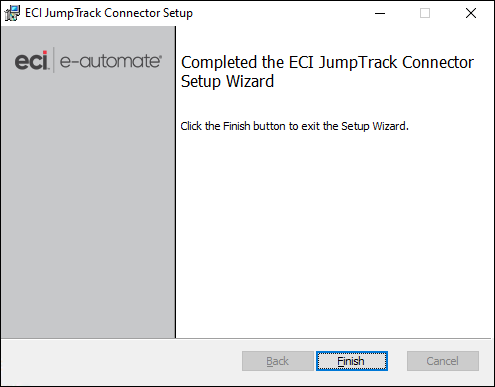
When the process completes, click the [Finish] button to close the ECI e-automate JumpTrack Connector Setup window.
Setting the Delivery DateSetting the Delivery Date
During the JumpTrack Connector installation process, you indicated if you want the delivery date to be set to the current date, the next business date, or the date requested on the sales order.
If you need to update the delivery date setting after the installation, refer to the following image and do the following:
On the system where you installed the JumpTrack Connector, navigate to the C:\Program Files\ECI Solutions\ECI JumpTrack Connector folder.
Open the JumpTrack.Core.dll.config file using a text editor such as NotePad++.
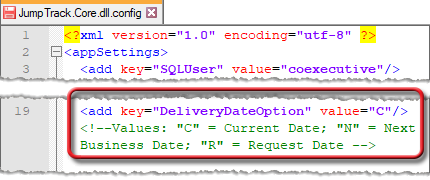
Locate the row that begins with: <add key="DeliveryDateOption".
Change the value for this row to:
C for Current Date
N for Next Business Date
R for Request Date
Save the file.
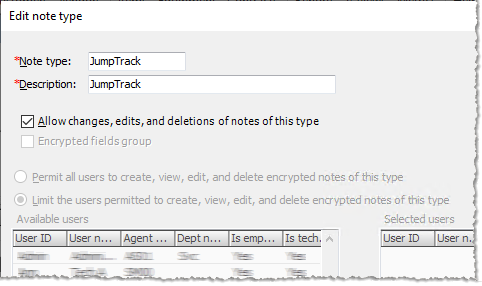
Creating a JumpTrack Note TypeCreating a JumpTrack Note Type
The installation process creates a Note Type record named JumpTrack (which you can access via Tools > Lists and Codes when Select a list or code type is set to Note types).
When you tap the JumpTrack mobile app's  Note icon, and then add and save a note (which JumpTrack then displays below the delivery address),...
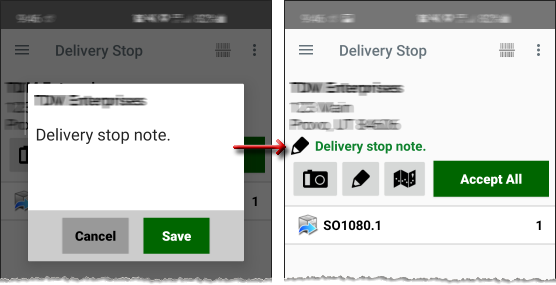
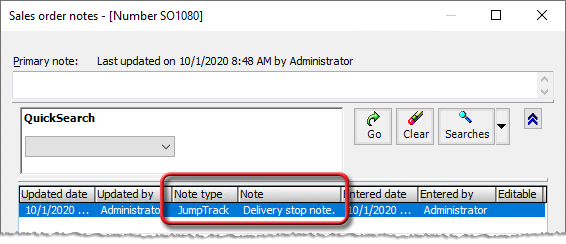
... the system uses this note type to associate the recorded note with the sales order in e-automate.
Configuring and Scheduling E-agent Task: Auto Invoice Sales OrdersConfiguring and Scheduling E-agent Task: Auto Invoice Sales Orders
You can configure and schedule e-agent task "Auto invoice sales orders" to automatically invoice sales orders for which deliveries have been completed via JumpTrack.
Configuring and Scheduling the Task (On Premise)Configuring and Scheduling the Task (On Premise)
In the Task name field, enter a name that reflects the purpose of fulfilling delivered sales orders (e.g., Invoice JumpTrack Complete SOs).
On the Options tab, click the link to the right of Include all order types. If no filter has been applied, the system displays an Include all (no filter) link to the right of the Include all order types field. If a filter has been applied, the system displays a Filtered link to the right of the Include all order types field. The system opens the Sales Orders window. On the Sales Orders window, do the following:
In the QuickSearch region, use the drop-down menu to select Status. The system displays additional fields.
In the second field, use the drop-down menu to select equals.
In the third field, enter the name of the sales order Status you defined to indicate when a delivery has been completed via JumpTrack (e.g., JT Complete).
If desired, enter additional QuickSearch parameters. For information on using QuickSearch functionality, see the Using the E-agent QuickSearch topic.
When the Sales Orders window displays the sales order(s) you want the system to include, click the [OK] button to close the Sales Orders window and return to the Options tab.
Enter additional information as appropriate to complete configuring and scheduling the task. For more information, see the Auto Invoice Sales Orders (On Premise) topic.
Defining Shipping Methods Corresponding to Each of Your RoutesDefining Shipping Methods Corresponding to Each of Your Routes
In JumpTrack, deliveries are categorized first by Region, then by Distribution Center, and then by Route. You use the JumpTrack portal (https://myjumptrack.com/) to define regions, distribution centers, and routes. For more information, see the "Maintaining regions, distribution centers & routes" video and/or PDF, accessible from the JumpTrack portal's Support tab.
A JumpTrack Distribution Center corresponds to an e-automate Branch. If you do not have branching enabled in e-automate, define one Distribution Center in JumpTrack that corresponds to your Main branch in e-automate. If you do have branching enabled, define a Distribution Center in JumpTrack for each of your e-automate Branches. For more information on branching, see the Enabling Branching topic.
A JumpTrack Route corresponds to an e-automate Shipping Method. For each of your delivery routes, define the Route in JumpTrack. Within each e-automate branch, define a Shipping Method for each delivery Route you want to use in JumpTrack.
To define a Shipping Method in e-automate that will correspond to a delivery Route in JumpTrack, refer to the following image and do the following:

In e-automate, on the Tools menu, select Lists and Codes to open the Lists and Codes window.
In the Select a list or code type field, use the drop-down menu to select Shipping Methods.
Click [New] to open the New Shipping Method window.
In the Shipping Method field, enter the name of the shipping method (e.g., JT Green Rte).
In the Description field, enter a brief description of the shipping method.
In the Shipping company field, use the lookup to select JumpTrack.
Verify the Active checkbox is checked.
Click [OK] to save the shipping method, or click [Apply] to save the current shipping method and enter a new shipping method.
Adding a Sales Order Custom Property for Storing a JumpTrack Delivery ValueAdding a Sales Order Custom Property for Storing a JumpTrack Delivery Value
This integration uses a JumpTrack custom property to communicate between JumpTrack and e-automate. To use custom properties, you need to enable custom properties on your system. The JumpTrack Connector installer does not enable custom properties.
When you run the JumpTrack Connector installer, the system adds a JumpTrack attribute to your Attributes list (which is accessible via Tools > Lists and Codes when Select a list or code type is set to Attributes).
If you do not already have a custom property configuration for sales orders, you will need to create one and add the JumpTrack attribute to the configuration. If you already have one or more existing custom property configurations for sales orders, you will need to add the JumpTrack attribute to each existing sales order custom property configuration that you want to use with JumpTrack.
Typically, once a custom property configuration is created, you would then assign the configuration to any sales order you want the configuration to apply to. When using the JumpTrack integration, if you only add the JumpTrack attribute to one sales order custom property configuration (or if you add the JumpTrack attribute to multiple sales order custom property configurations and specify the default sales order configuration you want the system to use for this integration), and then proceed to create a sales order, assign the Status defined to indicate the order is ready for delivery, and assign a Shipping Method associated with a Shipping Company of JumpTrack, then the system will automatically assign the default sales order configuration to the sales order. If you manually assign a configuration to a sales order set up for JumpTrack delivery, the configuration you assign must include the JumpTrack attribute.
Enabling Custom PropertiesEnabling Custom Properties
To use custom properties with your e-automate Sales Order records, you need to check the Enable custom properties checkbox in Tools > Lists and Codes > Misc. Options. If you do not already have custom properties enabled, see the Enabling Custom Properties topic.
Viewing the JumpTrack Custom AttributeViewing the JumpTrack Custom Attribute
The installation process adds a JumpTrack attribute to your Attributes list.
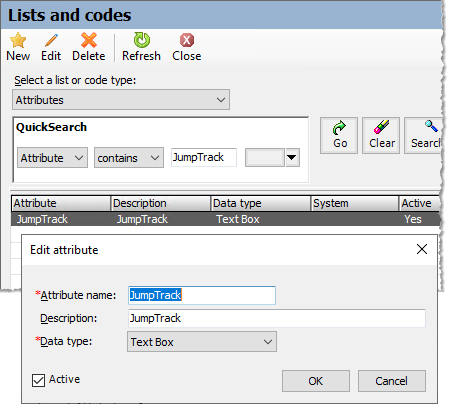
To view the JumpTrack attribute, do the following:
From the Tools menu, select Lists and Codes to open the Lists and Codes window.
In the Select a list or code type field, use the drop-down menu to select Attributes.
Locate the JumpTrack attribute.
Associating the JumpTrack Attribute with One or More Custom Property ConfigurationsAssociating the JumpTrack Attribute with One or More Custom Property Configurations
If you do not already have a custom property configuration for sales orders, you will need to create one and add the JumpTrack attribute to the configuration. If you already have one or more existing custom property configurations for sales orders, you will need to add the JumpTrack attribute to each existing sales order custom property configuration that you plan to use with sales orders you want to set up for JumpTrack delivery.
To add this attribute to a new sales order custom property configuration, do the following:
On the Tools menu, select Lists and Codes to open the Lists and Codes window.
In the Select a list or code type field, use the drop-down menu to select Configurations (custom properties).
Click [New] to open the New Tracking Configuration (List) window.
In the Name field, enter a name for this custom configuration (e.g., JT Sales Orders).
In the Description field, enter a description of the custom configuration (e.g., JumpTrack Sales Order Custom Properties).
In the Group field, use the drop-down menu to select Sales Order Properties.
In the Available Attribute(s) field, use the drop-down menu to select JumpTrack).
Click [QuickAdd] to add the attribute to the Selected Attributes list.
Click [OK] to save your changes and close this window.
For more information on creating custom configurations with which to associate attributes, see the Creating Custom Property Configurations topic.
Specifying a Default Sales Order Custom Property Configuration (On Premise Only)Specifying a Default Sales Order Custom Property Configuration (On Premise Only)
If you add the JumpTrack attribute to multiple sales order custom property configurations, you can specify the sales order custom property configuration you want the system to use by default when processing sales orders set up for JumpTrack delivery. Then, when you create a sales order for JumpTrack delivery for which you want to use the default sales order custom property configuration, you do not need to manually assign the sales order custom property configuration to the sales order; the system will do it for you.
To specify a default sales order custom property configuration, refer to the following image and do the following:
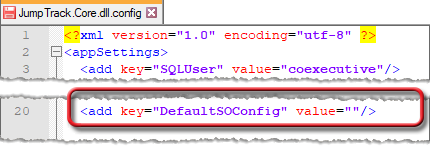
On the system where you installed the JumpTrack Connector, navigate to the C:\Program Files\ECI\ECI e-automate JumpTrack Connector folder.
Open the JumpTrack.Core.dll.config file using a text editor such as NotePad++.
Locate the row that begins with: <add key="DefaultSOConfig".
Change the value for this row to the name of sales order custom property configuration you want to use as the default configuration. For example, if you have a sales order custom property configuration named JT Sales Orders and you want to use this configuration as the default configuration, change this row to:
<add key="DefaultSOConfig" value="JT Sales Orders">
Save the file.
Assigning the Custom Property Configuration(s) to Sales Order RecordsAssigning the Custom Property Configuration(s) to Sales Order Records
Typically, to use a custom property with a sales order, you would manually assign the custom property configuration containing the custom property to the sales order on the Customproperties tab and then populate the custom property's field with the appropriate value. When using this integration, if you specified during the implementation process the default sales order custom property configuration you want the system to use for this integration, and then proceed to create a sales order, assign the Status defined to indicate the order is ready for delivery, and assign a Shipping Method associated with a Shipping Company of JumpTrack, then the system will automatically assign the default sales order custom property configuration that contains the JumpTrack attribute to the sales order. When the order is sent to JumpTrack, the system will update the JumpTrack field's value to Sent to JumpTrack. When you process a delivery for that sales order via JumpTrack, the system will update the JumpTrack field's value to SO1234.1 (where SO1234 is the sales order number and the .1 represents the delivery attempt—in this case, the first delivery attempt).
If you create a sales order with a Status and Shipping Method as defined above for JumpTrack processing and you choose to manually assign a configuration to the sales order before saving the record, be sure to assign a configuration to which you have added the JumpTrack attribute. For more information, see the Assigning Custom Property Configurations topic. Once you have saved the sales order and the system has manually assigned a configuration to the record, you should not replace the configuration assigned to the record; if you replace an existing configuration, the custom property value data that is replaced is not recoverable.
Configuring File AttachmentsConfiguring File Attachments
For e-automate to receive data back from JumpTrack via this integration, you need to configure file attachments. To configure file attachments, do the following:
From the Tools menu, select Options to open the Options window.
In the left pane of the window, double-click on Misc. options. The miscellaneous options are displayed in the right pane.
In the right pane, click [File Attachment Options] to open the File Attachments window.
Using the File Attachments window, do the following:
In the Local network path field, enter the path or browse to the path in which you want to store your attachments.
In the Maximum file size in megabytes field, enter the maximum size of file you will allow your users to attach. If you do not specify a file size maximum, users may attach very large files, taking up large amounts of hardware memory.
In the Number of revisions to retain field, enter the number of revisions of the files you attach that you want the system to retain. Keep in mind that e-automate stores a completely different file for each revision, taking up hardware memory.
Click [OK] to save the file attachment settings and return to the Options window.
Click [OK] to save your changes and to close the Options window.
Click [OK] to acknowledge the message.
Restart e-automate so that these changes will take effect.
If you are running e-agent, restart e-agent as well.
Starting the ServicesStarting the Services
The installation process creates two services: ECI.JumpTrack.Extract and ECI.JumpTrack.Update. The ECI.JumpTrack.Extract service monitors e-automate for sales orders set up for JumpTrack delivery and sends applicable data to JumpTrack to create delivery manifests for the sales orders. The ECI.JumpTrack.Update service monitors JumpTrack for completed delivery stops and sends applicable data to e-automate to update the sales orders with the results of the delivery stops and to create shipment records when applicable.
When you are ready to start these services, do the following:
In the Windows Type here to search field on the system where you installed the JumpTrack Connector, enter Services.msc to locate the Services app.
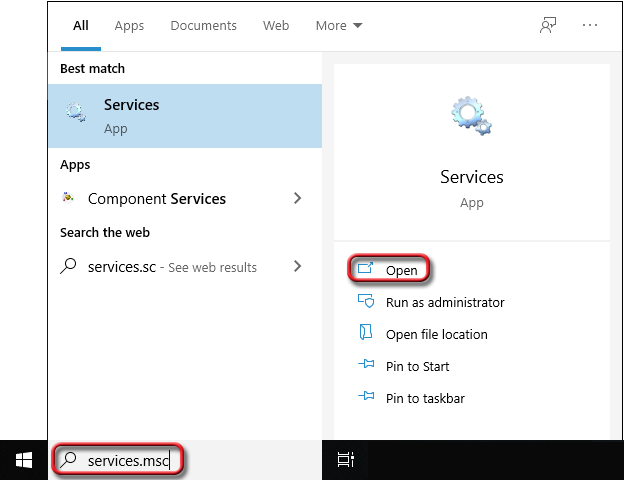
Open the Services app to display the Services window.
Locate and select the ECI.JumpTrack.Extract service.
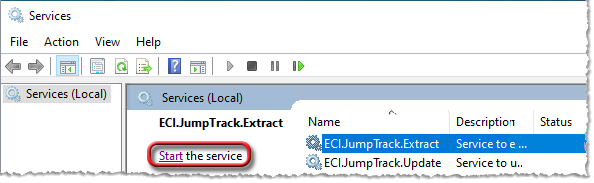
Click the Start link to start the service.
Select the ECI.JumpTrack.Update service.
Click the Start link to start the service.
Adjusting the Service Processing IntervalsAdjusting the Service Processing Intervals
The ECI.JumpTrack.Extract and ECI.JumpTrack.Update services are both set by default to process data at 15-minute intervals. The ECI.JumpTrack.Extract service monitors e-automate for sales orders set up for JumpTrack delivery and sends applicable data to JumpTrack to create delivery manifests for the sales orders. The ECI.JumpTrack.Update service monitors JumpTrack for completed delivery stops and sends applicable data to e-automate to update the sales orders with the results of the delivery stops and to create shipment records when applicable. You can adjust the processing intervals as follows:
To change the processing interval for the ECI.JumpTrack.Extract service, refer to the following image and do the following:
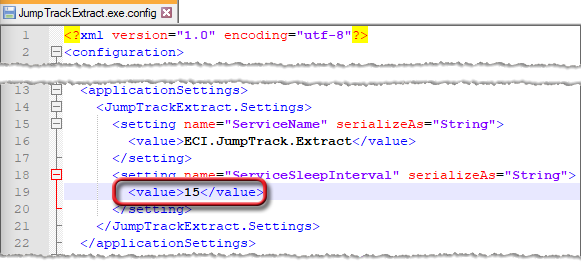
On the system where you installed the JumpTrack Connector, navigate to the C:\Program Files\ECI Solutions\ECI JumpTrack Connector folder.
Open the JumpTrackExtract.exe.config file using a text editor such as NotePad++.
Locate the row that begins with: <setting name="ServiceSleepInternval".
In the row below this row (by default, <value>15</value>), change the number to the number of minutes you want to elapse between each processing of the ECI.JumpTrack.Extract service (e.g., to have this service run every ten minutes, change this row to <value>10</value>).
Save the file.
To change the processing interval for the ECI.JumpTrack.Update service, refer to the following image and do the following:

On the system where you installed the JumpTrack Connector, navigate to the C:\Program Files\ECI Solutions\ECI JumpTrack Connector folder.
Open the JumpTrackUpdate.exe.config file using a text editor such as NotePad++.
Locate the row that begins with: <setting name="ServiceSleepInternval".
In the row below this row (by default, <value>15</value>), change the number to the number of minutes you want to elapse between each processing of the ECI.JumpTrack.Extract service (e.g., to have this service run every thirty minutes, change this row to <value>30</value>).
Save the file.
Enabling the JumpTrack E-viewEnabling the JumpTrack E-view
The installation process creates a JumpTrack Integration Logging Details view within a new System category's Custom.JumpTrack section.
To access this view, you need to have rights to Custom.JumpTrack eViews and applicable e-view category rights (i.e., Corporate, Favorites, Shared, and/or System). For more information, see the E-Views Security Rights topic.
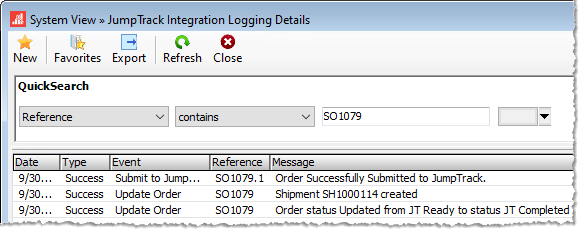
Security permitting, you can use this view to verify that the system is sending data to JumpTrack when you create an applicable sales order in e-automate and receiving data from JumpTrack when you use the JumpTrack mobile app to make a delivery.
You can also use this view as a reporting tool for answering questions about specific transactions. The system will store two month's of historical data.
For more information on using views, see the Using Views topic. For sample error/resolution messages, see the Using JumpTrack with E-automate topic's "Using the JumpTrack E-view" section.
©2025 ECI and the ECI logo are registered trademarks of ECI Software Solutions, Inc. All rights reserved.