Configuring E-agent (On Premise)
Caution: For e-agent to function properly, you must carefully review and configure each section listed below. Failure to assign correct network security to the e-agent service may result in the inability of e-agent to access reports or other files located on your network (see the Network User Settings section below).
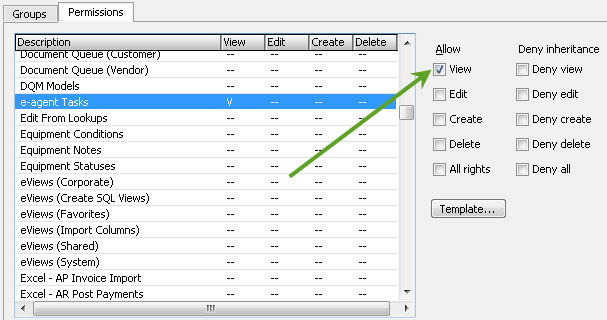
Before you can use e-agent for running automated tasks, you must first set the options associated with e-agent as well as setup a named network user under which the e-agent service (DGServer) can run. The named network user should have access to the resources on the computer in which DGServer is running, specifically report directories and fax services. If you plan to us e-agent to send faxes, the named user under which DGServer runs is the user that you should use to login to the MS Fax tools in order to see faxes sent. When e-agent installed, it is automatically configured to install using the system account, the MS Fax interface cannot run under a system account. If you do not configure e-agent to run under an appropriately permissioned, named, windows network account, your MS fax and other e-agent tasks will not work. For a user to have access to e-agent, you must grant the user e-agent tasks right in e-admin. If you want the user to have access to log in and view tasks only, you must grant only the View permission. If you want the user to be able to edit and run the e-agent tasks, the user must be given the View, Edit, Create, and/or Delete permissions to the e-agent task.
The specific e-agent areas that are necessary to configure are the email settings, the task engines, and the activity log. In the e-agent options you identify the email server and appropriate login credentials to the mail server. If you do not identify appropriate credentials, e-agent cannot email information from e-agent notifying you of events run and the associated results. You are also required to configure the e-agent task engine to run e-agent tasks. Configuring the task engine prepares the DGServer service to run automated tasks on a schedule. Task engines have access to specific network resources associated with the computer on which it is installed, like fax or printers. If necessary you can install a separate task engine to which you can direct e-agent tasks to be run based on the available resources, like access to fax phone lines. From the e-agent options you also have the ability to view details of any errors that have occurred in the activity log. Activity logging must be enabled in e-admin for you to be able to view e-agent activity.
Network User SettingsNetwork User Settings
Caution: Failure to assign correct network user security to the e-agent service may result in the inability of e-agent to access reports or other files located on your network.
When you have reports or other files that e-agent needs to access stored in a network location, e-agent must have access to these network locations. E-agent should run under a named user network account. You can assign appropriate permissions to system resources as well as the MS Fax system must be run under a specific actual user account.
E-agent runs through a service in e-automate called DGServer. In order to allow e-agent access to network locations, you need to configure the user under which DGServer runs. Prior to following these steps, the ECi best practice recommendation is to create a new network user with Read/Write access to the reports folder e-agent is using; access to run and process using the application installed on the computer, like MS Fax or any other resources. You could use a network/domain administrator; however, a named user is recommended, specifically if you are using e-agent to send faxes. For additional information on creating a network user with appropriate credentials, seek out and consult with a qualified network professional. Once you have created the user, you should then configure e-agent to run using the network user you created.
To change the user under which DGServer runs, do the following:
On your database server or where e-automate is installed, open the Control Panel and access Administrative Tools.
Locate and double-click on Services.
In the list of services, locate and right-click on DGServer and select Properties.
Click the Log On tab to bring it forward.
Select the radio button, This account and enter the appropriate User, Password, and Confirm password.
If you determine that you want to use the additional e-agent Task Engine, these same recommendations apply to the separate task engine, see Installing Additional Task Engines section below.
Email SettingsEmail Settings
In the Email Settings area of e-agent, you identify the email server for e-agent and the appropriate login credentials on the email server. To configure the email settings, do the following.
From within e-automate, click the Tools menu and select E-agent.
From the e-agent toolbar, click [Options]. E-agent displays the Options window.
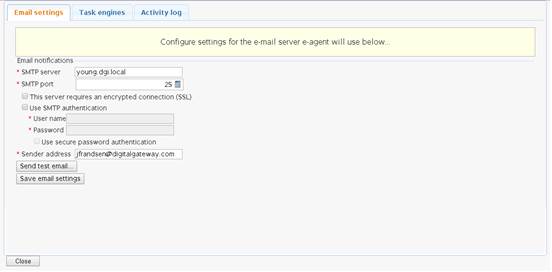
Verify the Email settings tab is forward.
In the SMTP server field, enter the address or name for your mail server.
Note: You can get this information from your system administrator.
In the SMTP port field, identify the port you use for email. The typical mail port is 25, change the port as necessary.
If your server requires an encrypted connection (secure socket layer), check the This server requires an encrypted connection (SSL) checkbox.
If you are required to use SMTP authentication with your SMTP server, check the Use SMTP authentication checkbox.
Note: This activates the User name and Password fields.
If you are using SMTP authentication, populate the User name and Password fields as appropriate.
Note: If you need these values, contact your system administrator.
If you want to use secure password authentication, check the Use secure password authentication checkbox.
Note: This option is only available if you are using SMTP authentication.
In the Sender address field, enter the return address for emails delivered from e-agent.
Note: You may consider entering a generic email address in this field (e.g., noreply@yourcompany.com).
Note: If you are using Microsoft Office 365, see the Enabling SMTP Auth for Specific Mailboxes topic.
To send a test email, click [Send test email].
Click [Save email settings] save your email settings.
Task Engine SetupTask Engine Setup
When you install e-automate (which includes e-agent), the system installs an e-agent scheduler, a default task engine, and a 'DGServer' service. E-admin, e-automate, and e-agent require the DGServer service to work.
The e-agent scheduler component of e-agent looks for tasks that are ready to be run. You only install one scheduler to look for these tasks, and this scheduler uses the DGServer service.
The default task engine installed with e-agent also runs on the DGServer service. If you have multiple tasks set to run at the same time on the same task engine, the system executes the tasks one right after the other in the order the tasks were set to run.
While a single task engine may be sufficient to meet your company's needs, you can install and set up more than one task engine (in addition to the built-in task engine) on which to run different tasks if necessary.
Configuring different task engines enables your company to run tasks specific to a company's location, to print to that location's printers, and to eliminate the issue of running the same task twice. For example, imagine your company has two separate locations, one in California and one in Nevada, each with their own task engine. You can set up an e-agent task to filter for invoices for California customers only, to print those invoices on a printer in California, and to use a report for generating the invoices that lists the California location's address, city, state, and postal code on each invoice. You can also set up another task on a different task engine for Nevada to filter for Navada customers only, to print to a Nevada printer, and to include a Nevada logo on each invoice. When the task scheduler—which is running on the DGServer service in only one location—finds a task that is ready to be processed, the system determines the appropriate task engine on which to run the process and then triggers the task to run on that task engine.
Setting up multiple task engines does add complexity. If you set up additional task engines, each additional task engine must be installed on a different server; you cannot have more than one task engine installed on the same server. Each additional task engine will run on a DGTaskEngine service on that server. To configure a task engine, you cannot have any tasks assigned to the task engine.
The task engines list provides the following information for each task engine.
Name: Name of the task engine.
Status: Current status of the task engine. Statuses include Not Configured, Initializing, READY, and IDLE.
Tasks: Number of tasks assigned to the task engine.
Firewall SettingsFirewall Settings
To be able to use the Remote Task Engine, you must have the correct firewall settings configured for both the server on which the DGServer is running and the server on which the Remote Task Engine is running. These settings open a connection between the two servers and allow the Remote Task Engine to connect with the DGServer server. If you do not configure the firewall settings properly the default Remote Task Engine will display an Inactive status on the Task Engines tab in e-agent.
To properly configure the firewall settings on both servers , complete the following. Your IT person may adjust these settings and make additional restrictions as long as the status of the task engine remains Ready,Idle on the Task Engines tab in e-agent.
On the server where DGServer is running, do the following:
From your Start menu open your Control Panel, and go to System and Security > Windows Firewall > Allow a program or feature through Windows Firewall.
Click [Allow another program] located in the bottom, right corner of the window. The Add a Program window opens.
Click [Browse] and navigate to the e-automate folder. The default location is C:\Program Files (x86)\ECi\e-automate.
Select DGServer.exe and click [Open]. An entry with only an icon and no description is added to the Add a Program window.
Select the newly added entry and click [Add]. The unnamed entry is added to the Allowed programs and features section.
Verify the checkbox to the left of the unnamed entry is checked. If not , check the box.
Check the Domain, Home/Work (Private), and Public checkboxes for the unnamed entry.
Click [OK].
On the server where the Remote Task Engine is running, do the following:
From the Start menu open your Control Panel, and go to System and Security > Windows Firewall > Advanced settings.
In the left pane, select Inbound Rules.
In the Actions pane on the far right, click New Rule. The Rule Type window displays.
Select the Port option.
Click [Next]. The Protocol and Ports window displays.
Select the TCP option.
Select the Specific local ports option and enter the port (1331, for example) in the provided field.
Click [Next]. The Action window displays.
Select the Allow the connection option.
Click [Next]. The Profile window displays.
Check the Domain, Private, and Public checkboxes.
Click [Next]. The Name window displays.
In the Name field, enter a name for this rule.
Click [Finish].
Downloading the E-agent Task Engine InstallerDownloading the E-agent Task Engine Installer
Using a browser on a computer connected to the Internet, go to https://customersupport.ecisolutions.com.
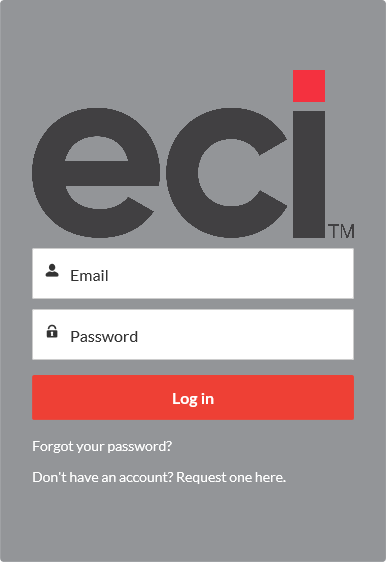
In the Email field, enter your email address.
In the Password field, enter your password for this site.
Note: If you cannot remember your password, click the Forgot your password? link.
Click the [Log in] button. If the information you entered is valid, the system displays the Customer Support Center home page.
On the Customer Support Center home page, click the Software Updates icon.
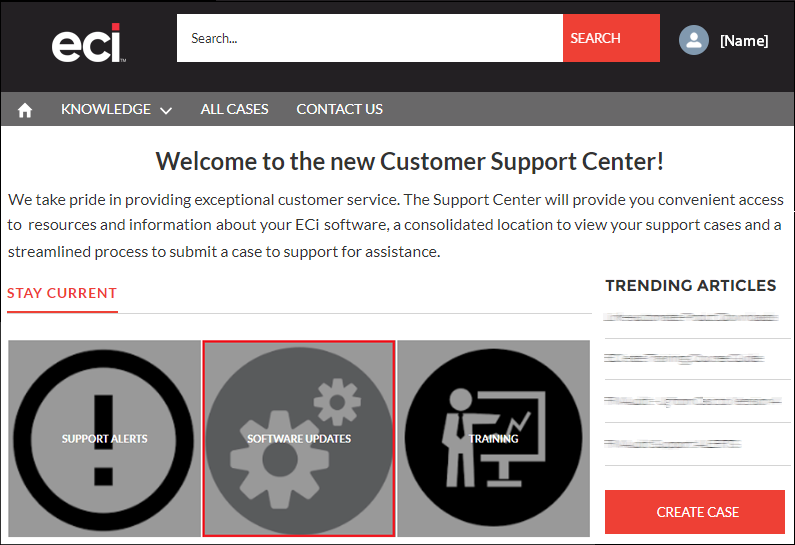
The system displays the Software Updates page.
On the Software Updates page, click the e-automate - Link for all e-automate product downloads.
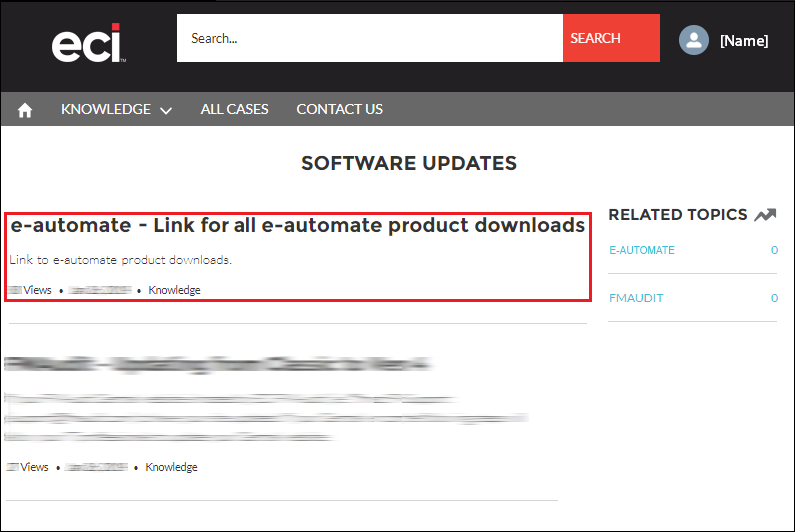
The system displays e-automate - Link for all e-automate product downloads on the E-AUTOMATE page.
Under e-automate - Link for all e-automate product downloads, scroll down to the ARTICLE section and click the "Click here for the latest e-automate versions..." link.
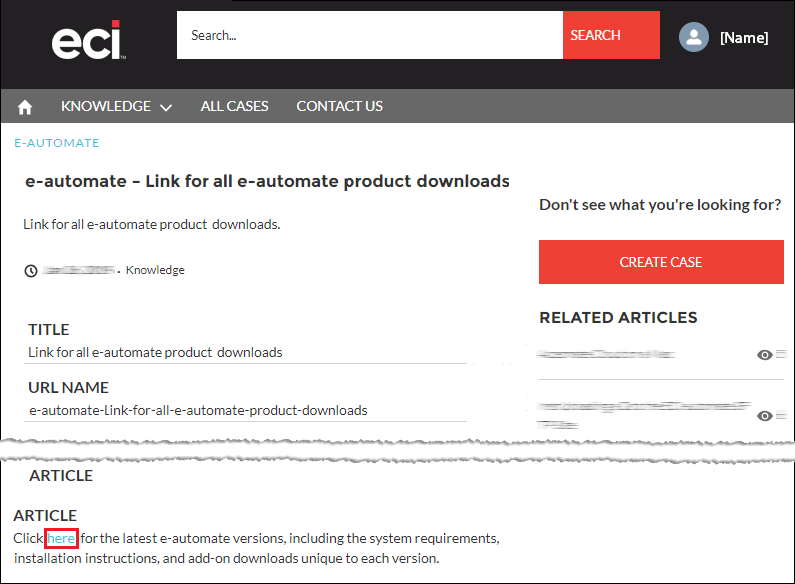
The system displays the E-automate Downloads page.
On the E-automate Downloads page, in the Server Downloads region, click the E-agent Task Engine link to begin the download.

Follow your browser’s prompts for downloading and saving the installation file.
Note: When you install a new version of e-automate, it is best practice to download and install new versions of all e-automate add-on products you actively use.
Be sure to review the System Requirements and related documentation.
Installing an Additional Task EngineInstalling an Additional Task Engine
If you install additional task engines, each additional task engine must be installed on a different server; you cannot have more than one task engine installed on the same server. Each additional task engine will run on a DGTaskEngine service on that server.
Note: If you are a system administrator and you want to install this software via group policy without using the installer's user interface, see the Configuring the E-agent Task Engine MSI File for Installation via Group Policy topic.
For each additional task engine you want to install, do the following:
Place the downloaded E-agent Task Engine (MSI) file on the intended installation computer on your network.
Open the E-agent Task Engine (MSI) file to access the ECi DGTaskEngine Setup window.
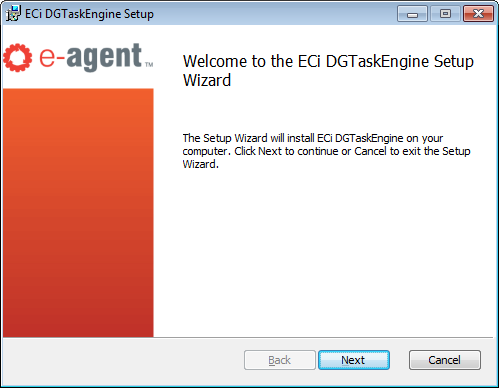
Click [Next] to continue. The system displays the End-User License Agreement window.
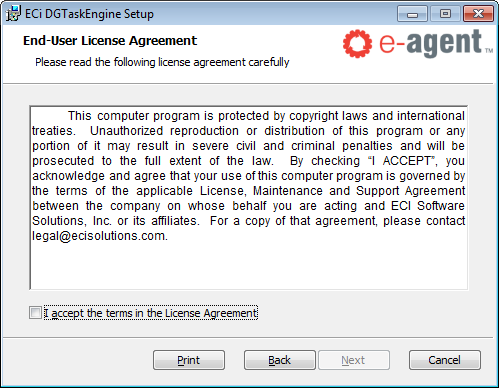
Review the terms of the license agreement and then check the I accept the terms of the License Agreement box if you want to proceed with the installation.
Click [Next] to continue. The system displays the Destination Folder window.

On the Destination Folder window, do one of the following:
To accept the default Install e-info to: location, click [Next] to continue.

To change the default Install e-info to: location, do the following:
Click [Change...] to open the Change Destination Folder window.
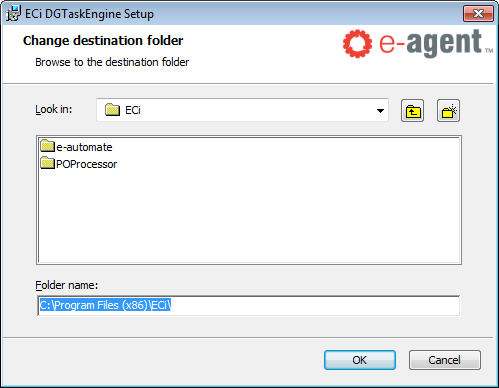
On the Change Destination Folder window, do any of the following:
In the Folder name field, enter the destination folder name.
In the Look in field, use the drop-down menu to navigate to a folder location.
Note: This action updates the display of subfolders in this location and updates the path displayed in the Folder name field.
To go up one folder from the currently selected folder location, click the Up one folder icon to the right of the Look in field.
Note: This action updates the display of subfolders in this location and updates the path displayed in the Folder name field.
To create a new subfolder in the currently selected folder location, do the following:
Click the Create a new folder icon to the right of the Up one folder icon.
Enter a name for the folder.
Note: This action adds the new folder to the display of subfolders in this location and updates the path displayed in the Folder name field.
In the display of subfolders, click a subfolder.
Note: This action updates the Look in field, displays the subfolders listed in the selected folder, and updates the path displayed in the Folder name field.
When the Folder name field contains the destination folder you want to use, click [ OK ] to close this window and populate the Destination Folder field on the Destination Folder window.
Click [Next] to continue.
On the DGServer Connection Information window, do the following:
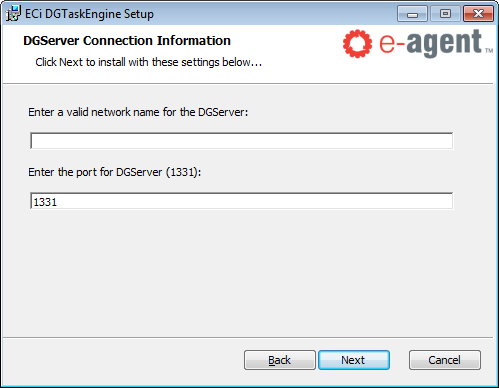
In the Enter a valid network name for the DGServer field, enter the name of the computer where DGServer is running.
In the Enter the port for DGServer (1331) field, enter the port on which DGServer is running.
Note: The default port is 1331.
Click [Next] to continue. If the system is able to validate the connection, the system will display the window. If the system is not able to validate the connection, the system will display this message:

If you see this message, review the DGServer connection information and repeat Step 7.
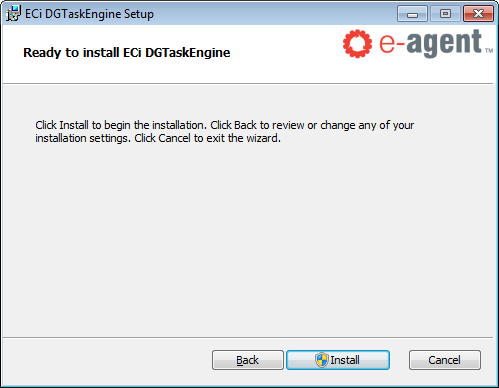
On the Ready to Install ECi DGTaskEngine window, click [Install] to continue.
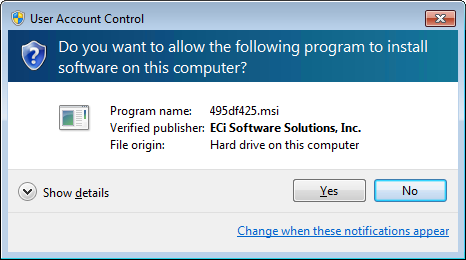
On the User Account Control window, click [Yes] to allow this program to proceed with installing the ECi DGTaskEngine on this computer.
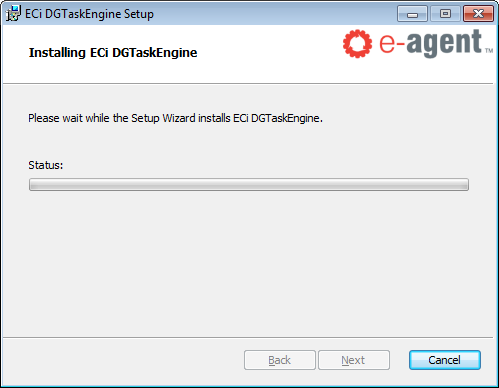
The system displays the Installing ECi DGTaskEngine window during processing.
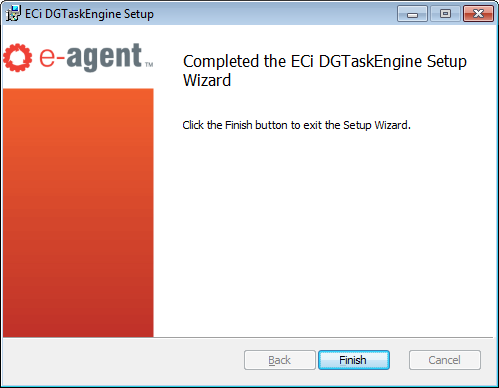
When the installation is complete, the system displays the Completed the ECi DGTaskEngine Setup Wizard window. Click [Finish] to close this window.
The new task engine displays on the Task engines tab of the Options area of e-agent.

Activity LogActivity Log
The activity log contains details on all tasks that have been run in e-agent. You can choose whether or not you want to have the activity log enabled. Enabling the Activity Log in e-agent is done in e-admin.

Enabling the Activity LogEnabling the Activity Log
To enable the Activity Log, do the following.
Open e-admin.
From the list of companies, select the company for which you want to enable the e-agent Activity Log.
From the Company menu, select the View system activity log option.
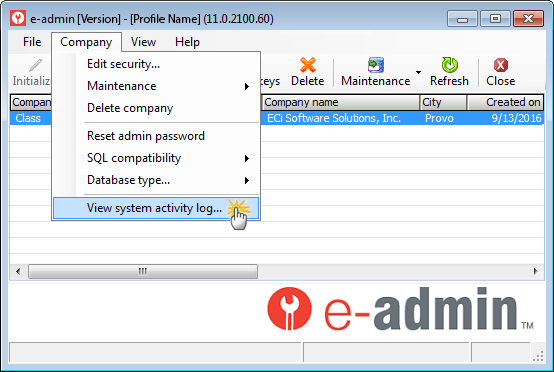
You may need to enter a password for the company. Click [OK]. The System Activity Log window opens.
Select one of the following:
No logging: Disables the Activity Log in e-agent.
Basic error logging: Provides basic information on e-automate activities performed.
Verbose logging: Provides more detailed information than the basic error logging on e-automate activities performed.
Click [OK] to save the setting.
Using the Activity LogUsing the Activity Log
To view activity that has been performed, do the following.
From the e-agent toolbar, click [Options]. E-agent displays the Options window.
Click the Activity log tab to bring it forward. Past activities display in the list.
To filter the list of log entries, do the following:
To perform a basic QuickSearch, do the following:
In the unlabeled column field (the first field in the QuickSearch region), use the drop-down menu to select the column of data you want to search.
In the unlabeled comparison operator field (the second field from the left in the QuickSearch region), select the method by which the value you specify for this field must relate to the value in the field by which you are searching for the system to consider the record a match. The available options may include any of the following, depending upon the data type of the column: equals, contains, does NOT contain, begins with, does NOT begin with, ends with, does NOT end with, is less than, is greater than, is in the range, is NOT equal to, and is NOT in the range.
In the unlabeled value field(s) in the QuickSearch region, which may be a single entry field for specifying a value, a set of entry fields for specifying a range of values, or a set of radio buttons for selecting a specific value, enter the value or range of values for which you wish to search.
Note: Observe these guidelines:
If the field is a monetary/currency field, do not enter the monetary/currency symbol in the field.
If the field is a text entry field, the search is not case-sensitive.
If the comparison operator you select is based on sorted values (e.g., you set the comparison operator to is greater than), the system sorts data in numeric-alpha order; a search for column values greater than A1 will exclude all values that begin with a number.
Click [Go] to perform the search.
To use advanced QuickSearch functionality, see the Using the E-agent QuickSearch (On Premise) topic.
User RightsUser Rights
View Rights Only
Rights to View, Create, and Edit
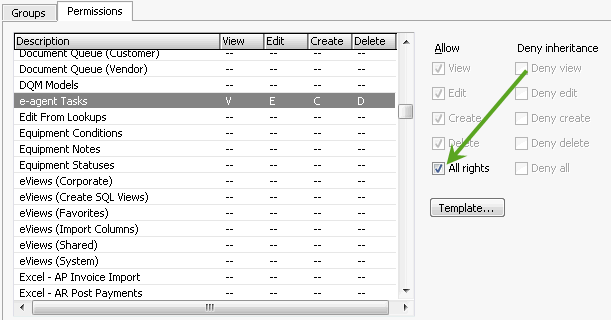
You can grant rights to users a couple different ways. You can give rights to each individual user. You can also create groups, give rights to the group, and then assign users to that group. Every user assigned to the group has the rights given to that particular group. For more information on the different ways to grant rights, see the Security topic.
Sending FaxesSending Faxes
In some cases, users have reported the inability to send faxes when using the Adobe PDF Reader software on the task engine fax sending server. To send faxes using e-agent, ECi recommends that you install an alternate PDF reader. The reader that has been tested and proven to work is the Foxit Software Reader. Foxit and Adobe Acrobat can both be installed; however, you must ensure that Foxit is set as the default PDF reader. You can download a free copy of Foxit Reader from the Foxit web site, www.foxitsoftware.com.
The following tasks have the ability to send faxes, and—if you choose to use any of the following tasks—you should consider installing the Foxit Reader software on that server:
Auto Send Customer Documents
Auto Invoice Service Calls
Auto Send Vendor Documents
Test Fax
If you only send faxes from a single specific task engine, the Foxit Reader software is only necessary on the faxing server.
Non-supported ReleaseNon-supported Release
©2022 ECI and the ECI logo are registered trademarks of ECI Software Solutions, Inc. All rights reserved.