Digital Analytics Installation and Configuration
IntroductionIntroduction
ECI™ Digital Analytics™ is an e-automate application that assists in performing statistical analysis on information stored in your e-automate database. Digital Analytics collects existing contract data from your e-automate database and re-organizes it into a separate database with a structure conducive to statistical analysis. The Digital Analytics database structure is designed to organize your contract data in a manner that makes statistical analysis easier and more comprehensive.
The installation can be performed on any client workstation from which you wish to control Digital Analytics as long as the Windows account has SQL Server admin privileges. To install Digital Analytics properly, you must log in to Windows using an account with SQL Server admin privileges. When you run the installer, you must make sure you run as administrator.
The Digital Analytics installer creates a Digital Analytics directory on your machine and installs these components in that directory:
Configuration Utility (da_Configure): A utility that configures an e-automate database for use with Digital Analytics.
Data Process Utility (da_DataProcess): A utility that extracts information from the live e-automate database and populates (incrementally) the analytics database. This utility must be executed from a Windows account that has SQL access (read/write) to the e-automate database.
Digital Analytics Data Process Service (da_DataProcessService): A service that automatically executes the Data Process Utility. This service is configured as part of the installation process.
Configuration File (da_DataProcessService.exe.config): A file where the system stores the configuration settings provided during the installation process.
During the last step of the Digital Analytics installation process, you have the option to launch the da_Configure utility. This utility:
Creates a Digital Analytics database from the live e-automate database you specify. The Digital Analytics database is more conducive to statistical analysis, has the same SQL instance as the live e-automate database, and is named by adding the suffix Analytics to the live database's name (e.g., if the live e-automate database is named coSample, the Digital Analytics database is named coSampleAnalytics).
Adds Digital Analytics specific reports to the Report Console in e-automate.
Adds Digital Analytics specific e-views to e-views.
If the da_Configure utility detects any of the following issues, the system will not configure the database and will a message:
The company for which you want to create a Digital Analytics database does not exist.
The base schema version (e.g., 7.6.5., 8.0) cannot be determined.
A Digital Analytics database already exists for the specified company.
Note: If you see a "Digital Analytics is already configured for [database]" message, see the Updating Digital Analytics section of this topic.
When the configuration process completes, the new Digital Analytics Data Process Service will automatically execute the Digital Analytics Data Process utility using the parameters specified during the installation. This service can manage only one e-automate/analytics database combination. If you have multiple e-automate databases for which you want to create Digital Analytics databases, you must execute the Digital Analytics Process manually for each database.
Downloading the Digital Analytics InstallerDownloading the Digital Analytics Installer
Using a browser on a computer connected to the Internet, go to https://customersupport.ecisolutions.com.

In the Email field, enter your email address.
In the Password field, enter your password for this site.
Note: If you cannot remember your password, click the Forgot your password? link.
Click the [Log in] button. If the information you entered is valid, the system displays the Customer Support Center home page.
On the Customer Support Center home page, click the Software Updates icon.
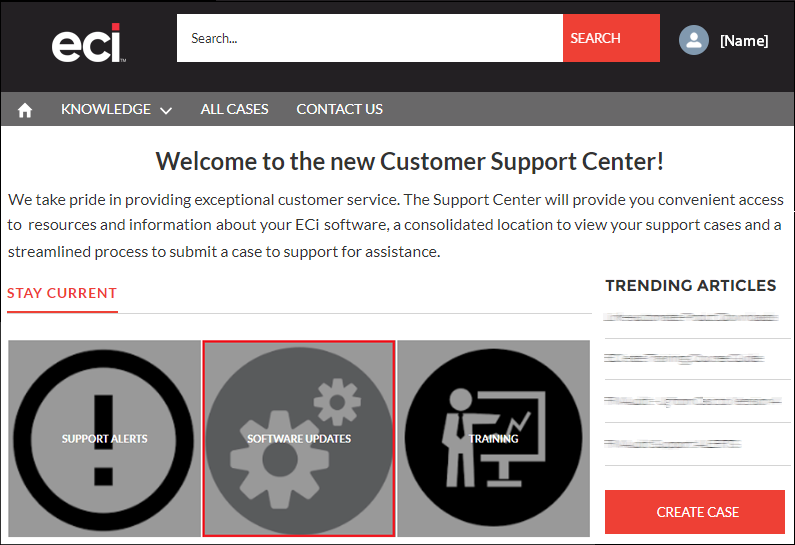
The system displays the Software Updates page.
On the Software Updates page, click the e-automate - Link for all e-automate product downloads.
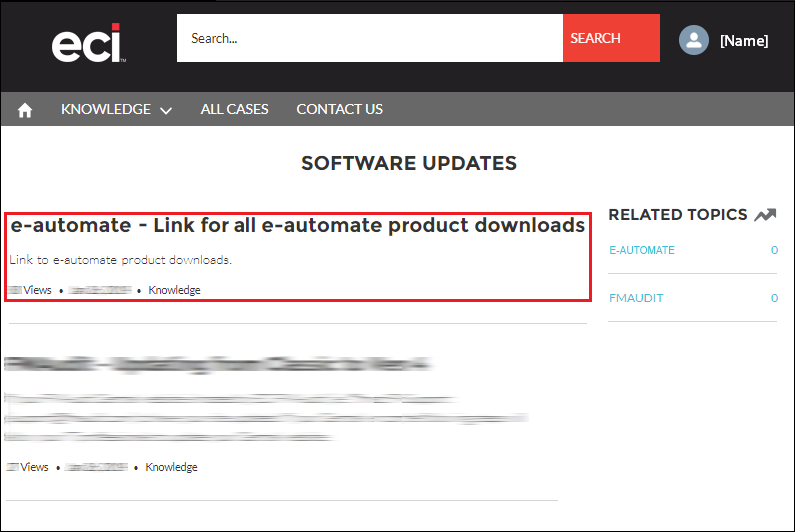
The system displays e-automate – Link for all e-automate product downloads on the E-AUTOMATE page.
Under e-automate – Link for all e-automate product downloads, scroll down to the ARTICLE section and click the "Click here for the latest e-automate versions..." link.
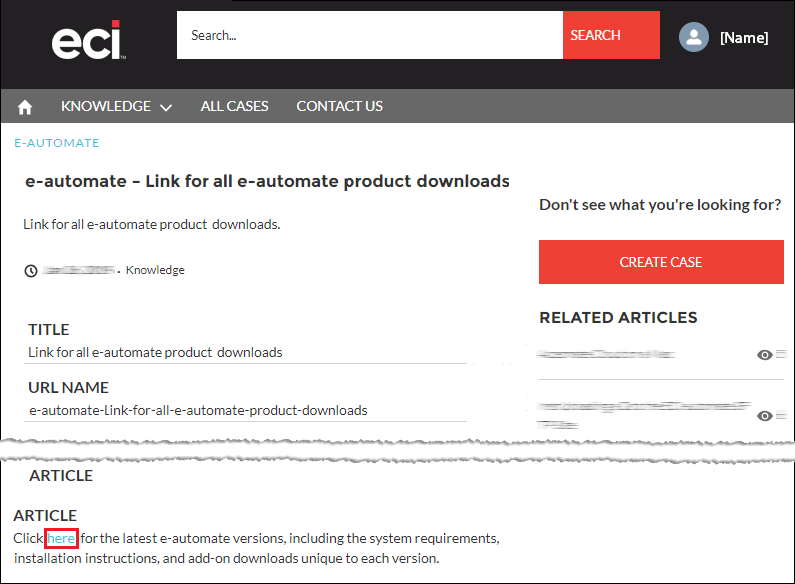
The system displays the E-automate Downloads page.
On the E-automate Downloads page, in the Server Downloads region, click the Digital Analytics link to begin the download.

Follow your browser’s prompts for downloading and saving the installation file.
Note: When you install a new version of e-automate, it is best practice to download and install new versions of all e-automate add-on products you actively use.
Be sure to review the System Requirements and related documentation.
First Time Digital Analytics InstallationFirst Time Digital Analytics Installation
If you are installing Digital Analytics for the first time, use the instructions in this topic to install Digital Analytics.
Place the downloaded Digital Analytics Microsoft Installer (MSI) file on the intended installation computer on your network.
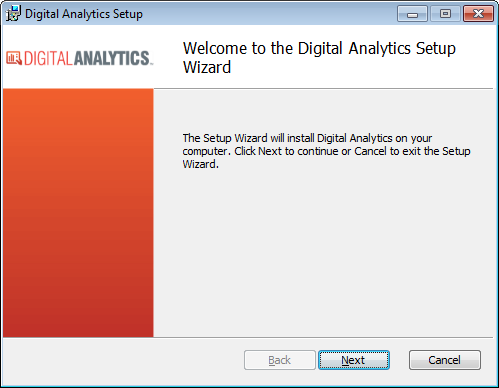
Open the Digital Analytics MSI file to access the Digital Analytics Setup window.
On the Welcome to the Digital Analytics Setup Wizard window, click [Next] to continue.
On the End-User License Agreement window, review the terms of the license agreement and then check the I accept the terms of the License Agreement box if you want to proceed with the installation.
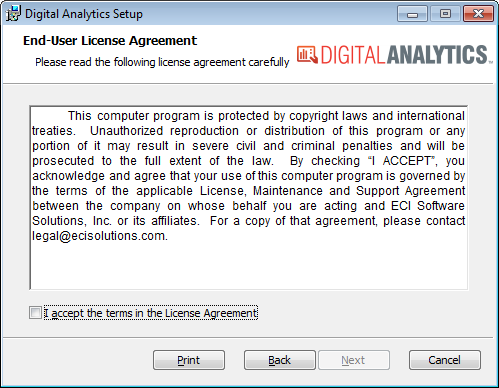
Click [ Next ] to continue.
On the Destination Folder window, do one of the following:
To accept the default Install Digital Analytics to: location, click [Next] to continue.
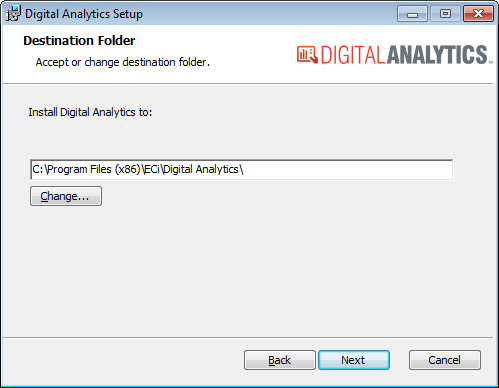
To change the default Install Digital Analytics to: location, do the following:
Click [Change...] to open the Change Destination Folder window.
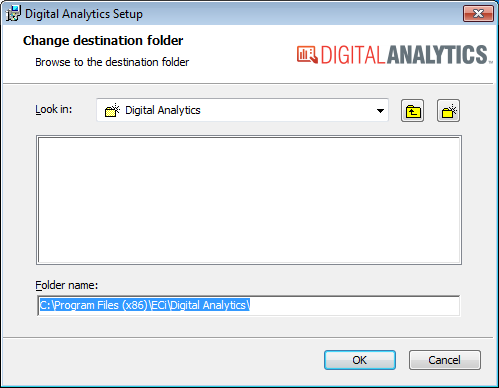
On the Change Destination Folder window, do any of the following:
In the Folder name field, enter the destination folder name.
In the Look in field, use the drop-down menu to navigate to a folder location.
Note: This action updates the display of subfolders in this location and updates the path displayed in the Folder name field.
To go up one folder from the currently selected folder location, click the Up one folder icon to the right of the Look in field.
Note: This action updates the display of subfolders in this location and updates the path displayed in the Folder name field.
To create a new subfolder in the currently selected folder location, do the following:
Click the Create a new folder icon to the right of the Up one folder icon.
Enter a name for the folder.
Note: This action adds the new folder to the display of subfolders in this location and updates the path displayed in the Folder name field.
In the display of subfolders, click a subfolder.
Note: This action updates the Look in field, displays the subfolders listed in the selected folder, and updates the path displayed in the Folder name field.
When the Folder name field contains the destination folder you want to use, click [ OK ] to close this window and populate the Destination Folder field on the Destination Folder window.
Click [ Next ] to continue.
On the E-automate Settings window, do the following:
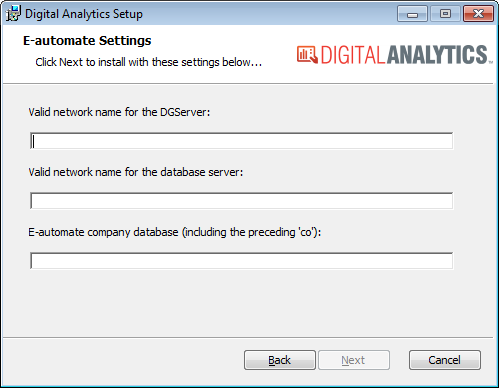
In the Valid network name for the DGServer field, enter the name of the computer where DGServer is running.
In the Valid network name for the database server field, enter the name of the network where your e-automate database is located.
In the E-automate company database (including the preceding 'co') field, enter the name of an e-automate database for which you to create an analytics database.
Click [Next] to continue.
Note: All fields on this window require an entry. To enable the [Next] button, enter data in each field and then tab out of the last field.
On the E-automate User Settings window, do the following:
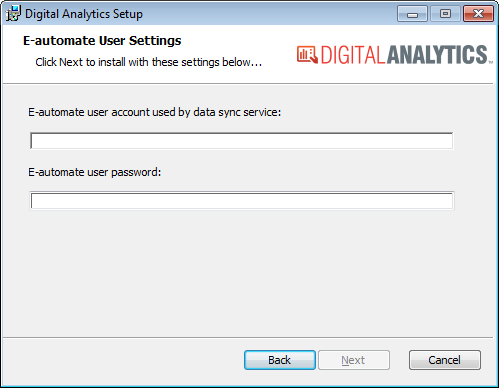
In the E-automate user account used by data sync service field, enter the e-automate user name you want to use for this purpose.
In the E-automate user password field, enter the password associated with the e-automate user name you entered in the E-automate user account used by data sync service field.
Click [Next] to continue.
Note: The first field on this window requires an entry. To enable the [Next] button, enter data in the first field and then tab to the next field.
On the Sync Service Settings window, do the following:
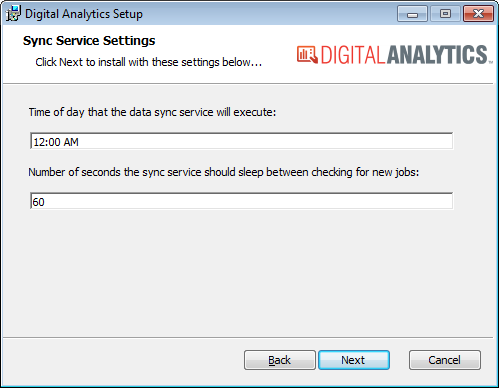
In the Time of day that the data sync service will execute field, enter the time of day you want the analytics database to sync with your e-automate database or make no change to use the value displayed.
In the Number of seconds the sync service should sleep between checking for new jobs field, enter the frequency (in seconds) at which the service should check to determine if the Digital Analytics Data Process utility should be run or make no change to use the value displayed.
Click [Next] to continue.
On the Email Settings window, you can specify default values for the following fields or leave them blank:
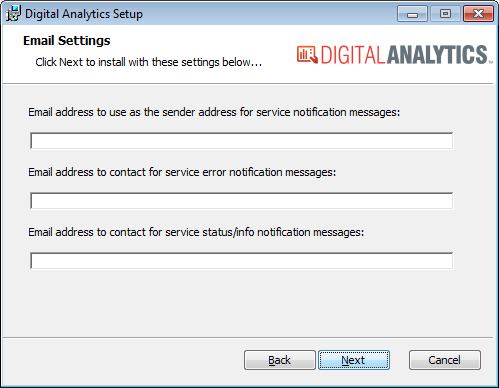
In the Email address to use as the sender address for service notification messages field, enter the email address from which you want Digital Analytics to send service notification emails (e.g., noreply@sender.com).
In the Email address to contact for service error notification messages field, enter the email address to which you want Digital Analytics to send service error notification emails.
In the Email address to contact for service status/info notification messages field, enter the email address to which you want Digital Analytics to send notification emails when a Digital Analytics database has been updated.
Click [Next] to continue.
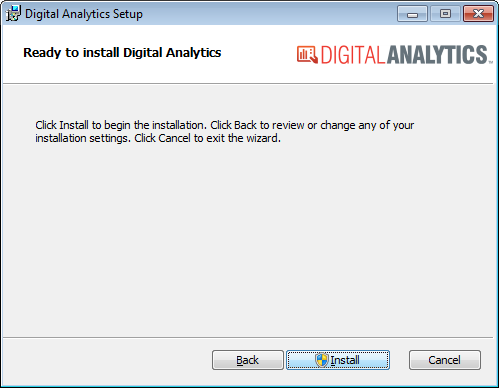
On the Ready to Install Digital Analytics window, click [Install] to continue.
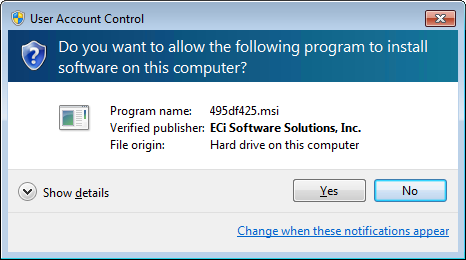
On the User Account Control window, click [Yes] to allow this program to proceed with installing Digital Analytics on this computer.
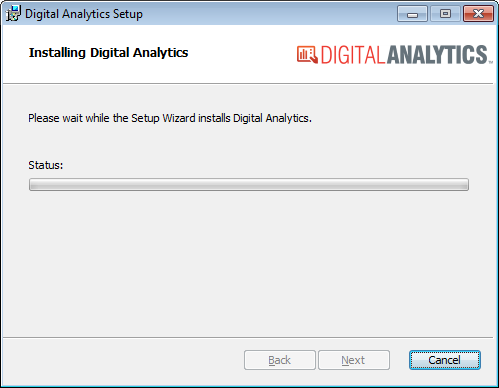
The system displays the Installing Digital Analytics window.
When the installation is complete, the system displays the Completed the Digital Analytics Setup Wizard window. Check the Launch da_Configure box if you want the system to open the da_Configure window after you click the [ Finish ] button.
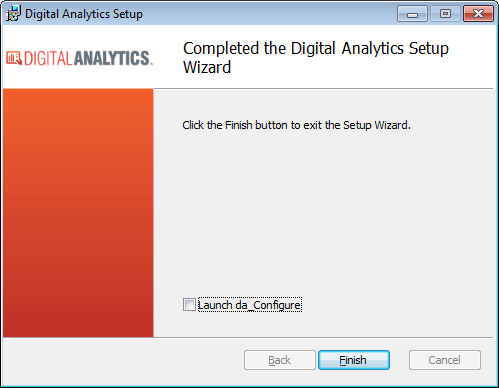
Click [Finish] to close this window.
If you checked the Launch da_Configure box, the system displays the Da_Configure: Digital Analytics Server window with summary data for configuring Digital Analytics for the e-automate company database you specified in Step 7.c above. To continue with the configuration, click [OK]. To exit without configuring the database, click [Cancel].
Note: If the system displays the message, "Analytics is already configured for [Company ID]" (which may occur if you are running through this process after uninstalling a previous version of this software), click [OK] to acknowledge the message and to close da_Configure; you do not need to reconfigure Digital Analytics for the specified company.
If you clicked [OK] in the previous step, the system configures the specified company database for use with Digital Analytics. When the process completes, the system displays a message with the text, "Configured analytics for [Company ID]." Click [OK] to acknowledge this message and close this window.
Note: Consistent with Microsoft installer (MSI) file processes, this installer does not automatically create Windows desktop shortcuts.
To create a Windows shortcut to the program, pin the program to your Windows Start menu, or pin the program to your Windows task bar, do the following:
Navigate to the path where you installed Digital Analytics (by default C:\Program Files (x86)\ECi\Digital Analytics).
Note: If you did not install Digital Analytics in the default location, navigate to the path where you installed Digital Analytics.
Right-click the program for which you want to create a shortcut or which you want to pin (e.g., da_Configure).
To create a Windows shortcut, do the following:
From the right-click menu, select Create shortcut.
Click [OK] to the message asking if you want the system to place the icon on the desktop. The system displays the shortcut on the desktop.
To pin the program to the Windows Start menu, select Pin to Start Menu from the right-click menu. The system adds the program to the Windows Start menu.
To pin the program to the Windows taskbar, select Pin to Taskbar from the right-click menu. The system adds the program to the Windows taskbar.
If you chose not to check the Launch da_Configure box in Step 13 above and/or if you need to configure other company databases for use with Digital Analytics, proceed to the Digital Analytics Configuration Utility section of this topic.
Updating Digital AnalyticsUpdating Digital Analytics
Uninstalling the previous version of the Digital Analytics SoftwareUninstalling the previous version of the Digital Analytics Software
If you are updating Digital Analytics from a software version prior to 16.1, best practice is to manually remove your previous version of this software before installing the new version.
Note: After you install Digital Analytics using the Digital Analytics MSI installer for 16.1, the system will remove the previous version of the software automatically during the process of installing a new version.
If you want to remove the previous version of Digital Analytics manually before proceeding with the new installation, use a process similar to the following (based on Windows 10):
To facilitate the process of removing the software, close any open e-automate, e-admin, and e-views programs.
Right-click the Windows Start menu icon, and select Apps and Features from the right-click menu.
From the Apps and Features list, locate and click on e-automate. The system displays [Modify] and [Uninstall] buttons.
Click the [Uninstall] button.
The system displays the message, "This app and its related info will be uninstalled." Click the [Uninstall] button to confirm the uninstall.
Note: If any e-automate programs are open, the system will display an E-automate window listing the open program(s). If you see this message, click [Cancel], close the open program(s) displayed in the list, and then restart the uninstall process.
If the system displays a User Account Control window, click [Yes] to allow this program to proceed with uninstalling the e-automate software components on this computer.
Updating E-automate Databases (Version 8.7 or earlier) Against Which You Previously Ran Digital AnalyticsUpdating E-automate Databases (Version 8.7 or earlier) Against Which You Previously Ran Digital Analytics
If you previously ran Digital Analytics against any e-automate databases from version 8.7 or earlier that you need to update to the current software version using e-admin, you must re-run da_Configure against each of those databases after you update them through e-admin.
Warning: If you do not re-run da_Configure against these databases after you convert them through e-admin, Digital Analytics will no longer work correctly.
For information on updating an e-automate database through e-admin, see the Updating a Database topic.
To re-run da_Configure against a database, do the following:
Access the Digital Analytics Configuration UtilityAccess the Digital Analytics Configuration Utility
To access the Digital Analytics Configuration utility, do the following:
Note: If you just completed the Digital Analytics software installation and checked the Launch da_Configure box, the system opened the login window for the Digital Analytics Configuration utility; proceed to Step 2 in the process listed below.
To open the Digital Analytics Configuration utility, do any of the following:
If you did not create a Windows shortcut to the program, pin the program to your Windows Start menu, or pin the program to your Windows task bar, do the following:
Navigate to the path where you installed Digital Analytics (by default C:\Program Files (x86)\ECi\Digital Analytics).
Note: If you did not install Digital Analytics in the default location, navigate to the path where you installed Digital Analytics.
To simplify access to the program in the future, do the following:
Right-click da_Configure.
To create a Windows shortcut, do the following:
From the right-click menu, select Create shortcut.
Click [OK] to the message asking if you want the system to place the icon on the desktop. The system displays the shortcut on the desktop.
To pin the program to the Windows Start menu, select Pin to Start Menu from the right-click menu. The system adds the program to the Windows Start menu.
To pin the program to the Windows taskbar, select Pin to Taskbar from the right-click menu. The system adds the program to the Windows taskbar.
Click the da_Configure file to open the Digital Analytics login window.
If you created a Windows shortcut to the program, pinned the program to your Windows Start menu, or pinned the program to your Windows taskbar, click your Digital Analytics Configuration utility (da_Configure) program icon to open the Digital Analytics login window.
In the Profile field, use the drop-down menu to select the appropriate login profile.
Click [OK] to open the main da_Configure window. See the additional sections of this topic for information on using this window.
Deconfigure Digital AnalyticsDeconfigure Digital Analytics
When you deconfigure a Digital Analytics database, the system removes the Digital Analytics database and removes all elements specific to Digital Analytics (such as e-views and report definitions) from the selected e-automate database.
To deconfigure a Digital Analytics database, do the following:
Access the da_Configure window (for information on accessing the utility, see the Accessing the Digital Analytics Configuration Utility section of this topic).
Right-click the database for which you want to deconfigure Digital Analytics. The system displays the Enter Admin Password window.
In the Admin password for [Company ID] field, enter the admin password.
Click [OK]. The right-click menu displays.
Note: If you do not have an admin password, simply click [OK].
If the system validates the password you entered, the system displays the right-click menu. Select Deconfigure Digital Analytics. The system displays a da_Configure: Digital Analytics window asking you to confirm you want to deconfigure Digital Analytics for this database.
Click [OK] to deconfigure Digital Analytics for this e-automate database.
Note: If you do not want to deconfigure Digital Analytics for this e-automate database, click [Cancel] to exit this process.
When the process completes, the system closes the da_Configure: Digital Analytics window, clears the AnalyticsServer and AnalyticsDatabase columns of the e-automate database list for the selected e-automate database, removes the Digital Analytics database, and removes elements specific to Digital Analytics (such as e-views and report definitions) from the e-automate database.
Configure Digital AnalyticsConfigure Digital Analytics
To use Digital Analytics with an e-automate database, you must process the Configure Digital Analytics option. This process creates the Digital Analytics database, identifies the Digital Analytics server, and populate the AnalyticsServer and AnalyticsDatabase columns of the e-automate database list with this information. Use the following process to configure each e-automate database on which you want to use Digital Analytics:
Verify all e-automate users are offline.
Access the da_Configure window (for information on accessing the utility see the Accessing the Digital Analytics Configuration Utility section of this topic).
Right-click the database for which you want to configure Digital Analytics. The system displays the Enter Admin Password window.
In the Admin password for [Company ID] field, enter the admin password.
Click [OK]. The right-click menu displays.
Note: If you do not have an admin password, simply click [OK].
If the system validates the password you entered, the system displays the right-click menu. Select Configure Digital Analytics. The system displays the da_Configure: Digital Analytics Server window. This window lists the e-automate SQL Server, e-automated Database Name you have selected, the Analytics Database Name the system will create, and the Analytics SQL Server.
If the information the system is displaying is correct, click [OK] to configure the analytics database.
Note: If the information the system displays is not as you expect, click [Cancel] to exit this process.
When the process completes, the system closes the da_Configure: Digital Analytics Server window, populates the AnalyticsServer and AnalyticsDatabase columns of the e-automate database list for the selected e-automate database, creates the Digital Analytics database, and adds elements specific to Digital Analytics (such as e-views and report definitions) to the e-automate database.
Installing the New Digital Analytics SoftwareInstalling the New Digital Analytics Software
When the process is complete, use the steps listed in the First Time Digital Analytics Installation section of this topic to install the software.
Digital Analytics Configuration UtilityDigital Analytics Configuration Utility
You use the Digital Analytics Configuration utility to enter optional data component license information and to create, delete, and manage analytics databases. The Digital Analytics Configuration utility must be executed from a Windows account that has SQL Admin rights.
For each of your company's e-automate databases, the utility lists one row containing the Company ID, Company name, City, Created on date, AnalyticsServer, AnalyticsDatabase, e-automate software Version, Compatibility level, Database type, and Days since last backup. Using this utility, you perform all actions by right-clicking a database and selecting from the right-click menu the option you want to process. The options the system displays in the right-click menu vary depending on whether the version of the database matches the version of the software and whether you have configured the database for use with Digital Analytics. The Version column displays each database's version information. The AnalyticsServer and AnalyticsDatabase columns are populated for each database for which Digital Analytics is configured.
The first time you access a database after opening this window, you are asked to supply the admin password for the database. A delay between the time when you enter the password and when the system displays the appropriate popup menu is normal.
Accessing the Digital Analytics Configuration UtilityAccessing the Digital Analytics Configuration Utility
To access the Digital Analytics Configuration utility, do the following:
Note: If you just completed the Digital Analytics software installation and checked the Launch da_Configure box, the system opened the login window for the Digital Analytics Configuration utility; proceed to Step 2 in the process listed below.
To open the Digital Analytics Configuration utility, do any of the following:
If you did not create a Windows shortcut to the program, pin the program to your Windows Start menu, or pin the program to your Windows task bar, do the following:
Navigate to the path where you installed Digital Analytics (by default C:\Program Files (x86)\ECi\Digital Analytics).
Note: If you did not install Digital Analytics in the default location, navigate to the path where you installed Digital Analytics.
To simplify access to the program in the future, do the following:
Right-click da_Configure.
To create a Windows shortcut, do the following:
From the right-click menu, select Create shortcut.
Click [OK] to the message asking if you want the system to place the icon on the desktop. The system displays the shortcut on the desktop.
To pin the program to the Windows Start menu, select Pin to Start Menu from the right-click menu. The system adds the program to the Windows Start menu.
To pin the program to the Windows taskbar, select Pin to Taskbar from the right-click menu. The system adds the program to the Windows taskbar.
Click the da_Configure file to open the Digital Analytics login window.
If you created a Windows shortcut to the program, pinned the program to your Windows Start menu, or pinned the program to your Windows taskbar, click your Digital Analytics Configuration utility (da_Configure) program icon to open the Digital Analytics login window.
In the Profile field, use the drop-down menu to select the appropriate login profile.
Click [OK] to open the main da_Configure window. See the additional sections of this topic for information on using this window.
Editing Dealer Connection Setting (Entering License Info)Editing Dealer Connection Setting (Entering License Info)
This functionality is not currently being used.
Configuring Digital AnalyticsConfiguring Digital Analytics
To use Digital Analytics with an e-automate database, you must process the Configure Digital Analytics option. This process creates the Digital Analytics database, identifies the Digital Analytics server, and populate the AnalyticsServer and AnalyticsDatabase columns of the e-automate database list with this information. Use the following process to configure each e-automate database on which you want to use Digital Analytics:
Verify all e-automate users are offline.
Access the da_Configure window (for information on accessing the utility see the Accessing the Digital Analytics Configuration Utility section of this topic).
Right-click the database for which you want to configure Digital Analytics. The system displays the Enter Admin Password window.
In the Admin password for [Company ID] field, enter the admin password.
Click [OK]. The right-click menu displays.
Note: If you do not have an admin password, simply click [OK].
If the system validates the password you entered, the system displays the right-click menu. Select Configure Digital Analytics. The system displays the da_Configure: Digital Analytics Server window. This window lists the e-automate SQL Server, e-automated Database Name you have selected, the Analytics Database Name the system will create, and the Analytics SQL Server.
If the information the system is displaying is correct, click [OK] to configure the analytics database.
Note: If the information the system displays is not as you expect, click [Cancel] to exit this process.
When the process completes, the system closes the da_Configure: Digital Analytics Server window, populates the AnalyticsServer and AnalyticsDatabase columns of the e-automate database list for the selected e-automate database, creates the Digital Analytics database, and adds elements specific to Digital Analytics (such as e-views and report definitions) to the e-automate database.
Deconfiguring Digital AnalyticsDeconfiguring Digital Analytics
When you deconfigure a Digital Analytics database, the system removes the Digital Analytics database and removes all elements specific to Digital Analytics (such as e-views and report definitions) from the selected e-automate database.
To deconfigure a Digital Analytics database, do the following:
Access the da_Configure window (for information on accessing the utility, see the Accessing the Digital Analytics Configuration Utility section of this topic).
Right-click the database for which you want to deconfigure Digital Analytics. The system displays the Enter Admin Password window.
In the Admin password for [Company ID] field, enter the admin password.
Click [OK]. The right-click menu displays.
Note: If you do not have an admin password, simply click [OK].
If the system validates the password you entered, the system displays the right-click menu. Select Deconfigure Digital Analytics. The system displays a da_Configure: Digital Analytics window asking you to confirm you want to deconfigure Digital Analytics for this database.
Click [OK] to deconfigure Digital Analytics for this e-automate database.
Note: If you do not want to deconfigure Digital Analytics for this e-automate database, click [Cancel] to exit this process.
When the process completes, the system closes the da_Configure: Digital Analytics window, clears the AnalyticsServer and AnalyticsDatabase columns of the e-automate database list for the selected e-automate database, removes the Digital Analytics database, and removes elements specific to Digital Analytics (such as e-views and report definitions) from the e-automate database.
Resetting Digital Analytics DataResetting Digital Analytics Data
The Reset Digital Analytics Data option is similar to performing a deconfigure and then a reconfigure of the analytics database. The difference, however, is that using the Reset option does not make a change to the e-automate database; all elements specific to Digital Analytics (such as e-views and report definitions) remain in the e-automate database.
To reset the Digital Analytics data for a database, do the following:
Access the da_Configure window (for information on accessing the utility, see the Accessing the Digital Analytics Configuration Utility section of this topic).
Right-click the database for which you want to deconfigure Digital Analytics. The system displays the Enter Admin Password window.
In the Admin password for [Company ID] field, enter the admin password.
Click [OK]. The right-click menu displays.
Note: If you do not have an admin password, simply click [OK].
If the system validates the password you entered, the system displays the right-click menu. Select Reset Digital Analytics Data. The system displays a Digital Analytics: da_Configure window asking you to confirm you want to reset/clear Digital Analytics data for this database.
Click [Yes] to reset/clear Digital Analytics data for this e-automate database.
Note: If you do not want to reset/clear Digital Analytics data for this e-automate database, click [No] to exit this process.
When the process completes, the system closes the Digital Analytics: da_Configure window, leaves populated the AnalyticsServer and AnalyticsDatabase columns of the e-automate database list for the selected e-automate database, resets/clears the Digital Analytics database, and does not modify elements specific to Digital Analytics (such as e-views and report definitions) in the e-automate database.
Clearing Work in ProgressClearing Work in Progress
Only one instance of the Digital Analytics Data Process utility can be active at a time. To ensure only one instance is active at a time, the system sets a Work In Progress flag. If another instance of the Digital Analytics Data Process utility is executed while this flag is set, the system displays an error and closes the utility. Normally, the system clears this flag when the Digital Analytics Data Process utility terminates—even if it terminates due to an error. In rare cases, this flag can remain set. In these rare cases, use the Clear Work in Progress option to clear the flag and permit another instance of the Digital Analytics Data Process utility to run. Make certain no instances of the Digital Analytics Data Process utility are running before using the Clear Work in Progress option.
To use the Clear Work in Progress option, do the following:
Access the da_Configure window (for information on accessing the utility, see the Accessing the Digital Analytics Configuration Utility section of this topic).
Right-click the database for which you want to clear the Work In Progress flag. The system displays the Enter Admin Password window.
In the Admin password for [Company ID] field, enter the admin password.
Note: If you do not have an admin password, leave this field blank.
Click [OK].
If the system validates the password you entered, the system displays the right-click menu. Select Clear Work in Progress to clear the Work In Progress flag.
If the system verifies the Work In Progress flag is set (indicating a data process is active), the system displays the message: "Analytics data processing was started at [time and date] by [user]. This state should NOT be changed unless the data process is no longer running! Are you certain you wish to clear this status?"
If you are certain the Work In Progress flag should be cleared for the process identified in the message, click [Yes]. The system will clear the flag and display the message: "Analytics Work In Progress status has been cleared." You can now run another instance of the Digital Analytics Data Process utility. If you are not certain the flag should be cleared, click [No] to close this message and leave the Work In Progress flag set.
Editing Data Process Service ParametersEditing Data Process Service Parameters
The Edit Data Process Service Parameters option is used to edit the Digital Analytics configuration settings. These settings are initially configured during the installation process. To edit the configuration settings, do the following:
Access the da_Configure window (for information on accessing the utility, see the Accessing the Digital Analytics Configuration Utility section of this topic).
Right-click the database for which you want to deconfigure Digital Analytics. The system displays the Enter Admin Password window.
In the Admin password for [Company ID] field, enter the admin password.
Click [OK]. The right-click menu displays.
Note: If you do not have an admin password, simply click [OK].
If the system validates the password you entered, the system displays the right-click menu. Select Edit Data Process Service Parameters. The system displays the Digital Analytics Configuration Settings window.
In the Service App Settings (optional) region, the system displays the following defaults (which were initially specified when Digital Analytics was installed):
In the Email From field, enter the email address from which you want Digital Analytics to send emails (or make no change to use the value displayed).
In the Email Error Contact field, enter the email address to which you want Digital Analytics to send emails informing the individual of Digital Analytics errors (or make no change to use the value displayed).
In the Email Info Contact field, enter the email address to which you want Digital Analytics to send emails informing the individual when the Digital Analytics database has been updated (or make no change to use the value displayed).
The Sleep Seconds field displays the frequency with which the service will check to determine whether the Digital Analytics Data Process utility should be run. This field cannot be edited.
To add a database entry, do the following:
Click [Add] to open the Digital Analytics Configuration Settings window.
In the Entry Identifier field, enter an appropriate identifier for this process (e.g., da_DataProcess).
In the Server Authentication region, enter the appropriate information in the following fields:
In the DG Server field, enter the name of DG Server where the e-automate database resides (or make no change to use the value displayed).
In the SQL Server field, enter the name of your SQL Server where the e-automate database resides (or make no change to use the value displayed).
In the CompanyID field, enter the name of a company database from which Digital Analytics will put information.
Note: Do not add the 'co' prefix to the CompanyID field. The system populates the Database Name field based on the value you enter in the CompanyID field.
In the Service Config Settings region, enter the appropriate information in the following fields:
In the Application Path field, enter the location where the da_DataProcess.exe file is located (or make no change to use the value displayed).
Note: If you need to change the location, use the [Browse] button to navigate to the location where this program is installed (by default C:\Program Files (x86)\ECi\Digital Analytics\da_DataProcess.exe).
In the e-auto Username field, enter the username you use to log in to e-automate (or make no change to use the value displayed).
In the e-auto Password field, enter the password you use to log in to e-automate with the Username supplied (or make no change to use the value displayed).
To see the value in the e-auto Password field, check the Show Password box; to use asterisks (*) to hide the value in the e-auto Password field, uncheck the Show Password box.
In the Execution Time field, enter the time of day you want Digital Analytics to update the database. You can specify the time in 12-hour (with AM/PM suffix) format or 24-hour format.
Verify the Enabled box is checked.
Click [OK] to save the changes and return to the Digital Analytics Service Configuration Settings window.
Click [Update] to update the display.
Click [Close] to close the Digital Analytics Service Configuration Settings window.
Digital Analytics Data Process UtilityDigital Analytics Data Process Utility
The Digital Analytics Data Process utility is used to process the contents of the e-automate database and place the resulting information in the associated analytics database. Subsequent executions of the Data Process utility can be set to run automatically at the time you determine in the Digital Analytics Configuration Settings (see the Edit Data Process Service Parameters). You may also run the Digital Analytics Data Process utility manually, if needed.
Each time the data process utility executes, a series of intermediate tables are created in the live e-automate database to hold the data as the data is being processed and prepared to be organized into the analytics database. The first time the data process utility executes, the size of the tables can be substantial which, in turn, causes the size of your e-automate database to increase considerably. Once the analytics database is created, those intermediate tables are dropped. The space that was used by the tables, however, is not released. The SQL service engine will use that space as required. Subsequent executions of the data process utility will only moderately increase the size of your e-automate database.
To run the Digital Analytics Data Process utility manually, do the following.
To open the Digital Analytics Data Process utility, do any of the following:
If you did not create a Windows shortcut to the program, pin the program to your Windows Start menu, or pin the program to your Windows task bar, do the following:
Navigate to the path where you installed Digital Analytics (by default C:\Program Files (x86)\ECi\Digital Analytics).
Note: If you did not install Digital Analytics in the default location, navigate to the path where you installed Digital Analytics.
To simplify access to the program in the future, do the following:
Right-click da_DataProcess.
To create a Windows shortcut, do the following:
From the right-click menu, select Create shortcut.
Click [OK] to the message asking if you want the system to place the icon on the desktop. The system displays the shortcut on the desktop.
To pin the program to the Windows Start menu, select Pin to Start Menu from the right-click menu. The system adds the program to the Windows Start menu.
To pin the program to the Windows taskbar, select Pin to Taskbar from the right-click menu. The system adds the program to the Windows taskbar.
Click the da_DataProcess file to open the Digital Analytics login window.
If you created a Windows shortcut to the program, pinned the program to your Windows Start menu, or pinned the program to your Windows taskbar, click the Digital Analytics Data Process utility (da_DataProcess) program icon to open the Digital Analytics login window.
In the Profile field, use the drop-down menu to select the appropriate login profile.
Click [OK] to continue.
The da_DataProcess window informs you this process may take some time and asks if you are ready to proceed. Click [Yes] to proceed, or click [No] to cancel this process.
If you clicked [Yes] in the previous step, the system displays a "Please Wait" message during processing and then a Da_DataProcess message indicating the process is complete. Click [OK] to acknowledge and close this message.
SMTP e-mail ConfigurationSMTP e-mail Configuration
SMTP settings must be properly configured for Digital Analytics to send notification emails. During the installation process, the system collects e-mail credentials as part of the process of configuring Digital Analytics for the company database you specify. After the installation, you can use the Digital Analytics Configuration utility (da_Configure) to update this information for that company database and/or to enter information to use in conjunction with other company databases for which you configure Digital Analytics. For more information, see the Digital Analytics Configuration Utility > Editing Data Process Service Parameters section of this topic.
The system stores the SMTP configuration values in a da_DataProcessService.exe.config file, which you can edit with any text editor (such as Notepad++). Within the <configuration> tag, you can add a new section containing the tags shown in the example below, starting with the <system.net> tag. Note that for many SMTP systems, the value for the EmailFrom key must match the SMTP network userName value. Also, some systems will require the enableSsl attribute to be set to true while others will require it to be set to false.
<system.net>
<mailSettings>
<smtp deliveryMethod="network">
<network
host="smtp host name"
port="port number"
enableSsl="true"
userName="user name"
password="password"
defaultCredentials="true"
/>
</smtp>
</mailSettings>
</system.net>
Note: If you are using Microsoft Office 365, see the Enabling SMTP Auth for Specific Mailboxes topic.
Time Out IssuesTime Out Issues
The system may need a significant amount of time to create the Digital Analytics database, especially if you are creating the Digital Analytics database for the first time on a database your company has been using for many years and you have a lot of data to process. If Digital Analytics times out during processing, you can modify the timeout options using the da_DataProcessOptions.xml file in the Digital Analytics folder (which is stored by default at C:\Program Files (x86)\ECi\Digital Analytics).
The da_DataProcessOptions.xml file provides four options you can use to keep your system from timing out when processing the Digital Analytics database.
The file contains the following basic code (along with comments on using each of the four options):
<?xml version="1.0"?>
<DigitalAnalytics>
<Options>
<ProcessingCutoffDateTime> now </ProcessingCutoffDateTime>
<RegularSQLTimeout> 0:40:0 </RegularSQLTimeout>
<HugeSQLTimeout> 6:0:0 </HugeSQLTimeout>
<SQLCommandTimeOutMultiplier> 1.0 </SQLCommandTimeOutMultiplier>
</Options>
</DigitalAnalytics>
The options are:
ProcessingCutoffDateTime: This code tag is used to identify the most recent transaction date that will be processed. The default value is now (or any value the system cannot identify as a valid date and time) so that the system's default cutoff is through the most recent transaction. You can change this value to a specific date and time (e.g., 31-Dec-2012 23:59:59) to limit the date and time through which the system will process transactions. You can use any date and time supported by the .Net date/time parser. If the system recognizes the value you enter as a valid date and time, then the system will process transactions through that date and time. If the system does not recognize the value you enter as a valid date and time, the system will process transactions through the date and time the database was created. Example:
<ProcessingCutoffDateTime> now 31-Dec-2012 23:59:59 </ProcessingCutoffDateTime>
In this example, the now at the beginning of the value will prevent the system from recognizing the value as a valid date and time, causing the system to process transactions through the date and time the database was created. If you remove the now prefix, leaving 31-Dec-2012 23:59:59, the system will process transactions through that date and time only and no transactions dated after that will be processed.
RegularSQLTimeout: This code tag tells the utility how long to let the utility process before the system times out. The standard timeout value used for the majority of SQL statements in the analytics data process is 40 minutes. The value of this tag is in the “hours:minutes:seconds” format. Modifying this option should not typically be required, but may be in cases where a very large e-automate database results in very large executions times. Example:
<RegularSQLTimeout> 1:00:0 </RegularSQLTimeout>
In this example, the regular SQL timeout is extended from 40 minutes to 60 minutes (1 hour).
HugeSQLTimeout: A small number of SQL statements in the analytics data process can take much longer to execute than the majority of the statements. Because of this, these SQL statement use a much larger timeout value. This code tag tells the utility how long to let these specific SQL statements process before timing out. The default value is 6 hours. The value of this tag is in the “hours:minutes:seconds” format. Example:
<HugeSQLTimeout> 9:0:0 </HugeSQLTimeout>
In this example, the huge SQL timeout is extended from 6 hours to 9 hours.
SQLCommandTimeoutMultiplier: If you want to increase (or decrease) the timeout length using a constant factor, you can edit the value of this tag to set a multiplier value. The multiplier value defaults to 1.0. Example:
<SQLCommandTimeOutMultiplier> 1.5 </SQLCommandTimeOutMultiplier>
In this example, the timeout values for the regular and huge SQL timeouts will be increased by 50%. A 40-minute regular SQL timeout would become a 60-minute (1 hour) timeout, and 6-hour huge SQL timeout would become a 9-hour timeout.
You can use all the options with their standard values, modify any of the values, and/or remove any of the options you do not want to use. For example, if all you want to do is increase the timeout values by 50%, you only need to change the <SQLCommandTimeoutMultiplier> tag's default value from 1.0 to 1.5.
E-viewsE-views
If you are running e-automate 7.6.5, you must make sure you have the latest eviews.exe file in order to be able to run the Analytics views. This file contains extended functionality for Digital Analytics that does not exist with the standard e-views that ships with e-automate 7.6.5.
ReportsReports
The installer will copy the reports to the location (by default C:\Program Files (x86)\ECi\Digital Analytics\Reports) on the workstation on which the installer is run. If you normally store report definitions on a shared folder, copy the report files to that shared folder to ensure everyone you want to have access to the reports will have access. If you are not sure where to place the reports, look under Tools > Options > Reports and under Tools > Client Settings > Reports to see how you have your report paths set up.
Non-supported ReleaseNon-supported Release
©2022 ECI and the ECI logo are registered trademarks of ECI Software Solutions, Inc. All rights reserved.