Creating a New User
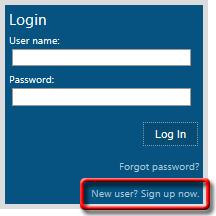
You may have the ability to create your own e-info user login and password. If you do, you will see a New user? Sign up now. link in the lower right corner of the Login tile on the e-info Log In page. This topic explains how to sign up to use e-info if this option is available to you. If this option is not available to you through the e-info login page, contact your e-info Admin to request a new e-info user account. If you do not have an e-info Admin, contact us and we will set up the new user account.
To create a new e-info user when this option is available via the e-info Log In page, do the following:
Go to the e-info URL we provided you.
Click the New user? Sign up now link.

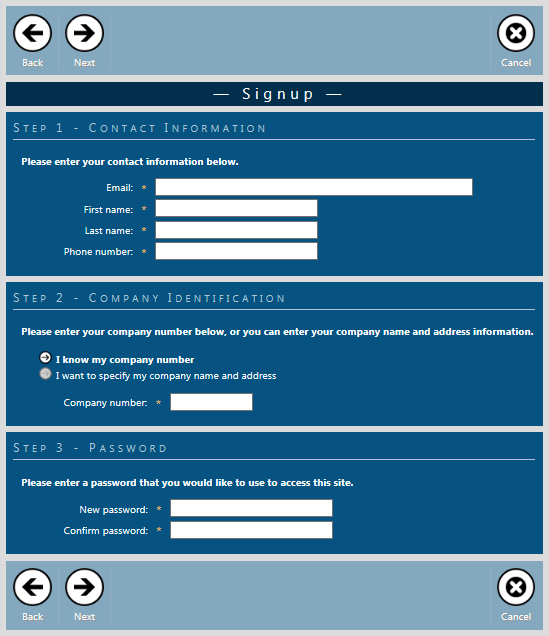
The system displays the Signup page.

In the Step 1 – Contact Information region, enter the appropriate information in the following fields:
Email: Primary email address for the e-info contact.
Note: When you log in to the e-info web page, this email address will be your user name.
First name: First name of the e-info contact.
Last name: Last name of the e-info contact.
Phone number: Primary phone number for the e-info contact.
In the Step 2 – Company Identification region, do the following:
To identify your company by company number, do the following:
Select the I know my company number option.
In the Company number field, enter your company number.
To identify your company by company name and address, do the following:
Select the I want to specify my company name and address option.
Enter the appropriate information in the following fields:
Company name: Name of your company.
Address: Physical address of your company.
City: City in which your company is located.
State: State or province in which your company is located.
Zip: Zip/postal code in which your company is located.
In the Step 3 – Password region, do the following:
In the New password field, enter the password you want to use to log in to e-info.
In the Confirm password field, reenter the password you entered in the New password field.
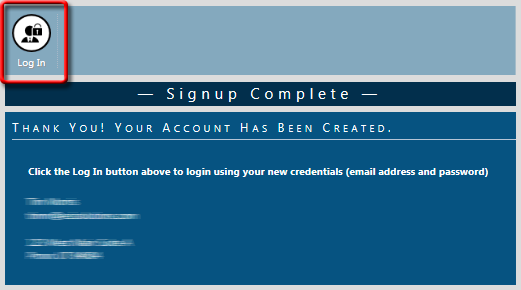
Click [Next]. If you successfully created a new use account, the system displays the Signup Complete page.
Note: If the system does not display the Signup Complete page, review the information displayed and update the signup information as necessary.
To log in, click the Log In link at the top left of the Signup Complete page.

The system re-displays the Log In page. In the User name field of the Login tile, enter the email you listed for the new user account.
In the Password field, enter the password you listed for the new user account.
Click [Log In]. Do one of the following:
If the system displays the home page and the tiles on the home page contain data associated with the customer location you entered, the process is complete. For more information, see the Logging In topic.
If the system displays the home page and lists the appropriate customer information in the page header but the tiles on the home page do not contain data associated with the customer location you entered, then the system recognizes your user name and password combination but no e-info access rights are associated with your login. Contact your e-info Admin to request this information be set up for your login. If you do not have an e-info Admin, contact us to request this information be set up for your login.
If the system displays a red "Login was unsuccessful" message below the Login tile on the Log In page, then the system is set up to allow you to create an account but requires account activation before you can log in to the e-info web site using this login information. Contact your e-info Admin to request account activation. If you do not have an e-info Admin, contact us to request account activation.
©2022 ECI and the ECI logo are registered trademarks of ECI Software Solutions, Inc. All rights reserved.