Logging In to Digital Quote Manager Resources in the Hosted (Cloud) Environment
You can log in to Digital Quote Manager resources in the hosted environment using a web page portal (RDWEB). The system delivers this server page over a secure connection to ensure privacy.
Accessing the ECI e-automate DQM FolderAccessing the ECI e-automate DQM Folder
To access the ECI e-automate DQM folder in the hosted environment, do the following:
Using your browser, enter the URL: https://eautomate.ecihosted.com/RDWeb/Pages/en-US/default.aspx.
The system displays the ECI Cloud – e-automate RemoteApp and Desktop Connection page. Using this page, do the following:
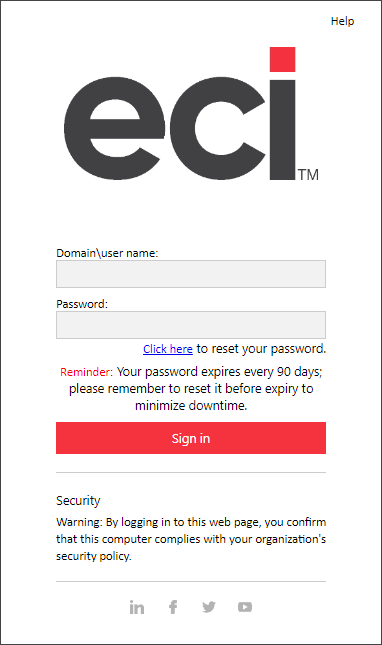
In the Domain\user name field, enter the domain and user name (e.g., ecihosted\myusername) you were supplied for accessing the hosted environment.
In the Password field, enter the password you were supplied for accessing the hosted environment.
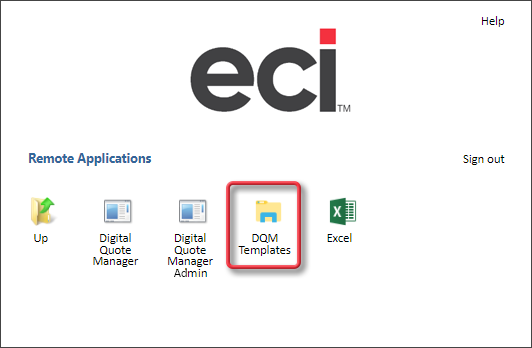
Click [Sign in]. The system displays the Current folder.
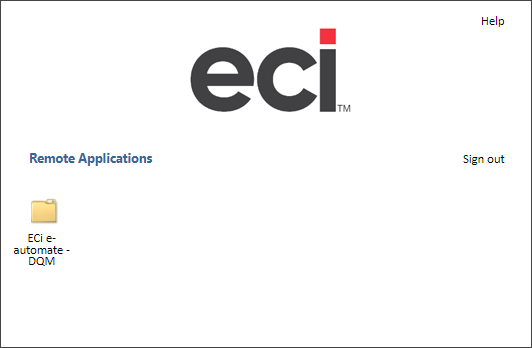
Click the ECI e-automate - DQM folder to open the folder.
Accessing Digital Quote ManagerAccessing Digital Quote Manager
To access Digital Quote Manager from the ECI e-automate DQM folder in the hosted environment, do the following:
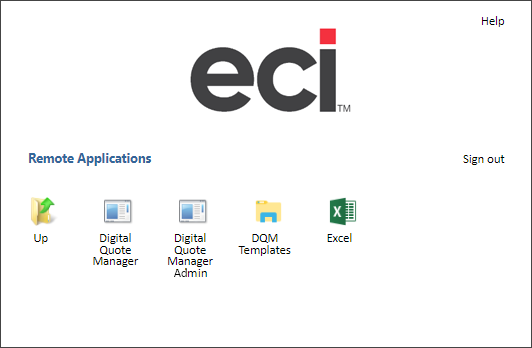
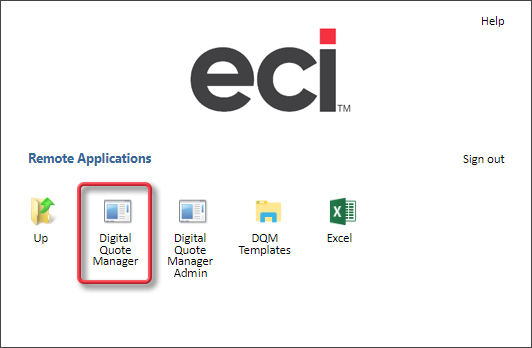
In the ECI e-automate - DQM folder, click the Digital Quote Manager icon.
Chrome creates a cpub-DGISalesQuoteManager...CmsRdsh.rdp download file in the downloads folder and displays a message similar to the following on the screen:
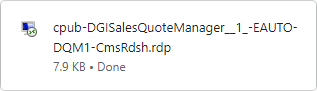
When the download message displays the word Done, click the download message or open the cpub-DGISalesQuoteManager...CmsRdsh.rdp file from the downloads folder.
The system displays a RemoteApp window, similar to the following, asking if you trust the publisher of the RemoteApp program.
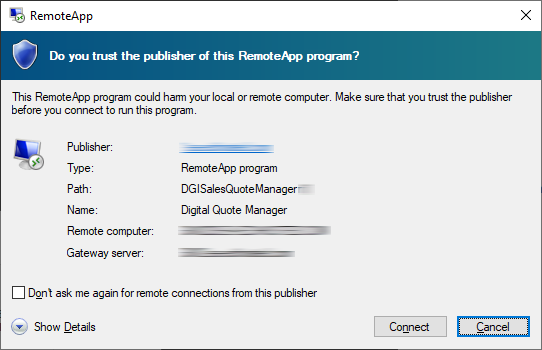
Click the [Connect] button.
If the system displays a Windows Security window similar to the following, do the following:
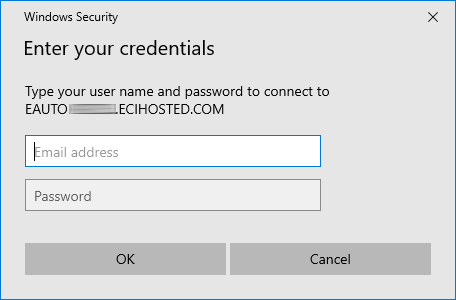
Using this window, do the following:
In the Email address field, enter the domain and user name (e.g., ecihosted\myusername) you were supplied for accessing the hosted environment.
In the Password field, enter the password you were supplied for accessing the hosted environment.
Click the [OK] button.
When you click the [OK] button, the system displays a RemoteApp window and starts the app.
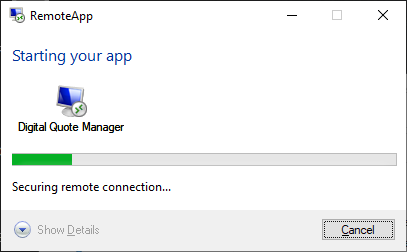
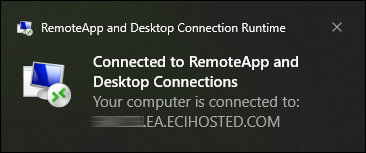
When the system establishes the connection to the RemoteApp and Desktop Connections, the system displays a message similar to the following:
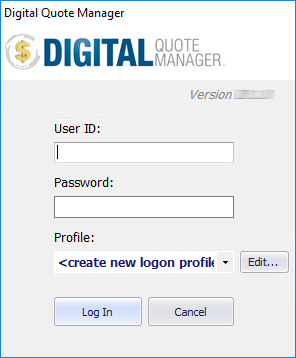
The system then displays the Digital Quote Manager login window.
Accessing Digital Quote Manager AdminAccessing Digital Quote Manager Admin
To access Digital Quote Manager Admin from the ECI e-automate DQM folder in the hosted environment, do the following:
In the ECI e-automate - DQM folder, click the Digital Quote Manager Admin icon.
Chrome creates a cpub-DGIProductConfigurator...CmsRdsh.rdp download file in the downloads folder and displays a message similar to the following on the screen:
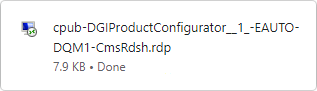
When the download message displays the word Done, click the download message or open the cpub-DGIProductConfigurator...CmsRdsh.rdp file from the downloads folder.
The system displays a RemoteApp window, similar to the following, asking if you trust the publisher of the RemoteApp program.

Click the [Connect] button.
If the system displays a Windows Security window similar to the following, do the following:
Using this window, do the following:
In the Email address field, enter the domain and user name (e.g., ecihosted\myusername) you were supplied for accessing the hosted environment.
In the Password field, enter the password you were supplied for accessing the hosted environment.
Click the [OK] button.
When you click the [OK] button, the system displays a RemoteApp window and starts the app.
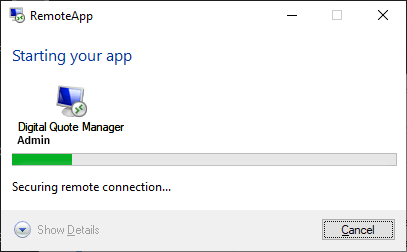
When the system establishes the connection to the RemoteApp and Desktop Connections, the system displays a message similar to the following:
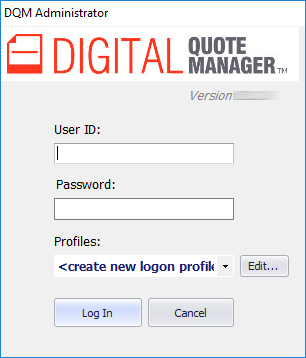
The system then displays the Digital Quote Manager Admin login window.
Accessing the DQM TemplatesAccessing the DQM Templates
To access the DQM Templates folder from the ECI e-automate DQM folder in the hosted environment, do the following:
In the ECI e-automate - DQM folder, click the DQM Templates icon.
Chrome creates a cpub-explore...CmsRdsh.rdp download file in the downloads folder and displays a message similar to the following on the screen:
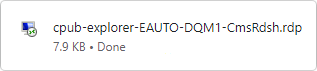
When the download message displays the word Done, click the download message or open the cpub-explore...CmsRdsh.rdp file from the downloads folder.
The system displays a RemoteApp window, similar to the following, asking if you trust the publisher of the RemoteApp program.
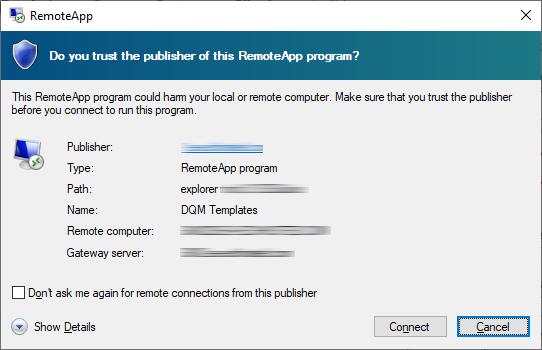
Click the [Connect] button.
If the system displays a Windows Security window similar to the following, do the following:
Using this window, do the following:
In the Email address field, enter the domain and user name (e.g., ecihosted\myusername) you were supplied for accessing the hosted environment.
In the Password field, enter the password you were supplied for accessing the hosted environment.
Click the [OK] button.
When you click the [OK] button, the system displays a RemoteApp window and starts the app.
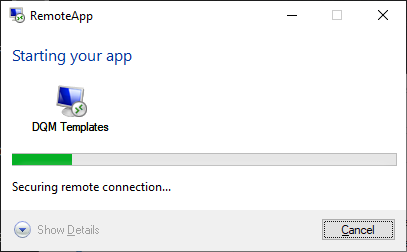
When the system establishes the connection to the RemoteApp and Desktop Connections, the system displays a message similar to the following:
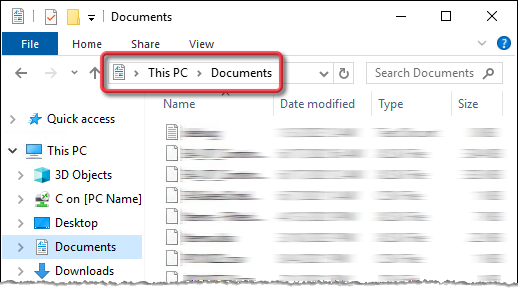
The system opens the This PC > Local Disk (C:) > Users > [UserName] > Documents folder in the hosted environment.
Accessing MS ExcelAccessing MS Excel
To access MS Excel from the ECI e-automate DQM folder in the hosted environment, do the following:
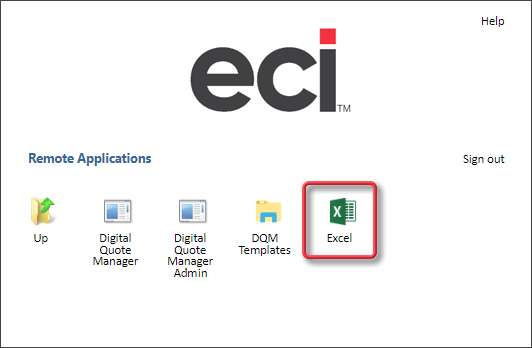
In the ECI e-automate - DQM folder, click the Excel icon.
Chrome creates a cpub-EXCEL...CmsRdsh.rdp download file in the downloads folder and displays a message similar to the following on the screen:
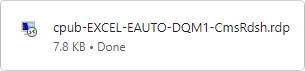
When the download message displays the word Done, click the download message or open the cpub-EXCEL...CmsRdsh.rdp file from the downloads folder.
The system displays a RemoteApp window, similar to the following, asking if you trust the publisher of the RemoteApp program.
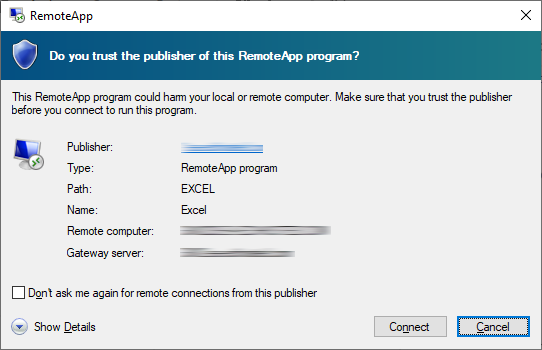
Click the [Connect] button.
If the system displays a Windows Security window similar to the following, do the following:
Using this window, do the following:
In the Email address field, enter the domain and user name (e.g., ecihosted\myusername) you were supplied for accessing the hosted environment.
In the Password field, enter the password you were supplied for accessing the hosted environment.
Click the [OK] button.
When you click the [OK] button, the system displays a RemoteApp window and starts the app.
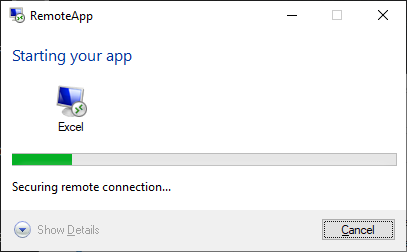
When the system establishes the connection to the RemoteApp and Desktop Connections, the system displays a message similar to the following:
The system opens Microsoft Excel.
Troubleshooting StepsTroubleshooting Steps
If your system is using Internet Explorer's Enhanced Protected Mode setting, Internet Explorer will display an "Error: Unable to display RD Web Access" message when you attempt to log in to the web page portal. You may be able to disable this setting using the following steps, but your IT team may have put a group network policy in place that prohibits you from disabling Internet Explorer's Enhanced Protected Mode. ECI recommends discussing with your IT team the implications of disabling this setting. If your IT team determines that disabling this setting is acceptable and a group network policy is not prohibiting you from making this change, do the following:
In Internet Explorer, click the Tools icon (or press Alt + X) to access the right-click menu.
Select Internet options to open the Internet Options window.
Click the [Advanced] tab to bring it forward.
Scroll down to the Security section, locate the Enable Enhanced Protected Mode* checkbox, and uncheck this box.
©2025 ECI and the ECI logo are registered trademarks of ECI Software Solutions, Inc. All rights reserved.