Creating and Customizing a View
E-views is a comprehensive data-mining tool that offers you instant access to key information from your e-automate database. E-views uses a simple but powerful querying technology to assist you in creating database queries. You can use e-views to create and save hundreds of custom queries (views). You can easily drill-down to more detailed information, jump to related data, and export query results for advanced sorting, filtering, and analysis activities.
Views are sorted into four categories: Favorites, Shared, Corporate, and System. The System views are the views that come with e-views. All other views are views that you create based on a system view, customize, and place in one or more of the view categories. When you customize a view, you change what displays by default in a system view and save the view as a new view. When customizing a view, you can do any of the following:
Specify the columns you want the view to display
Specify the columns you want to be able filter by
Add or remove functions
Add or remove linked views
To create and customize a view, do the following:
Click the category tab (e.g., the System tab) containing the existing view on which you want to base the view you want to create.
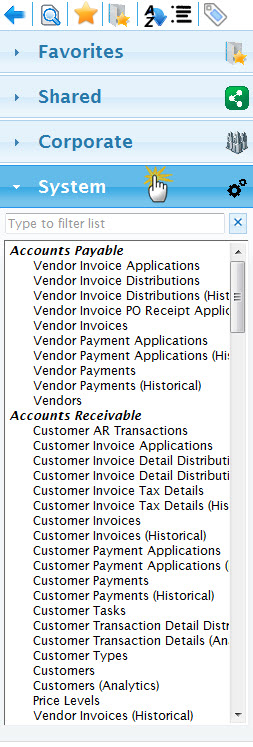
Locate and select the existing view on which you want to base the view you want to create. For information on filtering a list, see the Filtering and Searching topic.
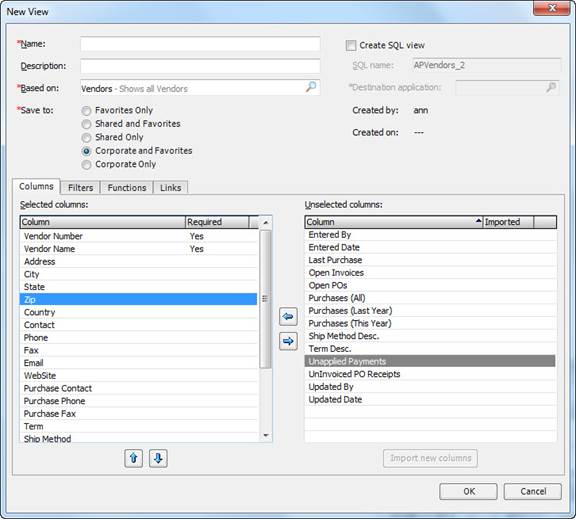
With the view selected in the list, click the ![]() Create View icon. The system displays the New View window populated with the parameters associated with that view.
Create View icon. The system displays the New View window populated with the parameters associated with that view.
In the Name field, enter a name for the new view.
In the Description field, enter a brief description to further identify the new view.
If the Based on field is not already populated with the correct view, use the lookup to select the view on which you want to base this new view. The Selected columns region on the Columns tab populates with the columns that display by default for the view you selected.
In the Save to region, select the view category or categories to which you want to save this new view.
To create a SQL view from this view, do the following:
Check the Create SQL view checkbox in the upper right-hand corner. E-views displays the SQL name field and the Destination application field.
E-views identifies a unique name for the SQL view and populates the name in the SQL name field. Change the name as necessary using only text and—if desired—underscores; do not use spaces.
In the Destination application field, use the lookup to select the application with which you will use this SQL view.
Click [OK] to save the SQL view.
Verify the Columns tab is forward. On the Columns tab, the Selected columns region lists the columns the system will list in the View window. The order in which you sequence the columns in the Selected columns region is the order in which the system will list the columns in the View window. The Unselected columns region lists the columns the system will not display in the View window.
To add a column to the view, do the following:
In the Unselected columns region, select a column you want the view to display.
Click the [Add available column] button (blue, left arrow) to move the column to the Selected columns region.
The order in which you sequence the columns in the Selected columns region is the order in which the system will list the columns in the View window. To reposition a column within the view, do the following:
Select a column you want to reposition.
Click the blue, up arrow to move the column up in the list; or click the blue, down arrow to move the column down in the list.
To remove a column from the view, do the following:
In the Selected columns region, select the column you do not want the view to display.
Click the [Remove selected column] button (blue, right arrow) to move the column to the Unselected columns region.
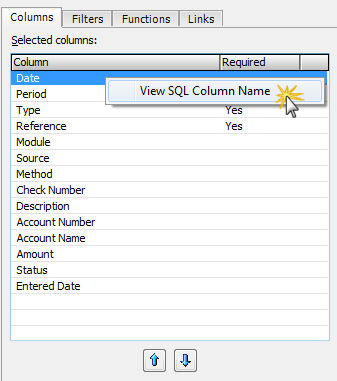
To view the actual SQL column name, the column header from the database, do the following:
Right-click on the column in the Selected columns region.
Select View SQL Column Name.
E-views displays the column name.
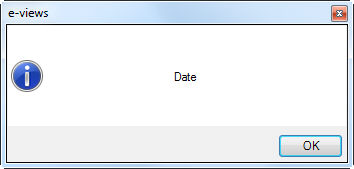
Click [OK] to acknowledge the message.
To import a custom property (column) into this view, do the following:
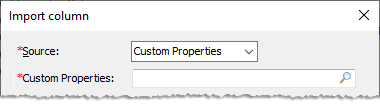
Click the [Import New Columns] button. E-views opens the Import Column window.
In the Source field, use the drop-down menu to select Custom Properties.
Enabled custom properties. For more information, see the Enabling Custom Properties topic.
Added at least one custom property to the e-automate record on which this view (table) is based. For more information, go to the online help's Contents tab and see the E-automate > Custom Properties book.
In the Custom Properties field, use the lookup to select a custom attribute (column) that you want to import. Once selected, e-views lists the attribute in the Available columns region, and populates the Column Name and the SQL Column Name fields on this screen.
In the Column Name field, enter a name to identify this column in the e-view or make no change to use the name displayed.
In the SQLColumn Name field, enter a name to identify this column in SQL or make no change to use the name displayed.
Do one of the following:
Click [Apply] to have the system add the column to the Unselected columns region and to leave the Import Column window open.
Click [OK] to have the system add the column to the Unselected columns region and to close the Import Column window.
With the column selected in the Unselected columns region, click the Add available column (blue left arrow) icon to add the column to the Selected columns region.
In the Selected columns region, click the Move selected column up (blue up arrow) icon or the Move selected column down (blue down arrow) icon if desired to reposition the column within the view.
To import a column from a different view (table) into this view, do the following:
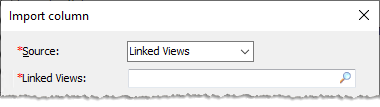
Click the [Import New Columns] button. E-views opens the Import Column window.
In the Source field, use the drop-down menu to select Linked Views.
Use the drop-down menu to select Linked Views.
In the Linked Views field, use the lookup to select a view containing the column you want to import. Once selected, e-views displays the available columns in the Available columns region.
In the Available columns region, select the column you want to import. E-views displays the Column Name and the SQL Column Name for the row you select from the Available columns region.
In the Column Name field, enter a name to identify this column in the e-view or make no change to use the name displayed.
In the SQLColumn Name field, enter a name to identify this column in SQL or make no change to use the name displayed.
Do one of the following:
Click [Apply] to have the system add the column to the Unselected columns region and to leave the Import Column window open.
Click [OK] to have the system add the column to the Unselected columns region and to close the Import Column window.
With the column selected in the Unselected columns region, click the Add available column (blue left arrow) icon to add the column to the Selected columns region.
In the Selected columns region, click the Move selected column up (blue up arrow) icon or the Move selected column down (blue down arrow) icon if desired to reposition the column within the view.
Click the Filters tab to bring it forward. You use this tab to specify the filters you want the system to include in the QuickSearch drop-down menu of the View window and the sequence in which you want the system to list the filters in the drop-down menu. The Selected filters region lists the filters the system will include in the QuickSearch drop-down menu of the View window. The sequence in which the filters appear in the Selected filters region is the sequence in which the system will list the filters in the QuickSearch drop-down menu.
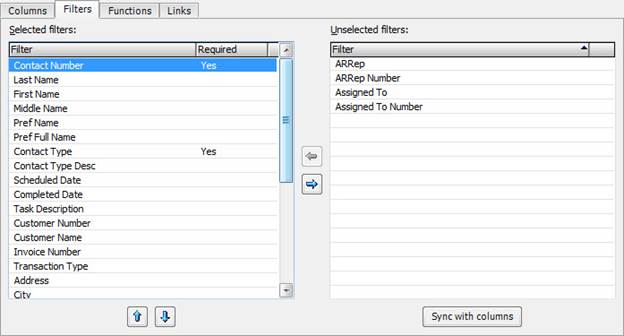
To add a filter for each column listed in the Selected columns region of the Columns tab, click [Sync with columns].
To add a filter for a specific column, do the following:
In the Unselected filters region, select a filter you want to add.
Click the [Add available filter] button (blue, left arrow) to add the selected filter to the Selected filters region. The filters you list in this region are the filters the system will list in the QuickSearch drop-down menu of the View window.
The order in which you list the filters in the Selected filters region is the order in which the system will list the filters in the QuickSearch drop-down menu of the View window. To reposition a filter, do the following:
Select a filter you want to reposition.
Click the blue, up arrow to move the filter up in the list; or click the blue, down arrow to move the filter down in the list.
To remove a filter, do the following:
In the Selected filters region, select the filter you do not want to display in the QuickSearch drop-down menu of the View window.
Click the [Remove selected filter] button (blue, right arrow) to move the filter to the Unselected columns region.
Click the Functions tab to bring it forward. You use this tab to specify the functions for which you want the system to calculate and display values at the bottom of the View window for the records returned by the view. The Selected functions region lists the functions the system will calculate and display values for at the bottom of the View window. The sequence in which you list the functions in the Selected functions region is the sequence in which the system will list the functions at the bottom of the View window. The Unselected functions region lists the functions that will not be used in the view.
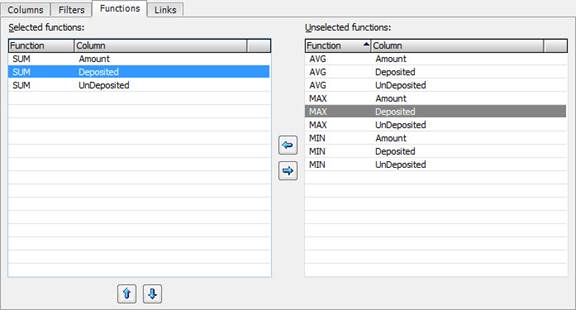
To add a function, do the following:
In the Unselected functions region, select a function you want to add.
Click the [Add available function] button (blue, left arrow) to move the selected function to the Selected functions region.
The order in which you list the functions in the Selected filters region is the order in which the system will display the functions at the bottom of the view. To reposition a function, do the following:
Select a function you want to reposition.
Click the blue, up arrow to move the function up in the list; or click the blue, down arrow to move the function down in the list.
To remove a function, do the following:
In the Selected functions region, select the function you do not want to use in the view.
Click the [Remove selected function] button (blue, right arrow) to move the function to the Unselected functions region.
Click the Links tab to bring it forward. You use this tab to specify the links to any existing views that you want the system to list in the right-click menu accessible from each row of data listed in the View window for this view. When you right-click on a row of data in the View window and select a linked view, the system opens that view in a new View window and filters that view to display the results associated with the row of data from which you accessed the linked view. For example, if you are viewing the System View >> Customers view, right-click on a selected customer, and select Customer Invoices (Customer Number) from the right-click menu, the system opens the System View >> Customer Invoices view and filters the view to display invoices for that customer. For system views, the links for each view are pre-defined and cannot be changed. When you customize a view, you can edit the links and only display the links you choose. The Selected links region lists the existing views that will be available from the right-click menu for this view. The Unselected links region lists the existing views that will not be displayed in the right-click menu for this view.
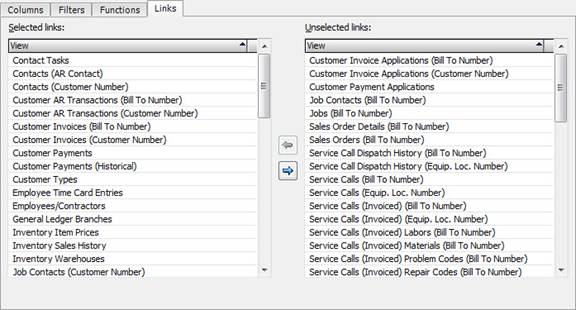
To add a link, do the following.
In the Unselected links region, select a view you want to list in the right-click menu for this view.
Click the [Add available link] button (blue, left arrow) to move the selected view to the Selected link region.
To remove a link, do the following:
In the Selected links region, select a view you want to exclude from the right-click menu for this view.
Click [Remove selected link] button (blue, right arrow) to move the link to the Unselected links region.
Click [OK] to save the new view.
Release Support Ends July 31, 2026Release Support Ends July 31, 2026
©2026 ECI and the ECI logo are registered trademarks of ECI Software Solutions, Inc. All rights reserved.