Installing and Configuring Equipment Swapping Functionality
Equipment Swapping functionality is provided as a separate, purchased companion product to RemoteTech and e-automate. Please contact your Account Manager for purchase and support details.
When your company purchases the Equipment Swapping functionality, you will be given a zip file (e.g., Equipment_Swapping.[Version_Number].zip) containing the Equipment Swapping database component that you will need to extract and install via e-admin. Once you install the Equipment Swapping database component, RemoteTech's Feature Configuration page will display a new Equipment Swapping section. You will use this new section to enable the equipment swapping functionality in RemoteTech. For the equipment swapping functionality to work with e-automate, you will also need to verify that you have added a defective bin to each technician's warehouse and have added a service code to applicable item records.
Extracting the Zip File's ContentsExtracting the Zip File's Contents
To extract the Equipment_Swapping.[Version_Number].zip file's contents, do the following:
Copy the Equipment_Swapping.[Version_Number].zip to your server.
Extract the Equipment_Swapping.[Version_Number].zip file's contents into your ECI\e-automate\sql\CompanyDb\_components folder.
From the location on your server where you copied the Equipment_Swapping.[Version_Number].zip file, right-click the file and select the Extract All... option from the right-click menu. The system displays an Extract Compressed (Zipped) Folders window.
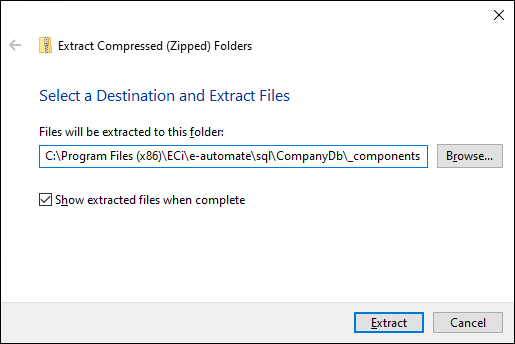
Click the [Browse...] button. The system display a Select a Destination window.
On the Select a Destination window, do the following:
Navigate to the location where you want to extract the files (e.g., ECI\e-automate\sql\CompanyDb\_components).
Click the [Select Folder] button to accept the specified folder location and to close the Select a Destination window.
Click the [Extract] button to extract the files to that location and to close the Extract Compressed (Zipped) Folders window. This action copies an EquipmentSwapping folder into the _components folder.
Installing the Database ComponentInstalling the Database Component
After extracting the zip file's contents to the appropriate folder on your server, install the database component by doing the following:
Log in to e-admin.
From the list of companies, select the company with which you want to use the equipment swapping functionality.
From the Company menu, select Maintenance > Database Components.... If you have your e-admin toolbar visible, you can use the drop-down menu on [Maintenance] and select Database Components.... You can also use the right-click menu and select Maintenance > Database Components....
The system displays the Enter Admin Password window.
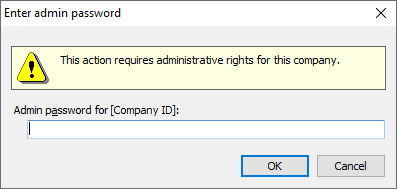
In the Admin password for [Company ID] field, enter your admin password.
Click [OK]. If the system verifies your admin password for the company you selected, the system displays the Database Components window.
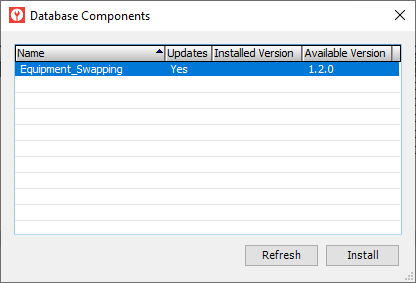
Select the Equipment_Swapping row.
Click the [Install] button. The system displays the Backup Database Location window. Prior to installing a database component, e-admin requires a backup of the database so that you can restore the backup if the database component installation does not complete as expected.
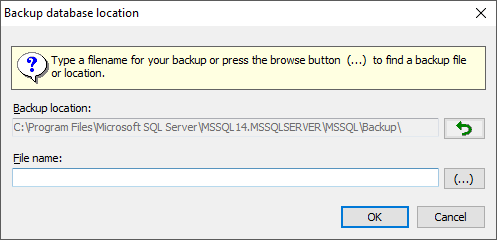
Enter a name for this backup in the File name field.
E-admin always displays the last navigated path in the Backup location field. If you want to browse your network for a different backup location, click [(...)] to open the Browse for Backup File... window.
Select the backup location you want to use and click [OK] to return to the Backup database location window. The filename you selected displays in the File name field.
Click [OK]. If you opted to use a file name that has already been used in e-admin, e-admin notifies you that you cannot use the file name identified. Enter a different name.
After the database is backed up, the system attempts to install the database component.
If the installation is successful, the system displays the message, "Installation complete." Click [OK] to acknowledge the message. When you click [OK], the system removes the Yes from the Updates column, updates the Installed Version to the new version, and clears the Available Version column.
If the installation is not successful, the system displays an Unexpected Error Information window. Review the Description field.
If the Description field reports only that one or more exceptions occurred, then the system was able to restore the backup you created before trying to install the update; you do not need to manually restore your database.
If the Description field—in addition to reporting that one or more exceptions occurred—includes a NOTICE letting you know you need to manually restore your backup, then the system was not able to automatically restore your backup. You need to restore your backup manually, and the NOTICE lists the name of the backup you created prior to trying to install the update. For information on restoring a backup, see the Restoring a Database topic.
Enabling Equipment Swapping Functionality via RemoteTechEnabling Equipment Swapping Functionality via RemoteTech
When you install the Equipment Swapping database component, the system adds an Equipment Swapping section to RemoteTech's Feature Configuration page. For information on enabling the Equipment Swapping functionality in RemoteTech, see the Equipment Swapping Section topic in the RemoteTech online help.
Adding a Defective Bin to Each Technician's WarehouseAdding a Defective Bin to Each Technician's Warehouse
For a technician using RemoteTech to swap equipment during a service call, the technician's warehouse must have a defective bin. The system uses this bin for receiving back from the customer's location the equipment that was replaced during an equipment swap. For each technician whose warehouse does not already have a defective bin, add a defective bin to the warehouse by doing the following:
From the Inventory menu, select Warehouse to open the Inventory Warehouses window.
Fom the Inventory Warehouses list, locate a technician warehouse to which you want to add a defective bin.
With the warehouse record selected in the list, click the Edit button on the toolbar or right-click the record and select Edit from the right-click menu. The system opens the Edit Inventory Warehouse window.
Verify the Details tab is forward; if it is not, click the Details tab to bring it forward.
In the Defective bin field, click the drop-down menu and select New. The system opens the New Inventory Bin window.
Using the New Inventory Bin window, do the following:
In the Bin field, enter a name or number to identify the bin.
In the Description field, enter brief text to further identify the bin.
Verify the Warehouse field displays the correct warehouse for this technician. If it does, proceed to the next step; if it does not, return to Step 3.
Verify the Stock type field displays Defective. If it does proceed, to the next step; if it does not, return to Step 5.
In the Picking order field, enter the number assigned to this bin that determines where it is located and printed in the picking order.
Verify the Active checkbox is checked if you want this bin to be active.
Click [OK] to save the bin, to close the New Inventory Bin window, and to populate the Defective bin field with the newly created bin.
Click [OK] to save your changes to the warehouse record.
Adding a Service Code to Applicable Item RecordsAdding a Service Code to Applicable Item Records
For each equipment item that you want to be able to swap, you need to add a service code to the item's Item record.
To complete this process, do the following:
If you already have one or more service codes defined that you want to use for this purpose, proceed to the next step; if you need to create one or more service codes, see the Creating Service Codes topic.
Do one or both of the following:
To bulk update Item records, do the following:
Back up your e-automate database. Once you have verified you have successfully backed up your database, proceed with the bulk update.
From the Tools menu, select Bulk Updates. The system opens the Bulk Updates window.
In the Update list field, use the drop-down menu to select Items.
Click [Go] to display the list of Item records.
In the QuickSearch region, do the following:
Enter your filter parameters. For example, to identify all serialized Item records that do not contain a service code and that do contain an equipment code, enter search parameters as shown in the image below:
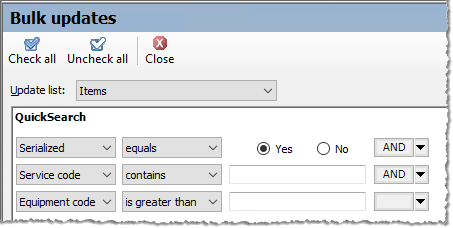
Click [Go] to filter the liste based on the specified parameters.
To select the Item records from the filtered list that you want to update, do any of the following:
To include all records listed in the display, click [Check All]. The system checks the checkbox at the beginning of each row in the display.
To include an individual record listed in the display, check the checkbox at the beginning of the row in the display.
To exclude all the records listed in the display, click [Unheck All]. The system unchecks the checkbox at the beginning of each row in the display.
To exclude an individual record listed in the display, uncheck the checkbox at the beginning of the row in the display.
In the Update field, use the drop-down menu to select Service code.
In the To field, use the lookup to select the service code you want to assign to the Item record(s) you selected in Step f. above.
Click [Update]. The system displays the message, "This will update service code to '[Service Code Number - Service CodeName]' on all selected records in the items list. Are you sure you want to continue?"
To update your records, click [Yes]. To cancel the update, click [No].
If you clicked [Yes] in the previous step, the system displays a message similar to the following, "[Number of] records have been updated. Would you like to refresh the list?"
Click [Yes] to update the list, or click [No] to leave the list intact, allowing you to perform other updates to the same list without updating your QuickSearch.
To close the Bulk Updates window, click [Close].
To manually update individual Item records, do the following:
On the e-automate toolbar, click [Items] to open the Items window.
Fom the Items list, locate an Item record that you want to update.
With the Item record selected in the list, click the Edit button on the toolbar or right-click the record and select Edit from the right-click menu. The system opens the Edit Inventory Item window.
Verify the Codes and Settings tab is forward; if it is not, click the Codes and Settings tab to bring it forward.
In the Service Code - GL field, use the drop-down menu to select the service code you want to assign to this Item record.
Click the [OK] button to save your changes.
Non-supported ReleaseNon-supported Release
©2024 ECI and the ECI logo are registered trademarks of ECI Software Solutions, Inc. All rights reserved.