Installing and Configuring RT 17.2.20 (On Premise)
Release NotesRelease Notes
Release FeaturesRelease Features
No new release features were added on this portfolio release.
EnhancementsEnhancements
No new enhancements were added on this portfolio release.
FixesFixes
This release addresses the following issues:
D-39050: Changes have been made to improve the bar code validation process RemoteTech uses when your system is set up to require a technician to scan an Equipment bar code to arrive at and depart from a service call.D-39050: Changes have been made to improve the bar code validation process RemoteTech uses when your system is set up to require a technician to scan an Equipment bar code to arrive at and depart from a service call.
To help resolve issues where
the system could not validate a vendor bar code scanned by
a technician to arrive at or depart from a service call, the
system's lib (library) file was updated.
Note: While this solution
improves scan validation, other issues may still influence
the system's ability to validate a scanned bar code (e.g.,
lighting, resolution of the scanned image, too much space
around the bar code in the scanned image such that the bar
code becomes too small to read, not enough space around the
bar code in the scanned image for the system to read the whole
bar code).
D-40566: If an e-info user enters a contact (instead of selecting a contact) when creating a service call, the system now correctly clears out the Caller Contact field.D-40566: If an e-info user enters a contact (instead of selecting a contact) when creating a service call, the system now correctly clears out the Caller Contact field.
Previously, if an e-info user entered information in the Name, Email, and/or Phone fields of the Enter your name, phone number, email, and customer PO number (optional) region of the New Service Call page (which is only available when the Enforce contact identity checkbox is not checked in the Dealer signup settings region of the Customer Gateway Configuration page), the system did not clear out the Caller contact field. As a result, when an e-automate user accessed the call via the Dispatch Console in e-automate or a RemoteTech user accessed the call via RemoteTech, the Caller contact field displayed different contact information than the information displayed in the Caller field (where the system appends the contact information entered by the e-info user).
D-40719: When you click the Search button on the Service Calls page in Remote Tech, the system no longer returns in error either no results or the message, "You are currently offline and cannot access the requested page. Please press the back button on your device."D-40719: When you click the Search button on the Service Calls page in Remote Tech, the system no longer returns in error either no results or the message, "You are currently offline and cannot access the requested page. Please press the back button on your device."
Previously, you clicked Remote Tech's Tools link on the main page, clicked [Call Search] to open the Service Calls page, entered search parameters, and then clicked the [Search] button, the system sometimes returned in error either no results or the message, "You are currently offline and cannot access the requested page. Please press the back button on your device."
D-43820: When your e-automate company/branch data, e-automate client server, and RemoteTech web server are configured to use the same time zone but your e-automate database server is configured to use a different time zone, and when your technicians use RemoteTech's "Fill Gap" functionality to account for existing time gaps before dispatching the next service call, the system now uses the time zone associated with your e-automate company/branch data, e-automate client server, and RemoteTech web server when assigning the Dispatch time to the service call.D-43820: When your e-automate company/branch data, e-automate client server, and RemoteTech web server are configured to use the same time zone but your e-automate database server is configured to use a different time zone, and when your technicians use RemoteTech's "Fill Gap" functionality to account for existing time gaps before dispatching the next service call, the system now uses the time zone associated with your e-automate company/branch data, e-automate client server, and RemoteTech web server when assigning the Dispatch time to the service call.
Previously, when a RemoteTech user clicked the [Fill Gap] button to account for the time between the previous activity and the call being dispatched, the system assigned the incorrect Dispatch time to the service call. For example, if the e-automate company/branch data, e-automate client server, and RemoteTech web server were configured to use Eastern Standard Time (EST), and the e-automate database server was configured to use Central Standard Time (CST), the system used EST + 1 hour when assigning the Dispatch time to the call in RemoteTech.
D-43821: When your e-automate company/branch data, e-automate client server, and RemoteTech web server are configured to use the same time zone but your e-automate database server is configured to use a different time zone, and when you allow your technicians to edit their own labor records via RemoteTech, the system now saves and re-displays via RemoteTech the Dispatch, Arrival, and Departure dates and times in their edited labor records using the time zone associated with your e-automate company/branch data, e-automate client server, and RemoteTech web server.D-43821: When your e-automate company/branch data, e-automate client server, and RemoteTech web server are configured to use the same time zone but your e-automate database server is configured to use a different time zone, and when you allow your technicians to edit their own labor records via RemoteTech, the system now saves and re-displays via RemoteTech the Dispatch, Arrival, and Departure dates and times in their edited labor records using the time zone associated with your e-automate company/branch data, e-automate client server, and RemoteTech web server.
Previously, the system did not assign the correct time zone to the Dispatch, Arrival, and Departure dates and times in the labor records edited and re-displayed via RemoteTech. For example, if the company/branch data, e-automate client server, and RemoteTech web server were configured to use Eastern Standard Time (EST) and the e-automate database server was configured to use Central Standard Time (CST), the labor records edited and re-displayed via RemoteTech showed Dispatch, Arrival, and Departure dates and times using EST + 1 hour.
B-47468: RemoteTech has been updated to continue using application cache functionality when supported by the RemoteTech user's browser, and to function without using the application cache—and without displaying an error message—when the RemoteTech user's browser does not support this functionality.B-47468: RemoteTech has been updated to continue using application cache functionality when supported by the RemoteTech user's browser, and to function without using the application cache—and without displaying an error message—when the RemoteTech user's browser does not support this functionality.
Although some browsers still support application cache functionality, this feature has been removed from the Web standards. Prior to this change, if a user attempted to access RemoteTech using a browser that no longer supported application cache functionality, the browser displayed an error message similar to the following: "The browser application cache is unavailable at this time."
For a complete list of Release Notes for the 17.2.20 release, see Release Notes for 17.2.20 (On Premise).
Network PrerequisitesNetwork Prerequisites
For your network environment to support RemoteTech, you must configure your network appropriately as well as meet system requirements related to using RemoteTech with e-automate. For a list of system requirements, please see the system requirements topic in the e-automate help. The "Web Server (ESN, E-info, PIP, RAP, RemoteTech, RSM, and DeskTech)" section addresses system requirements specific to RemoteTech. We recommend you consult a network professional for assistance with configuring your network and meeting these requirements.
Installing Internet Information ServicesInstalling Internet Information Services
In order for RemoteTech to work on the server in which you install RemoteTech Server, you must have Microsoft Internet Information Services (IIS) installed and running. If you proceed with the installation of RemoteTech Server without IIS installed, the installation will stop and you will be directed to install IIS before installing RemoteTech Server. We recommend you consult with a qualified IT resource to ensure IIS is running properly before you install RemoteTech.
The following image shows you the recommended
IIS settings.
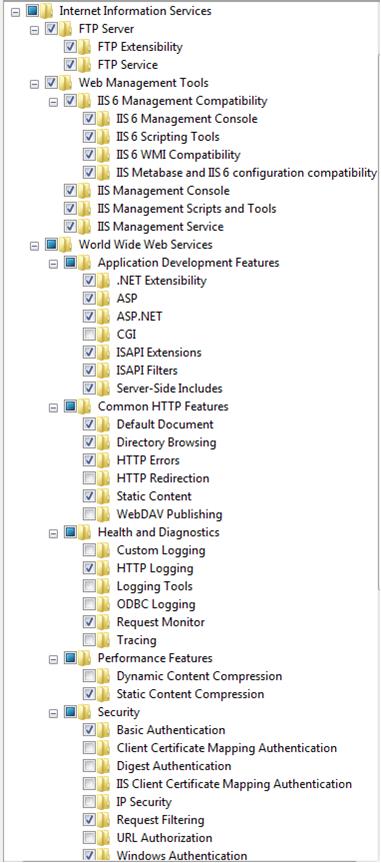
If you have configured these settings as shown in the above image and you are still having trouble, you may contact ECi e-automate customer care at eacustomercare@ecisolutions.com.
Downloading the RemoteTech InstallerDownloading the RemoteTech Installer
Using
a browser on a computer connected to the Internet, go to https://customersupport.ecisolutions.com.
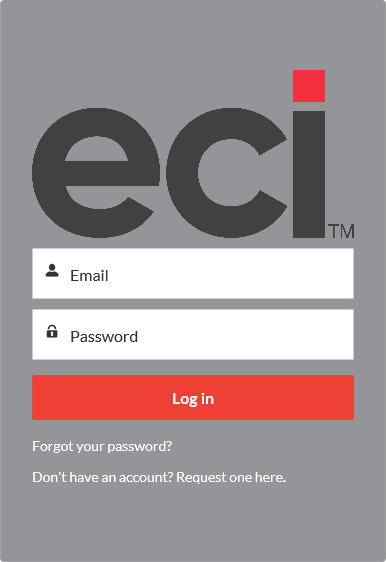
In the Email field, enter your email address.
In
the Password field, enter
your password for this site.
Note: If you cannot remember
your password, click the Forgot your password?
link.
Click the [Log in] button. If the information you entered is valid, the system displays the Customer Support Center home page.
On
the Customer Support Center
home page, click the Software Updates
icon.
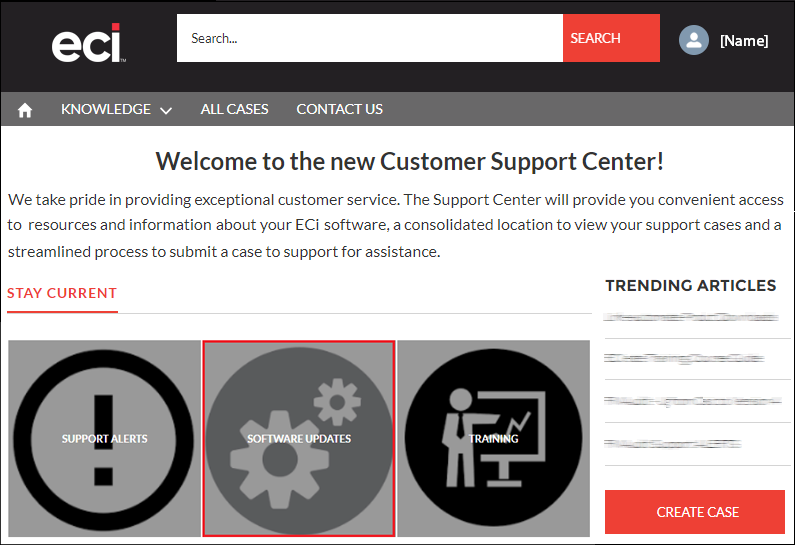
The system displays the Software Updates
page.
On
the Software Updates page,
click the e-automate
- Link for all e-automate product downloads.
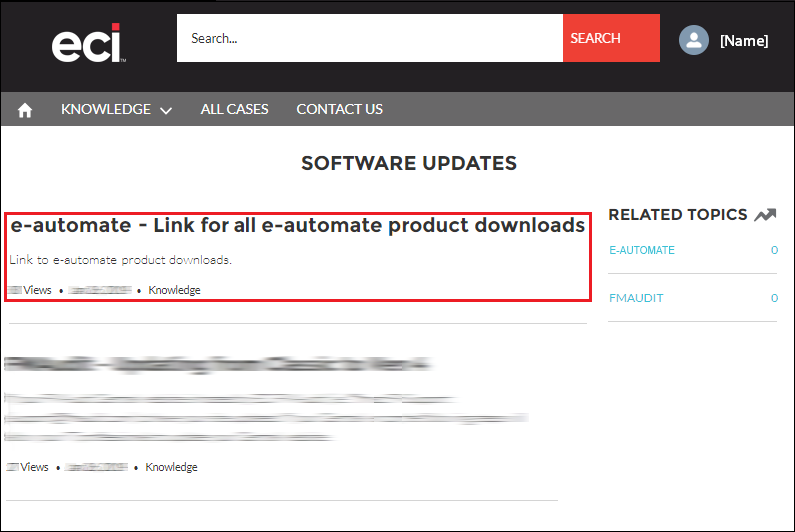
The system displays e-automate – Link
for all e-automate product downloads on the E-AUTOMATE page.
Under
e-automate – Link
for all e-automate product downloads, scroll down to the ARTICLE section and click the "Click
here
for the latest e-automate versions..." link.
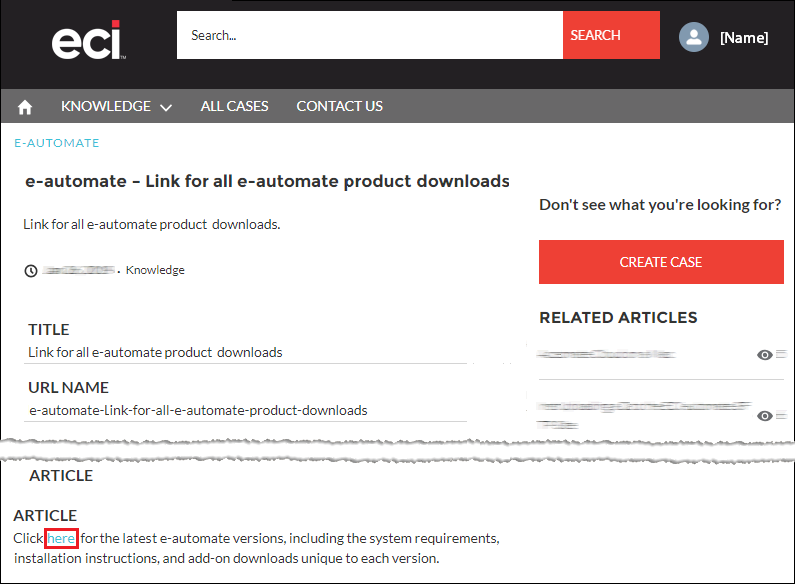
The system displays the E-automate
Downloads page.
On
the E-automate Downloads page,
scroll down to the Past Versions
region and click the e-automate 17.2 link.
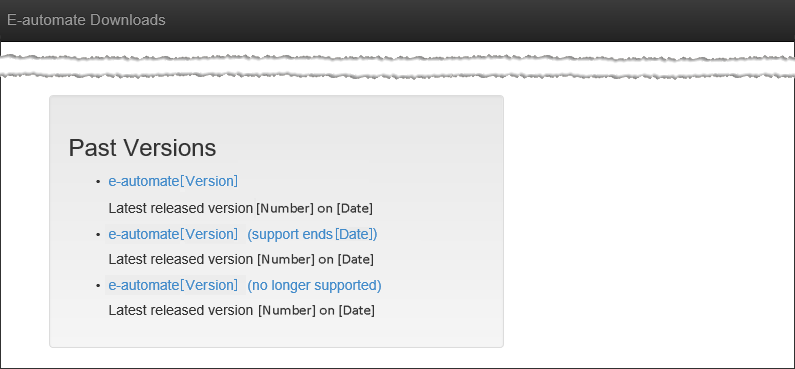
The system displays the E-automate
Downloads page for 17.2.
On
the E-automate Downloads page,
in the Server Downloads region,
click the RemoteTech link.
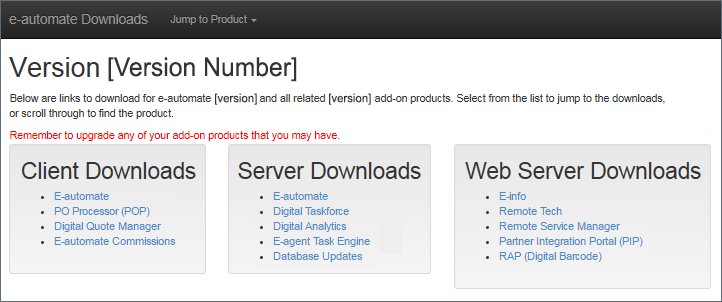
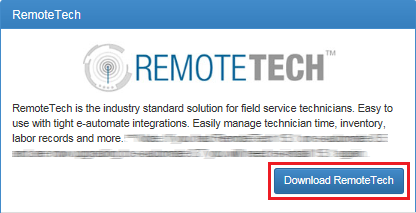
The system displays the RemoteTech
software download section.
Click
the [Download RemoteTech...]
button (similar to the one in the image shown below) to start the
download.
Follow
your browser’s prompts for downloading and saving the installation
file.
Note:
When you install a new version of e-automate, it is best practice
to download and install new versions of all e-automate add-on products
you actively use.
Be sure to review the System Requirements and related documentation.
SupportSupport
When installing and working with RemoteTech, you may need a few different kinds of support.
Installation
If you need installation assistance, contact e-automate Customer Care at eacustomercare@ecisolutions.com.
Product
If you need software product support, contact e-automate Customer Care at eacustomercare@ecisolutions.com.
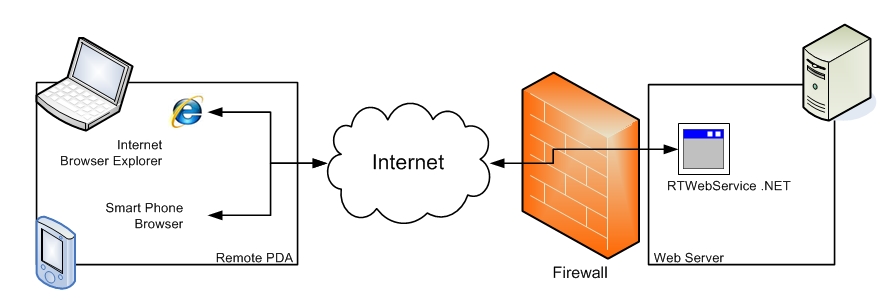
RemoteTech DeploymentRemoteTech Deployment
Once you install RemoteTech on your web server, you can use RemoteTech from any device (e.g., smartphone, tablet, laptop) that can access your server via the Internet. RemoteTech requires a Chrome browser. If you are using a tablet or smartphone, RemoteTech works with the following operating systems:
iOS 9.2.1
Android OS 6.x and 7.x
64-bit Operating Systems64-bit Operating Systems
If you are using a 64-bit operating system in order to run RemoteTech you are required to allow your operating system to run 32-bit applications. For additional information contact e-automate customer care at eacustomercare@ecisolutions.com to make the necessary adjustment to your system.
Uninstalling Previous VersionUninstalling Previous Version
If you have a previous version of RemoteTech installed on your machine, you must uninstall that version before you install the new version of RemoteTech. You uninstall the previous version of RemoteTech through your computer's Control Panel. The process of accessing the Control Panel as well as the process of uninstalling an application differ depending on what Operating System you are using.
Contact a qualified IT professional if you need assistance with uninstalling RemoteTech.
Installing RemoteTechInstalling RemoteTech
The installer for RemoteTech must be run as an administrator. Microsoft does not provide the option in the right-click menu to run an .msi file as an administrator. To run the RemoteTech installer as an administrator, do the following:
To install RemoteTech, do the following:
Place the downloaded RemoteTech Microsoft Installer (MSI) file on the intended installation computer on your network.
The RemoteTech MSI installer must be run as an administrator. Microsoft does not provide a right-click option to run this installer as an administrator, so you must run the installer using a command prompt. To open the installer as an administrator from the command line, do the following (based on Windows 7):
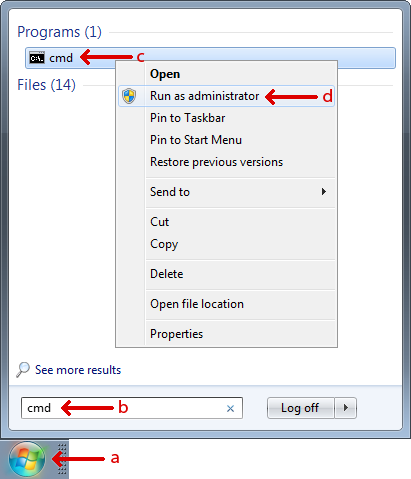
Click the Windows Start icon to display the Search programs and files field.
In the Search programs and files field, enter cmd to locate the cmd program.
Right-click the cmd program.
Select Run as administrator from the right-click menu.
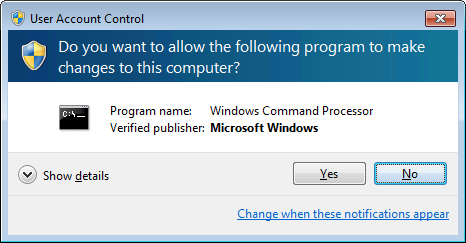
The system displays a User Account Control message, asking if you want to allow the cmd program to make changes to this computer. Click [Yes].
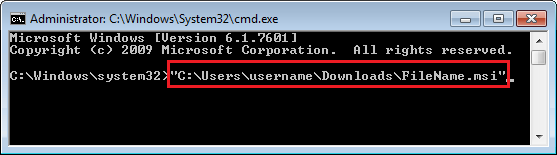
The system displays the Administrator: C:\Windows\System32\cmd.exe command prompt window. At the command prompt, enter the full path to—and file name of—the installer file. If the path contains any spaces, put the path inside quotes (e.g., "C:\Users\username\Downloads\FileName.msi" where FileName.msi is the name of the RT.msi file.
Click Enter to have the system open the RemoteTech Setup window.
On the Welcome to the RemoteTech Setup Wizard window, click [Next] to continue.
On the End-User License Agreement window, review the terms of the license agreement and then check the I accept the terms of the License Agreement box if you want to proceed with the installation.
Click [Next] to continue.
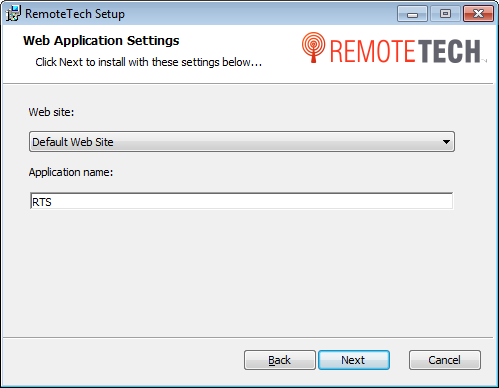
On the Web Application Settings window, do the following:
In the Web site field, use the drop-down menu to select a web site or make no change to use the default web site displayed (e.g., Default Web Site).
In the Application name field, enter a name for this application or make no change to use the default name (i.e., RTS) displayed.
Click [Next] to continue.
On the Destination Folder window, do one of the following:
To accept the default Install RemoteTech to: location, click [Next] to continue.
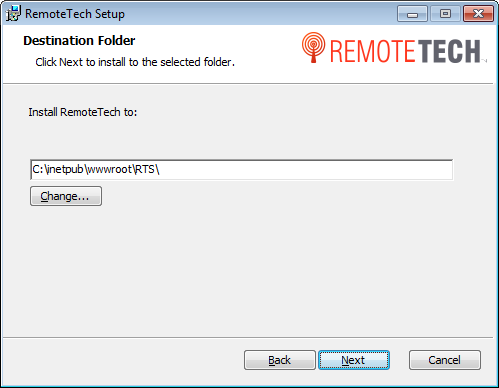
To change the default Install RemoteTech to: location, do the following:
Click [Change...] to open the Change Destination Folder window.
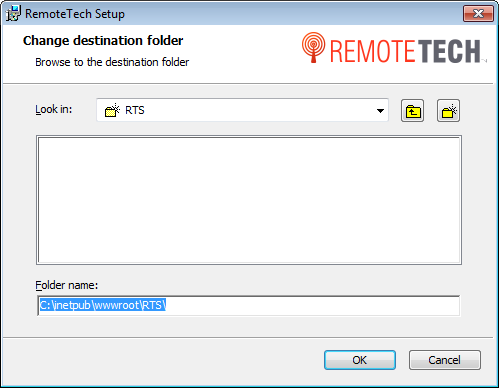
On the Change Destination Folder window, do any of the following:
In the Folder name field, enter the destination folder name.
In the Look in field, use the drop-down menu to navigate to a folder location.
Note: This action updates the display of subfolders in this location and updates the path displayed in the Folder name field.
To go up one folder from the currently selected folder location, click the Up one folder icon to the right of the Look in field.
Note: This action updates the display of subfolders in this location and updates the path displayed in the Folder name field.
To create a new subfolder in the currently selected folder location, do the following:
Click the Create a new folder icon to the right of the Up one folder icon.
Enter a name for the folder.
Note: This action adds the new folder to the display of subfolders in this location and updates the path displayed in the Folder name field.
In the display of subfolders, click a subfolder.
Note: This action updates the Look in field, displays the subfolders listed in the selected folder, and updates the path displayed in the Folder name field.
When the Folder name field contains the destination folder you want to use, click [OK] to close this window and populate the Install RemoteTech to field on the Destination Folder window.
Click [Next] to continue.
On the Database Connection Information window, do the following:
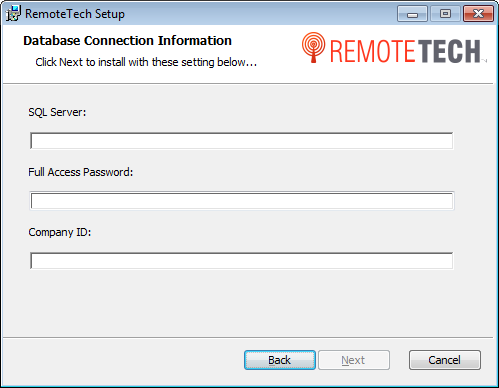
In the SQL Server field, enter the name of your SQL Server (e.g, ComputerName\SQLEXPRESS).
In the Full Access Password field, enter your company's full access password.
In the Company ID field, enter the Company ID of the company you have established in e-automate with which you want to use e-info.
Note: Do not include the Co prefix in this field; this prefix is part of the database name but not the company ID.
Click [Next] to continue.
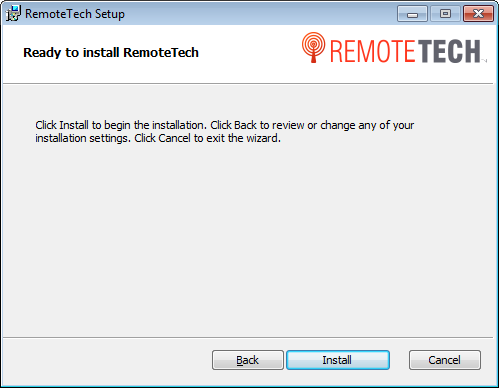
On the Ready to Install RemoteTech window, click [Install] to continue.
The system displays the Installing RemoteTech window.
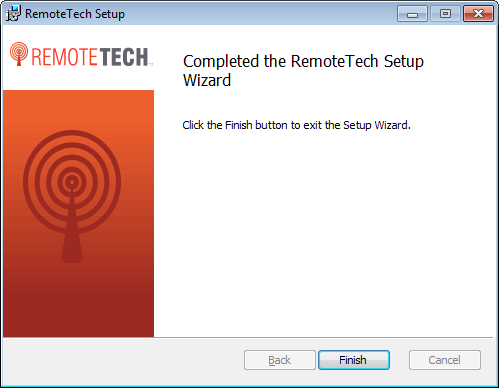
When the installation is complete, the system displays the Completed the RemoteTech Setup Wizard window. Click [Finish] to close this window.
To close the command prompt, do the following:
Type exit at the command prompt.
Click Enter.
Addressing Chrome's Discontinued Support for AppCacheAddressing Chrome's Discontinued Support for AppCache
A Google Chrome™ update (version 85) released on August 25, 2020, prevents caching functionality even on secure (https) web sites. When this update is applied to the Chrome browser, RemoteTech's offline functionality is no longer available and RemoteTech appears to hang when loading. For options on addressing this issue, see the Addressing Chrome's Discontinued Support for AppCache (On Premise) topic.
License KeyLicense Key
If you are using RemoteTech installed on your own server (on premise), use the following process to activate RemoteTech.
Once RemoteTech is installed, contact e-automate customer care at eacustomercare@ecisolutions.com for your customer number and a product key.
With your customer number and license key available, do the following to log in to the administration area of RemoteTech to access the license key features:
From
an Internet-accessible computer, go to your RemoteTech plogin.aspx
page.
Note:
If you installed RemoteTech in the default location, the URL to this
page will be https://[your_domain]/RTS/plogin.aspx
(where [your_domain] is your
actual domain). If RemoteTech is installed in a different location,
adjust the path accordingly. If you are not sure where RemoteTech
is installed and/or need assistance locating this page, consult with your network administrator or a qualified IT professional.
In the User name field, enter your admin user name.
In the Password field, enter the password associated with your admin user.
In the Company field, enter the e-automate database name to which you have connected RemoteTech.
Click [Login].
Click [Licensing] to display the RemoteTech Licensing page.
In the Customer number field, enter your company’s e-automate customer number.
In the Product key field, enter your RemoteTech License Key.
Click
[Activate] to communicate
with the ECi Software Solutions servers to validate your key and activate
your installation of RemoteTech.
Note:
If you have already activated your product key, this page displays
a [Deactivate] button. If
necessary, use this button to deactivate the product key.
Do one of the following:
If
RemoteTech is successfully activated, the system displays the message:
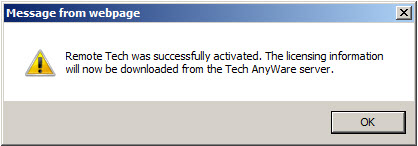
Click [OK] to acknowledge the
message.
Note:
Once the server is activated, RemoteTech displays the customer number,
product key, server name associated with this installation of RemoteTech,
version, number of users, and the last time the license key was refreshed.
Periodically, RemoteTech communicates with the ECi Software Solutions
servers to assure your installation is up-to-date.
If activation fails, contact eacustomercare@ecisolutions.com.
To refresh your license key, click [Refresh key]. This action updates your key based on any changes made to your account (e.g., the purchase of additional RemoteTech licenses).
To return to the menu, click [Back].
Moving ServersMoving Servers
This section only applies to moving SQL from one server to another. In the case that the RemoteTech installation is moved from one IIS server to another, there is nothing that needs to be done aside from re-installing RemoteTech. RemoteTech is licensed to the SQL server on the backend.
If you need to move web servers, you can deactivate a server for RemoteTech so you can activate a new server. Prior to deactivating, you should prepare your new server by setting it up to meet the RemoteTech installation requirements as well as have IIS configured and running.
Login to the license administration area.
From
an Internet-accessible computer, go to your RemoteTech plogin.aspx
page.
Note:
If you installed RemoteTech in the default location, the URL to this
page will be https://[your_domain]/RTS/plogin.aspx
(where [your_domain] is your
actual domain). If RemoteTech is installed in a different location,
adjust the path accordingly. If you are not sure where RemoteTech
is installed and/or need assistance locating this page, consult with your network administrator or a qualified IT professional.
In the User name field, enter your admin user name.
In the Password field, enter the password associated with your admin user.
In the Company field, enter the e-automate database name to which you have connected RemoteTech.
Click [Login].
Access the licensing features by clicking [Licensing] to open the RemoteTech Licensing page.
Click
[Deactivate] to remove the
RemoteTech license from this server.
Note:
To activate a new server, contact e-automate customer care at eacustomercare@ecisolutions.com.
Turning on RemoteTechTurning on RemoteTech
In order for RemoteTech to function in conjunction with e-automate your system administrator must first enable RemoteTech features.
On
an e-automate client computer, click [Start]
> Programs > e-automate
> e-automate to open the
e-automate client program.
Note:
You must have administrative rights to access company options.
Enter your User ID and Password and login to e-automate.
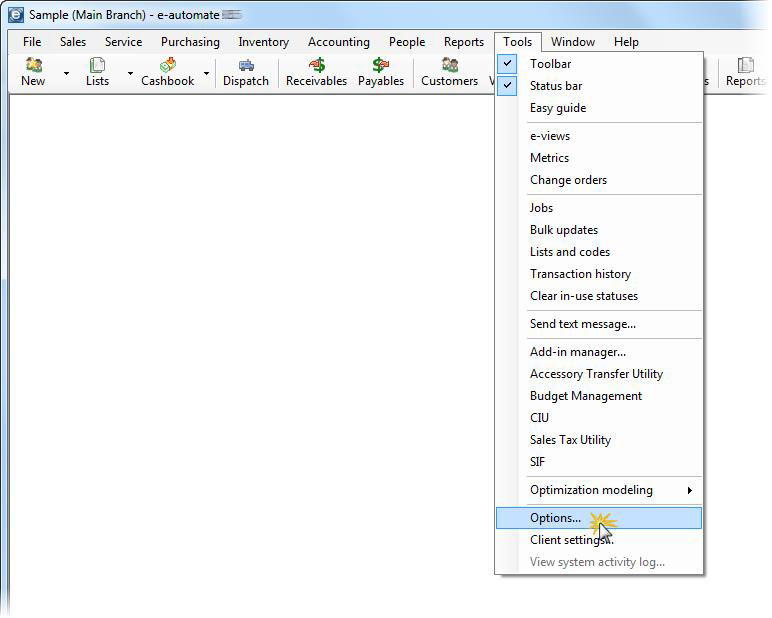
From
the Tools menu, select Options to open the Options window.
In
the left pane of the window, double-click on Service
Calls to expand the Service
calls menu, click on Dispatch
Console to display Dispatch Console options.
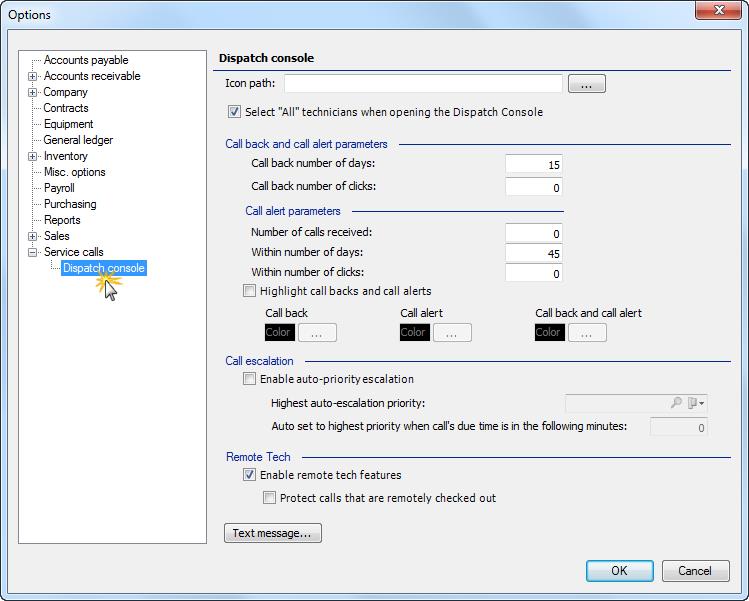
In
the RemoteTech region, check
Enable RemoteTech features.
When checked, e-automate allows RemoteTech to interact with the Dispatch
Console.
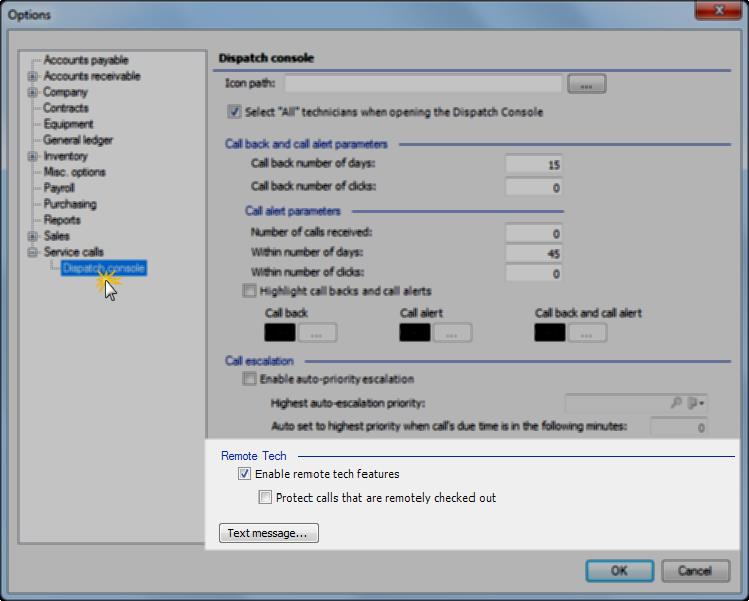
If you want to protect calls that are remotely checked out, check Protect calls that are remotely checked out.
Click [OK] to save your changes.
Creating RemoteTech Users in e-adminCreating RemoteTech Users in e-admin
To assign RemoteTech login credentials to a technician, you create a User ID for the technician in e-admin and then link the User ID to the technician's Employees/Contractors record in e-automate. When you create the technician's User ID in e-admin, you do not need to assign any e-automate rights to the technician.
To create a User ID for the technician in e-admin, do the following:
On your e-automate server, click Start > All Programs > ECi > e-admin to open the e-admin logon profile window.
In
the Profile field, use the
drop-down menu icon to select the profile identifying the server to
which you want to log in.
Note:
If you do not have a login profile, see the Creating
a Login Profile topic in the e-automate help.
Click [OK] to login.
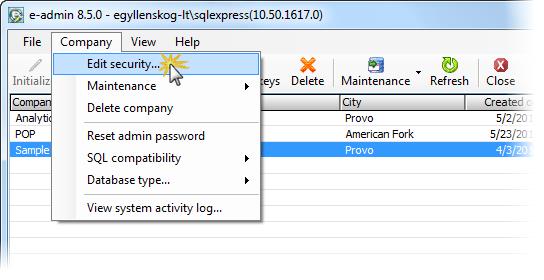
If you have configured your DGServer Email settings and the system is able to verify your login profile, the system displays the main e-admin window. From the list of companies displayed, select the company for which you want to create RemoteTech technician logins.
From
the Company menu, select Edit security. The system displays
the Enter Admin Password window.
In the Admin password for [Company] field on the Enter Admin Password window, enter the company’s administrator password.
Click [OK]. If the system is able to verify your password, E-admin displays the Security window.
On the Security window, verify the Users tab is forward.
Click
[Add] to create a new e-automate
user.

The system opens the User Properties window.
In
the User ID field, enter the
user identifier you want to assign to a RemoteTech technician.
Note: The technician will use
this User ID to log in to RemoteTech.
In the User name field, enter the technician's name.
In
the Password field, enter
the password you want to associate with this User
ID.
Note: The technician will use
this password (together with the User
ID) to log in to RemoteTech.
In the Confirm password field, re-enter the password for verification purposes.
If an Employee/Contractor record already exists in e-automate for the technician, then—in the Employee/Contractor field—use the down arrow and select the employee from the list. If an Employee/Contractor record does not already exist in e-automate for the technician, skip this step and complete the "Linking Employees to e-automate Users" section of this topic.
Click [OK] to save the e-automate user settings and return to the Security window.
To add additional users, repeat Steps 10-15.
Linking Employees to e-automate UsersLinking Employees to e-automate Users
If Employees/Contractors records already exist in e-automate for each of your technicians and you linked their e-admin User IDs to their e-automate employee records via the Employee/Contract field in Step 14 of the "Creating RemoteTech Users in e-admin" section of this topic, then you do not need to complete this section. If Employees/Contractors records do not already exists in e-automate for each of your technicians and you left the Employee/Contract field set to None in Step 14 of the "Creating RemoteTech Users in e-admin" section of this topic, then you need to create Employees/Contractors records in e-automate and add the e-admin User IDs to the e-automate Employees/Contractors records.
For detailed information on creating Employees/Contractors records in e-automate for your technicians, see the Creating Employees/Contractors topic in the e-automate help.
To add a technician's e-admin User ID to the technician's Employee/Contract record in e-automate, do the following:
Using
the Windows start menu from the client workstation, click Start
> All Programs
> ECi > e-automate.
The system displays the E-automate Login window.
Note:
You must have appropriate rights to employees to access the People menu. The e-admin right is
listed as P/R Employees in e-admin. You should have Create
and Edit rights.
In the User ID field, enter you user ID.
In the Password field, enter your password.
In the Profile field, select the appropriate logon profile.
Click [OK].
From
the People menu, select Employees/Contractors.
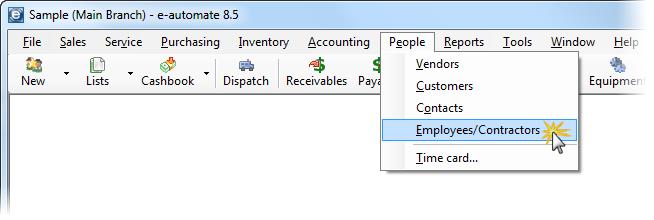
The system opens the Employees/Contractors list window.
From the list of service technician employees, select the service technician.
Click [Edit] to open the Edit Employee window.
In
the Login user ID field, use
the lookup to select the e-automate User
ID you created for the technician in e-admin.
Note:
This links the service technician's e-admin User
ID to the e-automate Employee/Contractor record, allowing RemoteTech
to know the technician’s warehouse and other employee settings.
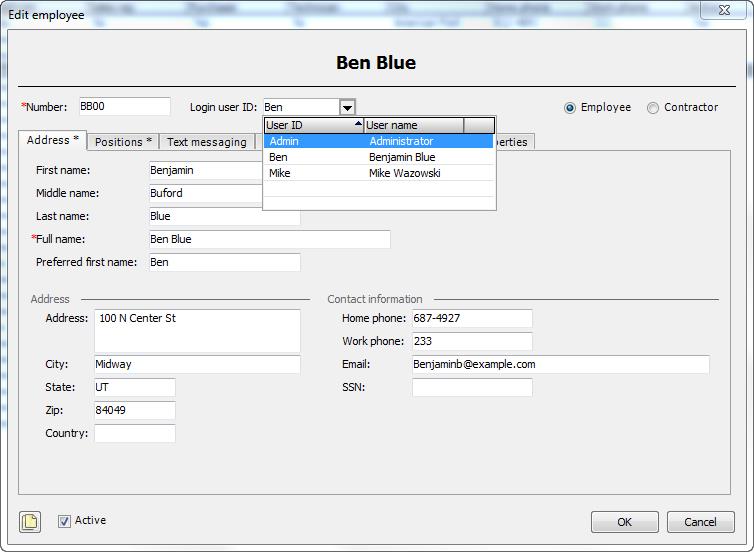
Click [OK] to save your changes.
Configuring Service ManagersConfiguring Service Managers
You can configure employees in e-automate to be flagged as managers. Once an employee is flagged as a manager, you can then specify a manager for other employees. The list of manager employees comes from the list of employees with the Manager field checked. When you flag a service technician as a manager, the service tech could have additional functionality in RemoteTech. The additional functionality is determined by the system administrator and the options set when installing RemoteTech. See RemoteTech Installation Guide. The system administrator can configure RemoteTech to allow call re-assignment only by managers or allow call re-assignment by any service tech. When only manager call re-assignment is enabled, then only service technicians with the manager flag checked on their employee profile can re-assign service calls. In addition to call re-assignment the system administrator can also configure RemoteTech to only allow technicians that have the manager flag checked allowed to perform service call searches.
RemoteTech can allow technicians from RemoteTech to view service calls. Technicians can look at any service call in your system whether they are still open or invoiced. They can filter those calls using a variety of filters. One filter that the technician can use is the Technician filter. When filtering by technician the technician can select a specific individual technician or they can choose technicians in their management group. The filter, Techs in Management Group is a filter that delivers all technicians that share the same manager as the currently logged in technician.
Marking a Technician as a ManagerMarking a Technician as a Manager
From the People menu, select Employees/Contractors to open the Employees/Contractors list.
From the list of service technician employees, select the service technician you want to flag as a manager and click [Edit] to open the Edit Employee window.
Click the Positions tab to bring it forward.
Check the Manager checkbox.
Click [OK] to save your changes.
Identifying a Service Technician's ManagerIdentifying a Service Technician's Manager
From within e-automate, select the People menu and select Employees/Contractors. The Employees/Contractors list displays.
To filter your employee list by active technicians, do the following:
Under QuickSearch, in the field labeled 1., use the down arrow to select Is Technician.
In the field adjacent, verify the operator is Equals.
Verify the radio button, Yes is selected.
On the unlabeled button on the current QuickSearch row, click the down arrow and choose AND to display row 2.
In field, 2., use the down arrow to select Active.
In the field adjacent, verify the operator is Equals.
Verify the radio button, Yes is selected.
Click [Go] to display the list of active technician employees.
From the list of active technician employees, select the employee to which you want to assign a manager and click [Edit] to open the Edit employee window.
Click the Positions tab to bring it forward.
In the Manager field, use the lookup to select this technician’s manager.
Click [OK] to save your changes.
Repeat Steps 3 – 6 to assign additional technician managers.
Configuring Time Card EntryConfiguring Time Card Entry
If you want to use the time card entry feature offered through RemoteTech, you will need to complete the following sections to provide for the necessary pre-requisites.
Creating Pay Periods
Payroll Groups
Activity Codes
Activity Code Categories
In order for the time card entry to work, you must have created and/or configured these areas.
The Time Card entry feature allows you to create a company or technician schedule and then when the technicians are working on calls through RemoteTech, it can track their time. When the technician dispatches themselves and arrive at a call, the time card module, logs the time as technician travel time on the time card. From when the technician arrives on the service call until they depart, the time card module logs their time as service labor. The time card module monitors travel and labor time throughout each day logging their time and then allows the technician to categorize and fill in any gaps that occur as well as lunch and breaks through the time card module. The categories available to the technician for gap time are determined by your system administrator and the activity codes they make available to the technicians in RemoteTech.
Creating a Payroll GroupCreating a Payroll Group
Before you can create a pay period you must first create Payroll Groups to associate with your pay periods. You can organize your employees based on the role they pay in your organization. For example you can create a group for standard repair on your equipment and then a group for specialized repair, like IT repair. Having these groups allows you reporting flags for your payroll expenses and system.
On an e-automate client computer, click [Start] > Programs > e-automate > e-automate to open the e-automate client program.
Note: You must have administrative rights to access Lists and Codes.
Enter your User ID and Password and login to e-automate.
On the Tools menu, select Lists and Codes. The Lists and codes window opens.
In the Select a list or code type field, use the drop-down menu to select Payroll groups.
Click [New] to open the New payroll group window.
In the Payroll group field, enter and name for the payroll group.
In the Description field, enter a description of the payroll group.
Click [OK] to save your pay period.
Creating Pay PeriodsCreating Pay Periods
You use pay periods in conjunction with the RemoteTech Time Card module. You create pay periods so they are available in RemoteTech to technicians when working on service calls in the field and logging their time using RemoteTech.
The pay period defines a specific period of time in which the technician can log their time. This time period is typically the same time frame or cycle in which they get paid for the work they provide. The pay period provides a beginning and an end date for which the technician is required to enter and submit their time. When the technician has recorded time for the bounds defined by the pay period, the technician can submit his or her time for payroll payment.
To use the Time Card feature in RemoteTech you must have your pay period defined in e-automate.
From the e-automate Tools menu, select Lists and codes.
Note: You must have administrative rights to access Lists and codes.
In the Select a list or code type field, use the drop-down menu to select Pay periods.
Click [New] to open the New pay period window.
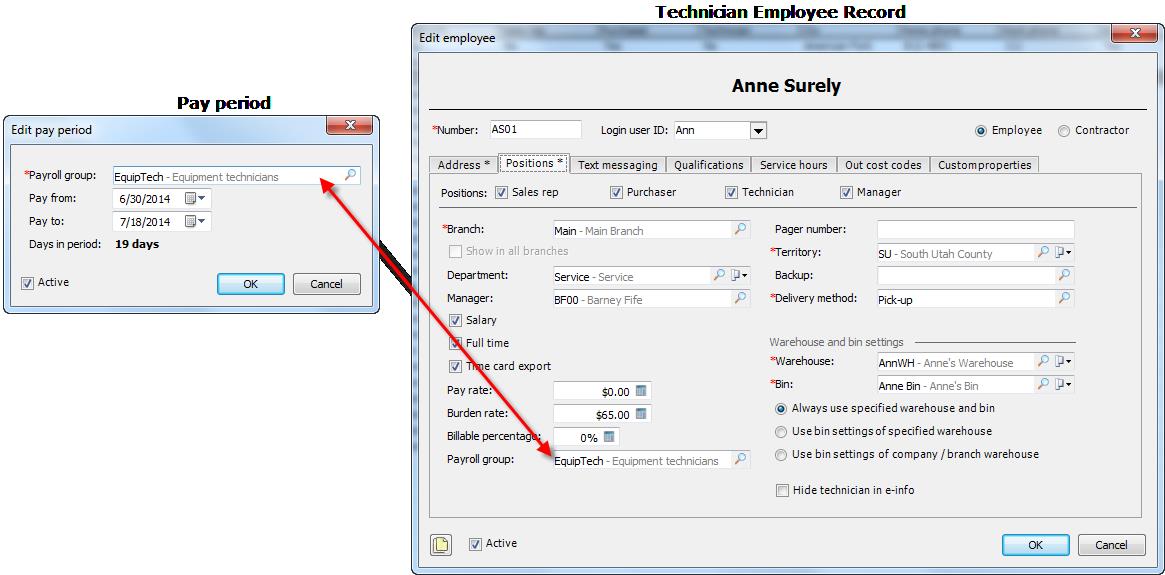
In the Payroll group field, use the lookup to select a payroll group to associate with this pay period.
In the Pay from field, use the down arrow (calendar control) to select the start of the pay period you are creating.
In the Pay to field use the down arrow to select the end date of the pay period.
Click [OK] to save your pay period.
Customer RecordCustomer Record
Once you have the payroll groups and pay periods set up that you want to use for your technicians, you must verify you have the same payroll group you assigned to the pay period also assigned to the technician. Only the pay periods that are assigned the same payroll group as is assigned to the technician will display in RemoteTech.
Activity Code CategoriesActivity Code Categories
You use Activity code categories to define the rules associated with Activity codes. While you identify an Activity code in e-automate, the Activity code category controls the use of the Activity code. The category tells e-automate and RemoteTech when the activity code associated with the category is available for selection. The settings on the Activity code category also allow e-automate the proper categorization of time on the Time Card Entry report.
On an e-automate client computer, click [Start] > Programs > e-automate > e-automate to open the e-automate client program.
Note: You must have administrative rights to access Lists and Codes.
Enter your User ID and Password and login to e-automate.
On the Tools menu, select Lists and codes. The Lists and codes window opens.
In the Select a list or code type field, use the drop-down menu to select Activity code categories.
Click [New] to open the New activity code category window.
Enter the appropriate information in the following fields:
Activity code category: Name of the Activity code category being created.
Description: Brief description of the Activity code category being created.
Payroll export code: Code associated with the Activity code that can be used in payroll export.
Note: This functionality is intended for a future release of e-automate.
Time card entry: When checked, Activity codes categorized with this category can be used in the RemoteTech time card tool as well as in the e-automate time card entry system.
Service calls: When checked, Activity codes with this category can be associated with a service call.
Unavailable: When checked, Activity codes associated with this category will be available in the service technician unavailable time.
Billable: When checked, Activity codes associated with this category are billable to your customers.
Paid time: When checked, Activity codes associated with this category are paid to the technician.
Work time: When checked, Activity codes associated with this category are attributed to work time for the technician. Work time is time paid but not necessarily working.
Require payroll admin security rights: When checked on the Activity code category and associated with Activity codes, only users with the appropriate security rights can use this Activity code.
Bypass meter reading requirement: When checked meter readings are not required meter readings associated with this activity code category.
Click [OK] to save the Activity code category.
Activity CodesActivity Codes
You use Activity codes to define the kinds of activities that technicians can perform on service calls, record on time cards and record as unavailable time on the employee record. The Activity code category associated with the Activity code controls where the Activity code can be used.
On an e-automate client computer, click [Start] > Programs > e-automate > e-automate to open the e-automate client program.
Note: You must have administrative rights to access Lists and Codes.
Enter your User ID and Password and login to e-automate.
On the Tools menu, select Lists and codes. The Lists and codes window opens.
In the Select a list or code type field, use the drop-down menu to select Activity codes.
Click [New] to open the New activity code window.
Enter the appropriate information in the following fields:
Activity code: Name of the Activity code being created.
Description: Brief description of the Activity code being created.
Category: Use the drop-down menu to select the category for this Activity code. The Activity code defines the kinds of activities in e-automate with which you can associate an Activity code. Tax as: Use the Lookup to identify how this activity is taxed.
Click [OK] to save the Activity code.
Configuring Attachment CapabilityConfiguring Attachment Capability
In order for technicians to be able to view and save attachments to service calls in RemoteTech, there are a few different settings you must configure. The file attachment settings in e-automate must be set up and you must have the correct settings for the application pool user in IIS on the server where you have e-info installed.
E-automate Settings for AttachmentsE-automate Settings for Attachments
You must have the File Attachments option properly configured in e-automate. This option allows you to determine where your saved files are located. You can also set a maximum size for files you will allow your users to attach and set the number of revisions of the files your users attach that you want the system to retain. This allows you to lower the amount of hardware memory used.
From the e-automate Tools menu, select Options to open the Options window.
In the left pane of the window, double-click on Misc. options. The miscellaneous options are displayed in the right pane.
Click [File Attachments Options] to open the File Attachments window.
Enter the appropriate information in the following fields:
In the Local network path field, enter the path or browse to the path in which you want to store your attachments. It is a requirement that the directory specified here is accessible through your network.
Note: RemoteTech users must have security to the folder specified in this path.
In the Maximum file size in megabytes field, enter the maximum size of file you want to allow your users to attach. If you do not specify a file size maximum, users may attach very large files, taking up large amounts of hardware memory.
In the Number of revisions to retain field, enter the number of revisions of the files you attach that you want the system to retain. Keep in mind that e-automate stores a completely different file for each revision, taking up hardware memory.
Click [OK] to save the file attachment settings.
IIS Settings for AttachmentsIIS Settings for Attachments
In order for technicians to be able to view and save attachments to service calls, you must specify the application pool user in your Internet Information Services (IIS) Manager.
To specify the application pool user, do the following:
On the server where you installed RemoteTech, open Internet Information Services (IIS) Manager.
In the Connections region in the left pane, expand the Server menu.
Select Application Pools to display the Application Pools region to the right of the Connections region.
In the Application Pools region, select the application pool that RemoteTech is using. If you do not know what application pool RemoteTech is using, do the following; otherwise, continue to Step 5.
In the Connections region, expand the Sites menu.
Expand the Default Web Site menu and select the one for RemoteTech.
In the Actions region on the far right, click on Basic Settings. The Edit Application window opens. The application pool that RemoteTech is using is found in the Application pool field.
Click [Cancel] to close the Edit Application window.
With the RemoteTech application pool selected in the Application Pools region, click Advanced Settings. The Advanced Settings window opens.
Locate Identity under the Process Model heading.
Click the [...] button in the Identity field. The Application Pool Identity window opens.
Select the Custom account option and click [Set]. The Set Credentials window opens.
In the User name field, enter the appropriate server admin user name. This user must have rights to read/write to the attachments folder from the server on which RemoteTech is installed.
In the Password field, enter the appropriate password.
In the Confirm password field, enter the same password.
Click [OK] to close the Set Credentials window and save the user name and password.
In the Application Pool Identity window, click [OK] to close the window.
In the Advanced Settings window, click [OK] to close the window.
With the application pool still selected in the Application Pools region of the Internet Information Services (IIS) Manager, in the Actions pane on the far right, click Recycle. Doing so activates the process.
Note: If you receive an error when recycling, this means there is something wrong with the user name and password you entered.
Troubleshooting Attachment Access IssuesTroubleshooting Attachment Access Issues
If you are unable to view or add attachments in RemoteTech, one of the following may be the problem:
The file attachment options in e-automate are not configured. For information on configuring file attachments, see the Setting Miscellaneous Options topic in the e-automate online help.
The user does not have security to the network folder defined in the file attachment options in e-automate.
If the user does have security to the network folder defined in the file attachment options in e-automate, you must change the file path to be a UNC path.
On Hold CodesOn Hold Codes
You can create on-hold codes that can be associated with:
Sales Orders
Customers
Service Calls
Accounts Payable Invoices
RTV orders
RMA orders
When creating the code, you determine where you will be able to use the on hold code. When service calls are on hold you cannot dispatch either in e-automate or RemoteTech. When sales orders or RMA orders are on hold you cannot ship or fulfill. When customers are on hold, all transactions associated with that customer are automatically flagged as on hold. When accounts payable invoices are on hold they are not presented for payment in the Pay Vendors activity.
All on-hold codes are created in Lists and Codes. You can associate a reason with each on hold code. The on hold codes that are shipped with e-automate are CH (Credit Hold), WP (Waiting for Parts), PA (Parts Available), BadSync (Bad Data from Remote Client), and WAuth (Waiting Authorization).
When creating an on hold code you determine where the on hold code can be used and if the on hold code can be used in RemoteTech by technicians. When you allow RemoteTech use, the on hold code can be set by technicians in the field. You can also determine if the on hold code can be released by technicians in the field. For example, when a call is on hold and waiting for parts and the parts for the call are received, e-automate can change the on hold code from Waiting for Parts to Parts Available when the parts are available. This functionality is only available when users are taking advantage of e-automate’s tools for transaction linking. When the parts are available, it would make sense to allow the technician to release the call from Parts Available so they can complete the call.
You can configure on hold codes to be controlled by security rights or not. When an on hold code is controlled by security rights, users must have the right, Set/Release On Hold Transactions, in e-admin security to place and release transactions that are on hold.
You can use service on hold codes to recalculate response time from when a call is released from hold to arrival instead of call received to arrival. This is especially needed when calls are on credit hold and you do not want these calls to adversely affect your response time.
On an e-automate client computer, click [Start] > Programs > e-automate > e-automate to open the e-automate client program.
Note: You must have administrative rights to access Lists and Codes.
Enter your User ID and Password and login to e-automate.
On the Tools menu, select Lists and Codes. The Lists and codes window opens.
In the Select a list or code type field, use the drop-down menu to select On Hold Codes.
Click [New] to open the New on hold code window.
Enter the appropriate information in the following fields.
On hold code: Name of the on hold code.
Description: Brief description of the on hold code.
Make on hold code available in Sales: When checked, this on hold code can be used on sales orders.
Customer: When checked, this on hold code can be associated with a customer.
Service: When checked, this on hold code can be used on service calls.
Set this hold code in RemoteTech: When checked, this on hold code can be used in RemoteTech by technicians.
Release this hold code in RemoteTech: When checked, this on hold code can be released by technicians in the field.
Accounts Payable Invoices: When checked, this on hold code can be used to place accounts payable invoices on hold or vendors.
RTV orders: When checked, this on hold code can be used to place RTV orders on hold.
RMA orders: When checked, this on hold code can be used to place RMA orders on hold.
Require security rights to set and release on hold status : When checked, users must have the Set/Release On Hold Transactions right to place and release this on hold code from a transaction.
Calculate response time using release date and time: When checked, e-automate uses the release date and time for response time calculations.
Note: This removes time spent on hold from the response time calculations.
In the Color field click the […] button to select a different color for the On Hold stamp.
If you want to include description of your on hold code on the On-hold stamp, check the Add description to the stamp text checkbox.
Click [OK] to save the on hold code.
Delay CodesDelay Codes
You can configure RemoteTech to require technicians to supply a delay code when they do not meet the response guidelines identified in e-automate. In order to require these things in RemoteTech your e-automate administrator must set the option to require a delay code as well as create delay codes for use within RemoteTech.
Setting the Require Delay Code OptionSetting the Require Delay Code Option
From the Tools menu, select Options.
On the left side of the Options window, click on Service Calls to display service call options.
On the right, click [Additional options] located at the bottom of the Options window to open the Additional service call options.
Check the Require delay code if response time exceeds XX hours checkbox. Enter the number of hours before you require a delay code.
Click [OK] to save the additional service calls options.
Click [OK] to save and close the Options window. Acknowledge that you must restart e-automate to restart your changes by clicking [OK].
Restart e-automate.
Creating Delay CodesCreating Delay Codes
From the Tools menu, select Lists and codes. The Lists and codes window opens.
In the Select a list or code type field, use the drop down menu to select Delay codes.
Click [New] to open the New delay code window.
In the Delay code field, type the name of the delay code.
In the Description field, enter a description of the delay code
Click [OK] to save the code for use in RemoteTech.
Creating Customer Onsite WarehousesCreating Customer Onsite Warehouses
With onsite warehouse created and assigned to equipment and customers, you can configure RemoteTech to allow your technicians to transfer items from the customer’s on site warehouse to the technician as needed. RemoteTech only allows a technician to transfer from a customer’s onsite warehouse when the technician is dispatched to a service call with that customer. RemoteTech allows technicians to select any warehouses matching the following criteria when attempting to transfer from a customer onsite warehouse. First it checks to see if the equipment on the service call has a customer onsite warehouse, second, it looks to see if the customer identified in the equipment location field has a customer onsite warehouse; third, it looks to see if the customer identified as a customer on the equipment has an onsite customer warehouse, finally it looks for a customer onsite warehouse associated with the customer on the service call. If you want to allow your technicians to use onsite warehouses, use these instructions to configure a customer onsite warehouse.
You can use the following instructions to create a company onsite warehouse. Once you have identified a company onsite warehouse on the customer record, e-automate will use the warehouse on service calls instead of the technician warehouse. You can remove the customer onsite warehouse from equipment if you do not want it used on service calls in lieu of the technician’s warehouse.
From the Inventory menu, select Warehouses to open the Inventory warehouses list window.
Click [New] to open the New inventory warehouse window.
Complete the following fields as appropriate.
Warehouse: Name for the customer onsite warehouse.
Description: Brief description of the onsite warehouse.
Type: Use the Lookup icon to select Customer Site.
Click [OK] to save the warehouse.
Click [Customers] on the e-automate toolbar.
On the customer list, locate and select the customer for which you created the onsite warehouse.
Click [Edit] to open the Edit customer window.
Click the Account tab to bring it forward.
In the On-site warehouse field, use the Lookup icon to select the warehouse you created for this customer.
Click [OK] to save the customer changes.
From the Inventory menu, select Warehouses.
On the warehouse list, locate and select the customer onsite warehouse you just linked to the customer.
Click [Edit] to open the Edit inventory warehouse window.
In the Customer field, use the Lookup icon to select the customer associated with the warehouse.
If the warehouse is physically located at the same address as the customer, check the Synchronize address with customer address checkbox.
Select the warehouse you just created from the list and click [Edit] to configure the warehouse.
In the Standard bin field, use the down arrow menu to select New. This opens the New inventory bin window. Enter the information as appropriate.
In the Description field, type a brief description of the bin.
Click [OK] to save the bin and return to the Edit Inventory Warehouse window.
Note: You can add additional bins as necessary.
Inventory Item Cross ReferenceInventory Item Cross Reference
When using RemoteTech, technicians can look up information about inventory items in e-automate. To learn information about an item, the technicians can lookup information using a variety of numbers. The following is a list of number that can be used as a lookup in RemoteTech.
Current item number
Current vendor number for the inventory item.
Historical vendor number for the item, one or many.
RemoteTech allows this flexibility so technicians have a high probability of finding information about inventory items regardless of the item number they use to lookup the information. e-automate expects that technicians in the field may not have the most recent item number but they may have an equipment manual with a historical number that they can use to lookup the information that they need. If the inventory personnel that use e-automate had populated this information, the technician has a more reasonable expectation of being able to find information about an item while in the field.
This instruction set is to identify where the above item numbers are in –automate and how to change or update these numbers.
Current Item NumberCurrent Item Number
On an e-automate client computer, click [Start] > Programs > e-automate > e-automate to open the e-automate client program.
Note: You must have appropriate rights to Inventory access the items list.
Enter your User ID and Password and login to e-automate.
Click [Items] to open the items list.
Select an inventory item from the list and click [Edit] to open the Edit inventory item window.
Edit the Item number field if necessary.
Click [OK] to save your changes.
Current and Historical Vendor NumbersCurrent and Historical Vendor Numbers
On an e-automate client computer, click [Start] > Programs > e-automate > e-automate to open the e-automate client program.
Note: You must have appropriate rights to Inventory access the items list.
Enter your User ID and Password and login to e-automate.
Click [Items] to open the items list.
Select an inventory item from the list and click [Edit].
Click the Vendors tab to bring it forward.
On the Vendors tab, select the vendor and click [Edit]. If there is no vendor, you can add a vendor. For more information on adding a vendor, see Creating an Inventory Item – Part or Supply.
In the Vendor item number field, e-automate displays the current vendor number. Change as necessary.
E-automate displays a list of historical numbers in the History of vendor item numbers region.
Do one or more of the following:
To remove a historical number, do the following:
Select the number to remove.
Click [Delete].
To add a new number to the history, do the following:
In the History of vendor item numbers region, in the Vendor item number field, enter a historical number that has been used to reference the item.
Click [QuickAdd] to add your number to the list.
Click [OK] to close the Edit item vendor window.
Repeat Steps 6 – 9 to change information for additional vendors.
Click [OK] to save your changes.
Repeat Steps 4 - 11 to change additional items.
Email and Fax Invoice InfoEmail and Fax Invoice Info
There are occasions when a technician may want to have an invoice for a service call faxed or emailed to a customer or to the technician upon call completion. You use these instructions to prepare the necessary pre-requisites to allow RemoteTech to ask if you want an invoice return to happen when using RemoteTech.
Before this functionality can work you must have e-agent up and running on a server with access to analog fax lines (if you plan to use fax) and internet access to your email server and the e-automate database. If you do not have e-agent installed, you can access the installation files on your e-automate server in the e-automate directory you will find a directory called, e-agent Install. Copy the file and take it to the computer on which you intend to run e-gent. For additional setup instruction on e-agent, see e-agent help. From inside e-agent, select the Help menu and select e-agent Help to access help.
Install and configure e-agent. Be sure to configure e-agent options located on the Tools menu.
With e-agent configured, you are ready to create an e-agent task, click [New] to open the New Task window.
In the Type region, select Auto invoice service calls and click [OK]. The Auto invoice service calls window displays.
In the Name field enter an appropriate name to identify the task as the task used to auto return service invoices.
Note: All tasks in e-agent must have a unique name.
If you only want to process calls from RemoteTech and auto-schedule this task to execute every minute, check the Process requests only from RemoteTech checkbox. Checking this checkbox displays two additional tabs, Email settings and Fax settings allowing technicians in the field using RemoteTech the ability to auto return the service invoices to the customer via fax or email.
Note: For this functionality to work you must have email settings configured as well as a fax service installed and running on your e-agent server.
If you want the service invoice created to include service invoice details (exact date, time and hours for labor, mileage amounts, and a listing of specific items on the call), check the Show details on service invoice checkbox
To prevent e-agent from invoicing service calls that have warnings, check the Do not invoice if warnings exist checkbox.
If you are processing requests from RemoteTech only you cannot choose other options associated with this task, you can create a second task to handle other service calls not processed through RemoteTech and set the other options associated with this task.
In the Notification email field, enter the e-mail address(es) of the person or persons you want notified. To notify multiple recipients, separate each e-mail address by a semi-colon or a comma. Use the delimiter associated with your email program. For example, janedoe@company.com; johndoe@company.com; joe@company.com.
Click the Email Settings tab to bring it forward.
Note: Be sure to configure both the Email and the Fax tabs.
In the E-mail from address field, enter the email address from which you want service invoices emailed. Most email programs will use this email address if the recipient replies to the email. In the Send bcc to field, enter an email address or addresses if you want to send a blind carbon copy of the invoices to a specific email address. If you enter more than one email address be sure to separate each address with an appropriate delimiter, for example, Microsoft Outlook uses the semi-colon.
If you want e-agent to pause as it sends service invoices, check the Wait X second(s) before sending each email checkbox and enter the number of seconds you want it to pause.
Click the Fax Settings tab to bring it forward. Be sure to configure both the Email and the Fax tabs.
In the Fax application region, use the radio buttons to select the appropriate fax sending choice.
Fax options changes based on the Fax applications selected. For your specified fax application complete the appropriate options.
Note: Cover pages options are not available on all fax application choices. If you want to import your own personal cover page, click [Import personal cover pages]. Use the Open window to navigate to your saved cover page file (.cov), select the file and click [Open]. Select your cover pages as appropriate in the Cover Pages region.
Note: Attaching an image is not available on all fax application choices. If you want to attach an image (company logo) to your faxes, click the [...] adjacent to the Attach Image field. Use the Open window to navigate to your saved cover logo file (.bmp, .jpg, .jpeg, .tif, gif), select the file and click [Open].
Click [OK] to save your task settings.
You should have checked Process requests only from RemoteTech so you do not have the options of scheduling this task. This task by checking Process requests only from RemoteTech is configured to automatically run every minute.
Non-supported ReleaseNon-supported Release
©2022 ECI and the ECI logo are registered trademarks of ECI Software Solutions, Inc. All rights reserved.