Installing the Making Tax Digital Utility (HMRC Only)
Her Majesty's Revenue and Customs (HMRC) has mandated to ‘make tax digital’ starting with VAT returns in April 2019. Businesses will have to keep digital records and send VAT returns to HMRC using MTD-compatible software for VAT accounting periods that start on or after 1 April 2019.
Follow the instructions provided in this topic to install the Making Tax Digital add-in utility.
Copying Installation FilesCopying Installation Files
EA customer care will provide a MakingTaxDigital.[version].zip file containing the following folders and files:
apiextensions
dbcomponents
eaddins
reports
MakingTaxDigitalAddinGuide
In preparation for installing the Making Tax Digital add-in utility, do the following:
Extract the MakingTaxDigital.[version].zip file's contents to a temporary location on your e-automate client server.
Copy the files from the apiextensions folder into the e-automate\web\bin folder on your e-automate client server.
From the dbcomponents folder, copy the Making Tax Digital folder into the e-automate\sql\CompanyDb\_components folder on your e-automate client server.
Copy the files from the eaddins folder into the e-automate\Addins folder on your e-automate client machine(s).
Installing the Making Tax Digital DB Component Using E-adminInstalling the Making Tax Digital DB Component Using E-admin
Install the Making Tax Digital database component as follows:
Log in to e-admin.
From the list of companies, select the company for which you want to install this database component.
From the Company menu, select Maintenance > Database Components.... If you have your e-admin toolbar visible, you can use the drop-down menu on [Maintenance] and select Database Components.... You can also use the right-click menu and select Maintenance > Database Components....
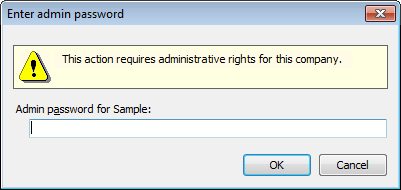
The system displays the Enter Admin Password window.

In the Admin password for [Company ID] field, enter your admin password.
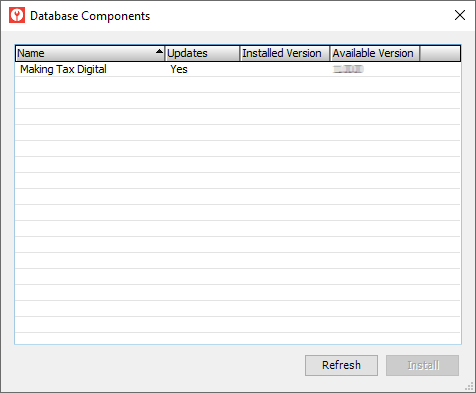
Click [OK]. If the system verifies your admin password for the company you selected, the system displays the Database Components window.

Select the Making Tax Digital row.
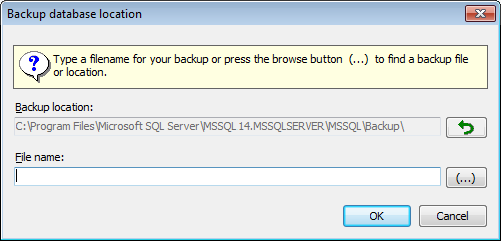
Click the [Install] button. The system displays the Backup Database Location window. Prior to installing a database component, e-admin requires a backup of the database so that you can restore the backup if the database component installation does not complete as expected.

Enter a name for this backup in the File name field.
E-admin always displays the last navigated path in the Backup location field. If you want to browse your network for a different backup location, click [(...)] to open the Browse for Backup File... window.
Select the backup location you want to use and click [OK] to return to the Backup database location window. The filename you selected displays in the File name field.
Click [OK]. If you opted to use a file name that has already been used in e-admin, e-admin notifies you that you cannot use the file name identified. Enter a different name.
After the database is backed up, the system attempts to install the database component.
If the installation is successful, the system displays the message, "Installation complete." Click [OK] to acknowledge the message. When you click [OK], the system removes the Yes from the Updates column, updates the Installed Version column to the new version (e.g., 0.1.2), and clears the Available Version column. If the Database Components window lists additional database components to install, return to Step 5 above if you want to install the additional components.
If the installation is not successful, the system displays an Unexpected Error Information window. Review the Description field.
If the Description field reports only that one or more exceptions occurred, then the system was able to restore the backup you created before trying to install the update; you do not need to manually restore your database.
If the Description field—in addition to reporting that one or more exceptions occurred—includes a NOTICE letting you know you need to manually restore your backup, then the system was not able to automatically restore your backup. You need to restore your backup manually, and the NOTICE lists the name of the backup you created prior to trying to install the update. For information on restoring a backup, see the Restoring a Database topic.
To have the system check for additional updates, click [Refresh].
Restarting DGServerRestarting DGServer
To restart DGServer, do the following:
In
the Windows Type here to search
field on your e-automate client server, enter Services.msc
to locate the Services app.

Open the Services app to display the Services window.
Locate
and select the DGServer service.

Click the Restart link to restart the DGServer service.
Non-supported ReleaseNon-supported Release
©2024 ECI and the ECI logo are registered trademarks of ECI Software Solutions, Inc. All rights reserved.