Equipment Solutions Network (ESN)
The Equipment Solutions Network (ESN) acts as a data portal that vendor integrations can use to interact with ECI ERP software solutions. The ESN data transfers between the dealers and vendors are bi-directional, 64-bit, blowfish-encrypted transfers. Vendors are authorized for a specific set of APIs per dealer integration.
ESN runs as a service on the server. It can be installed on either an e-automate server or a web server, provided the e-automate SQL database is accessible for the server. ESN is installed under the C:\Program Files (x86)\ECi\Internet Services Host folder. To stop, start, and/or restart the ECi Internet Services Host service, access the Services module (services.msc).
For Windows ESN installations, see the information provided below. For more information on setting up ESN, contact EA Customer Care (e-mail: EACustomerCare@ecisolutions.com; phone: 866-342-8392).
PrerequisitesPrerequisites
Network Considerations:
ESN network protocol is TCP.
Recommended port is 9780.
Port 9780 TCP must be opened and forwarded to the server hosting the ESN Service.
Supported Windows Platforms:
Windows 7
Windows 8
Windows 2008
Windows 2012
Required e-automate version:
e-automate 8.5 or greater
Required .NET Version:
.NET 4.0 or greater
Selecting the ESN Windows Installer FileSelecting the ESN Windows Installer File
ESN Installer (MSI) files are available for e-automate releases beginning with version 8.5 and have the following structure:
ESN-EA-85-[build number].msi (e-automate 8.5)
ESN-EA-87-[build number].msi (e-automate 8.7)
ESN-EA-161-[build number].msi (e-automate 16.1)
ESN-EA-171-[build number].msi (e-automate 17.1)
ESN-EA-172-[build number].msi (e-automate 17.2)
To obtain the appropriate ESN Installer (MSI) file for your version of e-automate, contact e-automate support.
Installing and Configuring the ESN ServiceInstalling and Configuring the ESN Service
To install and configure the ESN Service, do the following:
Place the ESN Installer (MSI) file (e.g., ESN-EA-[Version]-[Build].MSI) on the intended installation computer on your network.
The ESN Installer (MSI) file must be run as an administrator. Microsoft does not provide a right-click option to run this installer as an administrator, so you must run the installer using a command prompt. To open the installer as an administrator from the command line, do the following (based on Windows 10):
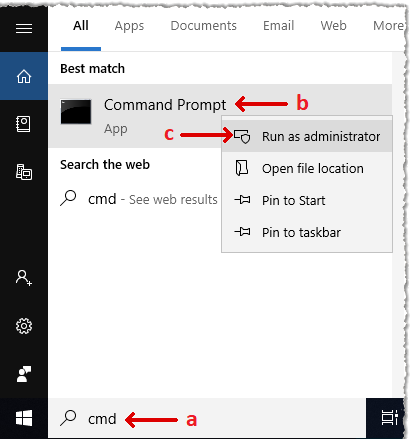
In the Windows Type here to search field, enter cmd to locate the Command Prompt app.
Right-click the Command Prompt app.
From the right-click menu, select Run as administrator.
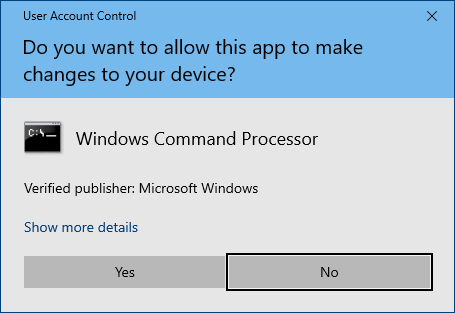
The system displays a User Account Control message, asking if you want to allow Windows Command Processor to make changes to this computer. Click [Yes].
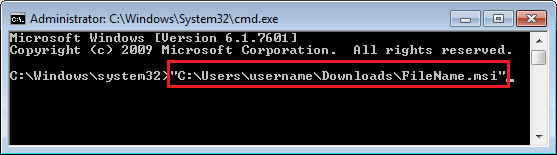
The system displays the Administrator: C:\Windows\System32\cmd.exe command prompt window. At the command prompt, enter in quotation marks the full path to—and file name of—the installer file (e.g., "C:\Users\username\Downloads\FileName.msi" where username is the name of the currently logged in user and FileName.msi is the name of the ESN-EA-[Version]-[Build].msi file).
Click Enter to have the system open the ESN E-automate [Version] Setup window.
On the ESN E-automate [Version] Setup window, the system displays the End-User License Agreement. Review the license agreement.
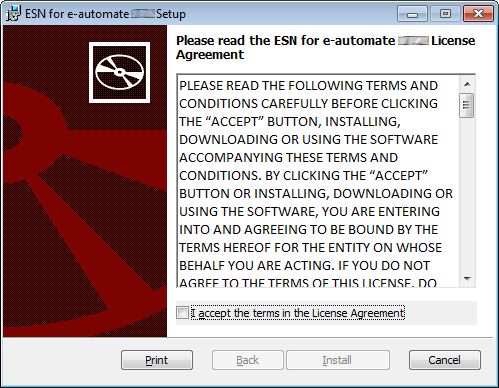
After reviewing the license agreement, check the I accept the terms in the License Agreement box if you are willing to accept the license agreement.
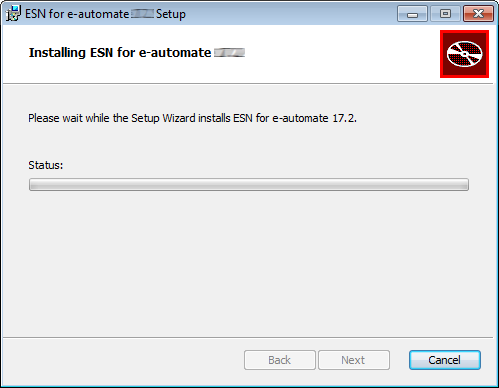
If you check the I accept the terms in the License Agreement box, the system enables the [Install] button. Click the [Install] button. The system begins the installation process.
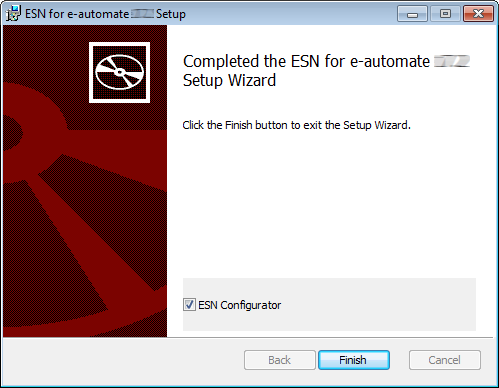
When the installation completes, the system displays a "Completed the ESN for e-automate [version] Setup Wizard" message. Do not uncheck the ESN Configurator checkbox on this window; the system will open the ESN Configurator window when you close this window. Click [Finish] to close this window and to open the ESN Configurator.
When the ESN Configurator window opens, do the following:
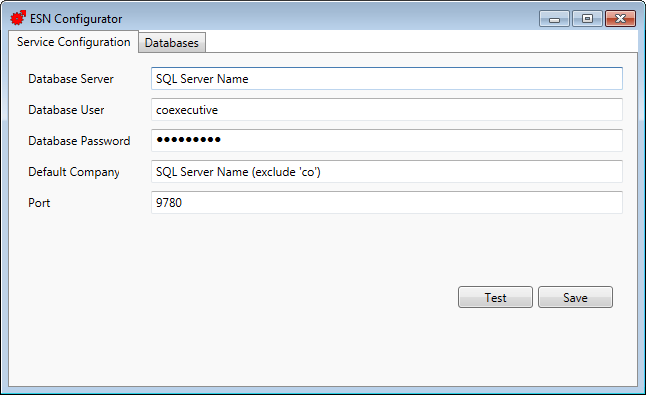
Verify the Service Configuration tab is forward.
In the Database Server field, enter the host name (SQL Server Name) or IP address (Use IP only if default SQL install) of the SQL server hosting the e-automate database.
In the Database User field, enter coexecutive.
In the Database Password field, enter your e-automate or SQL Server full access password (i.e., your coexecutive password).
In the Default Database field, enter the name of your company's e-automate database. Do not include the 'co' in the database name.
In the Port field, enter the port value the ESN traffic will be routed through (by default, 9780).
Click the [Test] button to have the system verify the configuration settings are correct.
If the system displays a "Test Succeeded" message, click [OK] to close the message and proceed to the next step; if the system displays a "Test Failed" message, review the message information and repeat the previous steps as necessary.
Click the [Save] button to save your settings.
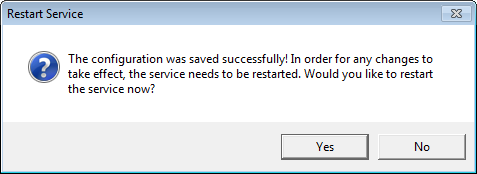
The system displays a message indicating the configuration was saved and prompting you to restart the service. Click [Yes] to restart the service.
The system displays a "Service restarted successfully" message. Click [OK] to close the message.
On the ESN Configurator window, click the Databases tab to bring it forward.
Click the [Refresh] button. The system pulls in all databases local to the Database Server specified in Step 9.
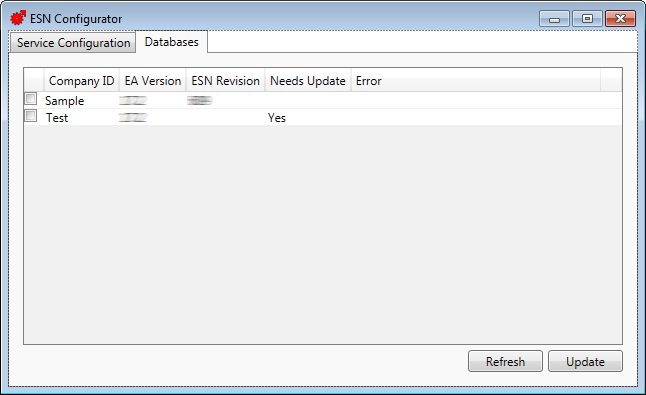
Check the checkbox at the beginning of the row listing the Default Database you specified in Step 12.
Click the [Update] button to execute the scripts required for the ESN installation.
Note: This process executes the UpdateESNStoredProcedures.sql script). When the script completes, the ESN Revision column should list the revision number in the ESN-EA-[Version]-[Build].MSI installer file.
Close the ESN Configurator window.
To close the command prompt, do the following:
Type exit at the command prompt.
Click Enter.
The ESN service installation and configuration process is now complete.
Modifying the SerializedContract Service Page for ESN CommunicationModifying the SerializedContract Service Page for ESN Communication
Complete the following client connection requirements:
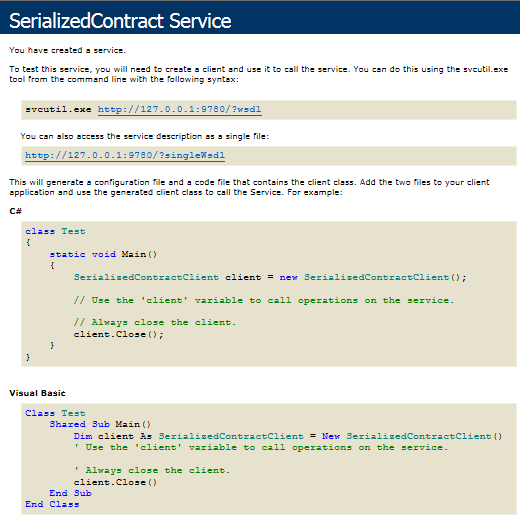
On the server where you installed and configured ESN, browse to http://localhost:9780. This URL should present a page that looks similar to the screen shot below and confirms the Internet Service Host service is running on the correct port (9780).
ESN runs on port 9780 TCP. Add a port forward rule to your company’s router/firewall. Ensure port 9780 is forwarded to the system where the ESN Service was installed.

From an external browser, browse to http://WANIP:9780 (replace “WANIP” with the WAN IP address of your company’s router.) This URL should present the same page as described in Step 1 above and will confirm that your port forward rule for 9780 is functional.
Once you have confirmed that the SerializedContract Service page above is externally accessible, you can lock ESN traffic on port 9780 down to the following IP ranges:
205.216.10.0/23
205.216.17.0/25
Completing the ESN Setup RequirementsCompleting the ESN Setup Requirements
To complete the ESN setup, supply the following information to your ESN support technician:
Your company’s Public IP address
Your E-automate Database
An e-automate user ID with the required permissions to the e-automate application (see the "Setting Up ESN Permissions in E-automate" section below for the required permissions).
Note: ESN needs this user ID to be able to communication with the database. ESN does not require an additional license fee, nor does it use a license seat.
We advise creating a default user in e-automate. Vendors who do not have the capability to store user credentials for their service use the default e-automate user name and password for data access.
You may create a separate user ID for each vendor interface. If you use a user ID other than the default user ID, please communicate the vendor-specific user credentials to the vendor.
Confirmation that port 9780 is open and forwarded to the system where ESN will be installed within your company’s internal network.
Once you relay the above information to the ESN support technician, the ESN support technician will perform a communications test to confirm a successful installation.
Upon successful communications test, the ESN support technician will communicate to the vendor and dealer the ESN dealer ID.
Setting Up ESN Permissions in E-automateSetting Up ESN Permissions in E-automate
Use the security functionality of e-admin to determine what a specific user can and cannot do via ESN. If you need more information on how to grant rights in e-admin, see the Security topic in the e-admin help.
The BEI APIs interact with data from the following e-automate tables:
|
Table |
Description |
View |
Edit |
Create |
Delete |
|
MTMeterTypes |
Meter Types |
v |
|
|
|
|
SCEquipments |
Service Equipment |
v |
|
|
|
The Contract APIs interact with data from the following e-automate table:
|
Table |
Description |
View |
Edit |
Create |
Delete |
|
SCContracts |
Service Contracts |
v |
|
|
|
The Dealer Gateway APIs interact with data from the following e-automate tables:
|
Items (Applies to Equipment, Parts, and Supplies) |
|||||
|
Table |
Description |
View |
Edit |
Create |
Delete |
|
APVendors |
A/P Vendors |
v |
|
|
|
|
ICCategories |
I/C Categories |
v |
|
|
|
|
ICEquipmentCodes |
I/C Equipment Codes |
v |
|
|
|
|
ICInventoryCodes |
I/C Inventory Codes |
v |
|
|
|
|
ICItems |
I/C Items |
v |
e |
c |
|
|
ICItemNotes |
I/C Item Notes |
v |
e |
c |
|
|
ICMakes |
I/C Makes |
v |
|
|
|
|
ICModelCategories |
I/C Model Categories |
v |
|
|
|
|
ICModels |
I/C Models |
v |
e |
c |
|
|
ICSalesCodes |
I/C Sales Codes |
v |
|
|
|
|
ICServiceCodes |
I/C Service Codes |
v |
|
|
|
|
ICUnits |
I/C Units |
v |
|
c |
|
|
Meters |
|||||
|
Table |
Description |
View |
Edit |
Create |
Delete |
|
MTMeterReadings |
Meter Readings |
v |
|
c |
|
|
MTMeterTypes |
Meter Types |
v |
|
|
|
|
SCEquipments |
Service Equipment |
v |
|
|
|
|
Service |
|||||
|
Table |
Description |
View |
Edit |
Create |
Delete |
|
ARCustomers |
A/R Customers |
v |
|
|
|
|
MTMeterTypes |
Meter Types |
v |
|
|
|
|
SCCalls |
Service Calls |
v |
e |
c |
|
|
SCCallNotes |
Service Call Notes |
v |
e |
c |
|
|
SCCallTypes |
Service Call Types |
v |
|
|
|
|
SCCancelCodes |
Service Cancel Codes |
v |
|
|
|
|
SCEquipments |
Service Equipment |
v |
|
|
|
|
SCProblemCodes |
Service Problem Codes |
v |
|
|
|
|
SCRepairCodes |
Service Repair Codes |
v |
|
|
|
|
SCReports |
Service Reports |
v |
|
|
|
|
SCTechnicians |
Service Technicians |
v |
|
|
|
|
ShOnHoldCodes |
Shared On Hold Codes |
v |
|
|
|
The DeskTech APIs interact with data from the following e-automate tables:
|
Table |
Description |
View |
Edit |
Create |
Delete |
|
CMContacts |
C/M Contacts |
v |
e |
c |
|
|
ICItems |
I/C Items |
v |
|
|
|
|
SA |
System Admin |
v |
|
|
|
|
SCCallFileAttachments |
Service Call File Attachments |
v |
e |
c |
d |
|
SCCalls |
Service Calls |
v |
e |
c |
|
|
SCContractDetailNotes |
Contract Equipment Notes |
v |
e |
c |
d |
|
SCWorkOrderNotes |
Work Order Notes |
v |
e |
c |
d |
The etactic APIs interact with data from the following e-automate tables:
|
Table |
Description |
View |
Edit |
Create |
Delete |
|
APVendors |
A/P Vendors |
v |
|
|
|
|
ARCustomers |
A/R Customers |
v |
|
|
|
|
ARInvoices |
A/R Invoices |
v |
|
|
|
|
ARReceipts |
A/R Receipts |
v |
e |
c |
|
|
ICBins |
I/C Bins |
v |
|
|
|
|
ICItems |
I/C Items |
v |
|
|
|
|
ICWarehouses |
I/C Warehouses |
v |
|||
|
MTMeterTypes |
Meter Types |
v |
|
|
|
|
SCEquipments |
Service Equipment |
v |
|
|
|
|
ShAgents |
Shared Agents |
v |
|
|
|
The leasing (lessor) APIs interact with data from the following e-automate tables:
|
Table |
Description |
View |
Edit |
Create |
Delete |
|
APVendors |
A/P Vendors |
v |
|
|
|
|
ARInvoices |
A/R Invoices |
v |
|
|
|
|
ARReceipts |
A/R Receipts |
v |
e |
c |
|
|
ICBins |
I/C Bins |
v |
|
|
|
|
ICItems |
I/C Items |
v |
|
|
|
|
ICWarehouses |
I/C Warehouses |
v |
|
|
|
|
MTMeterTypes |
Meter Types |
v |
|
|
|
|
SCEquipments |
Service Equipment |
v |
|
|
|
|
ShAgents |
Shared Agents |
v |
|
|
|
The meter APIs interact with data from the following e-automate tables:
|
Table |
Description |
View |
Edit |
Create |
Delete |
|
MTMeterReadings |
Meter Readings |
v |
e |
c |
|
|
MTMeterTypes |
Meter Types |
v |
|
|
|
|
SCEquipments |
Service Equipment |
v |
|
|
|
|
SOOrders |
Sales Orders |
v |
e |
c |
|
|
SOQuotes |
Sales Quotes |
v |
e |
c |
|
The ScanIt APIs interact with data from the following e-automate tables:
|
Table |
Description |
View |
Edit |
Create |
Delete |
|
ICBins |
I/C Bins |
v |
|||
|
ICItems |
I/C Items |
v |
|||
|
ICPhysInv |
I/C Physical Inv |
v |
e |
|
|
|
ICSerialNumbers |
I/C Serial Numbers |
v |
|
|
|
|
ICWharehouses |
I/C Warehouses |
v |
|
|
|
The Sharp License Manager APIs interact with data from the following e-automate tables:
|
Table |
Description |
View |
Edit |
Create |
Delete |
|
APVendors |
A/P Vendors |
v |
|
|
|
|
SOOrders |
Sales Orders |
v |
e |
c |
|
|
SOQuotes |
Sales Quotes |
v |
e |
c |
|
Non-supported ReleaseNon-supported Release
©2022 ECI and the ECI logo are registered trademarks of ECI Software Solutions, Inc. All rights reserved.